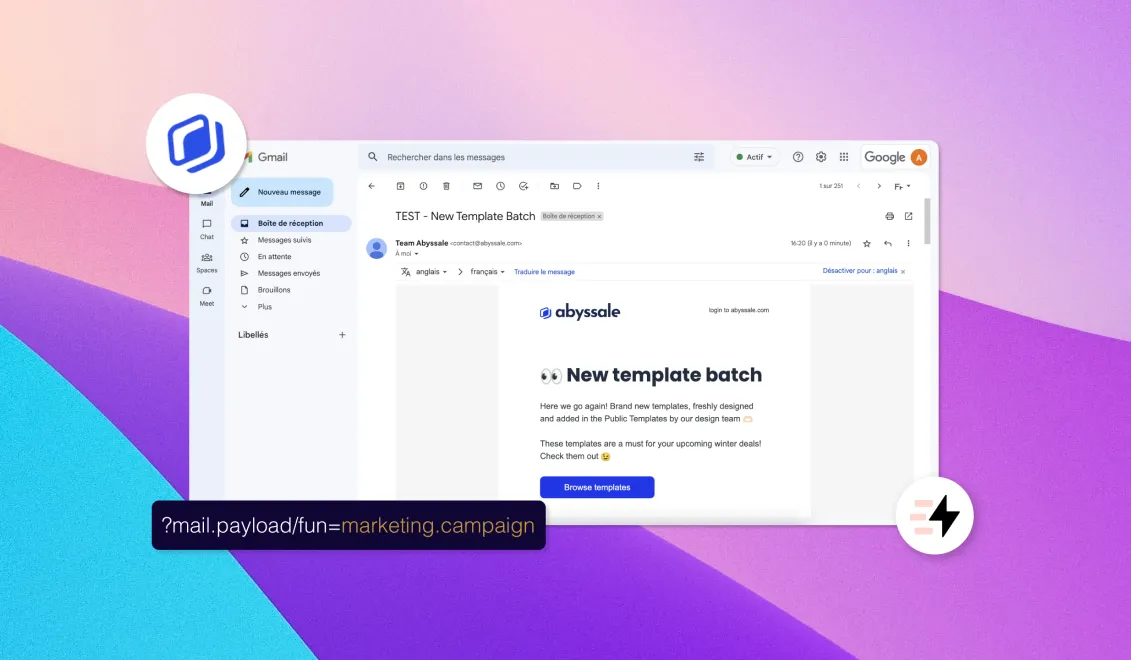
Emailing remains a preferred means of communication to launch a marketing campaign. Nevertheless, the success of such an operation depends on the reactivity rate of the recipients. This requires to be as credible as possible with your customers or prospects.
The signature of the e-mails is one of the elements that play the most on the confidence of your contacts. A professional signature with a photo of the sender and his role in the company brings more credibility.
Moreover, if the position of the sender is related to the message of the email, then your customers or prospects will be more inclined to answer you. Nevertheless, in small structures, the same person can have several hats. It is therefore necessary to adapt the name of the post according to the message and the interlocutors of each campaign.
In this tutorial, we'll explain step by step how to create a professional email signature that can be customized and modified according to the campaigns with Abyssale.
Create a template on Abyssale
Start by going to your Abyssale dashboard and creating a new template from Scratch.
It is recommended that you adjust the dimensions. For our example, we create a visual of 100 px height and 400 px width.
Then, create the design of your signature by adding a photo and text elements.
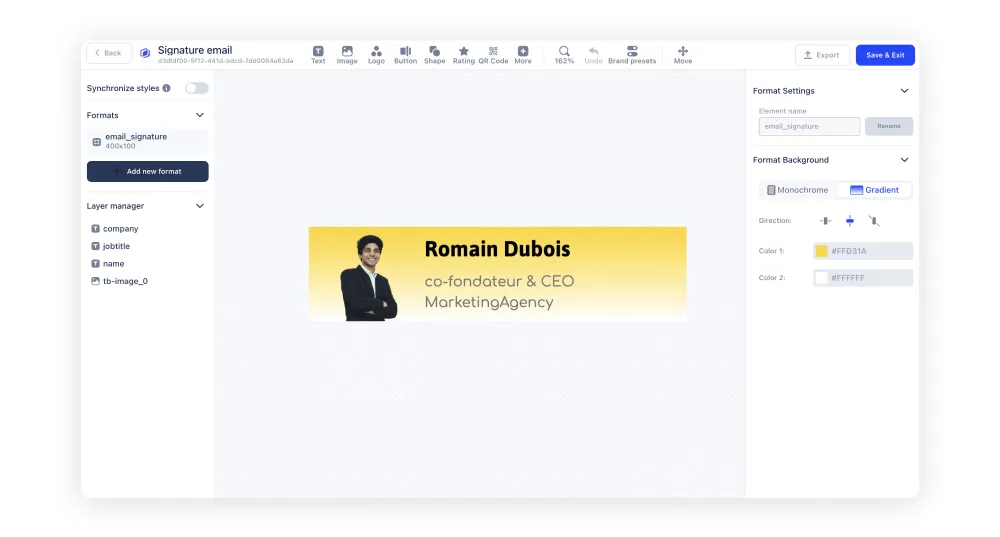
For our example, we will add a photo and 3 text elements. We will name each of them as follows:
- name
- jobtitle
- company
To name a text element or a photo, select the element. Then, in the right column, click on "Settings" and modify the "Element name". Don't forget to click on "rename" to save the modification.
Once your template is ready, click "Save & Exit".
Generate a Dynamic Image link
Now, that your template is ready, you need to generate a link with Dynamic Image by clicking on "Create new dynamic image". Then, give it a name, select the Base URL mode and click on "Create Dynamic mage".
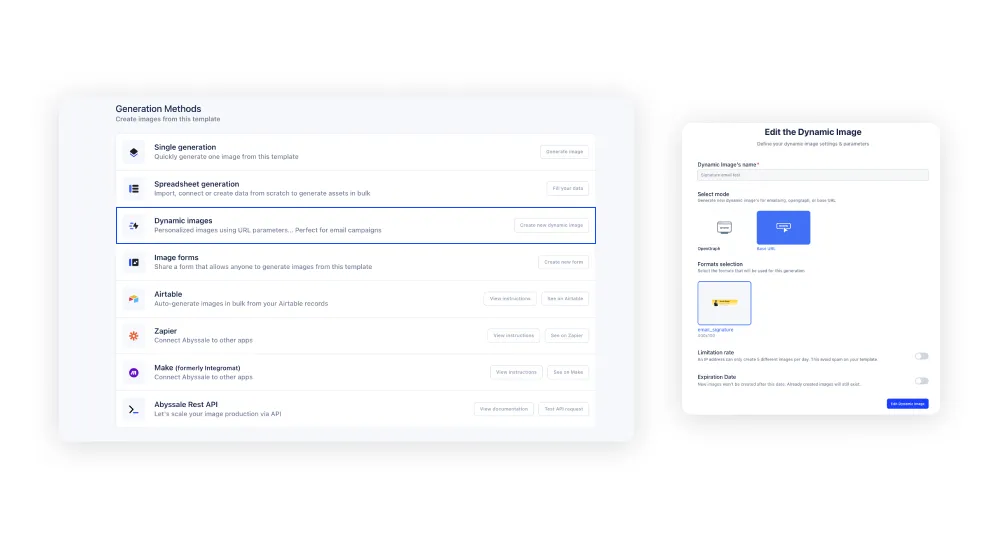
Then, you must select the elements you want to be able to modify.
In our example, we don't want to touch the image, the name or the name of the company. So we will only select "jobtitle". Remember to activate payload. You will see the link change.
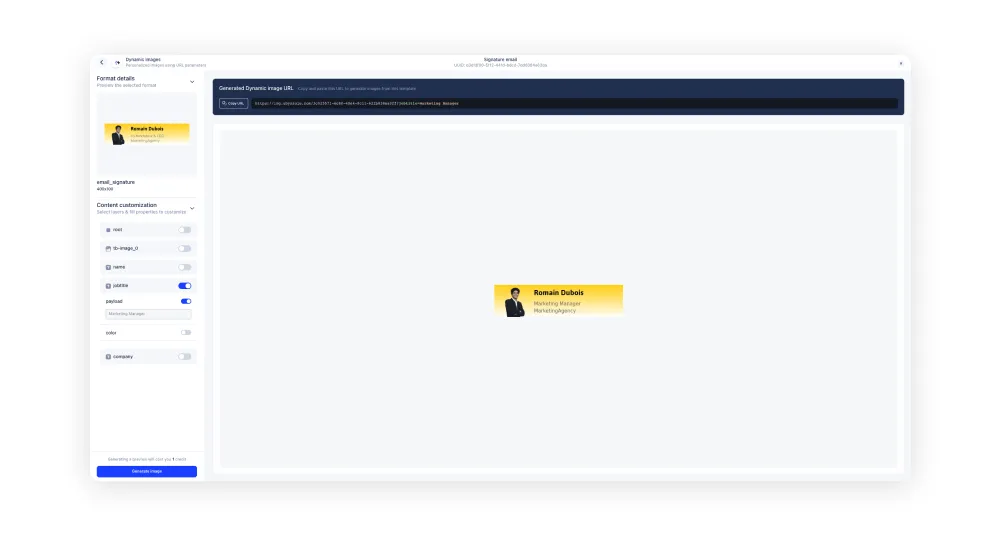
In our case, the generated link appears in this form: https://img.abyssale.com/3c025571-6c80-48e4-8c11-622b838ea0ff?jobtitle=Marketing+Manager
Your Dynamic Image link is ready! All that's left is to integrate it into your emailing tool.
Use your Dynamic Image link for the email signature
In our example, we use SendInBlue (Brevo) to send our emails. So we will show you how to use your Dynamic Image link with this tool. However, if you use another sending system for your marketing campaigns, the principle remains the same.
The method is very simple.
At the end of your email template, add an html element.
Then in your html editor add the line of code as follows:
<img src="your_dynamic_image_link">
In our example, this is what the html code looks like:
<img src="https://img.abyssale.com/3c025571-6c80-48e4-8c11-622b838ea0ff?jobtitle=co-fondateur+%26+CEO">
If you want to change the text elements in your image, change the part after the = sign.
In our example, let's say we want to change the current position to "Customer Relationship Manager". In this case, here is the html code:
<img src="https://img.abyssale.com/3c025571-6c80-48e4-8c11-622b838ea0ff?jobtitle=Responsable+relation+client">
From now on, whenever you want to launch a new campaign, just follow this procedure, adapting it to your needs.
Before sending your campaign, always make sure that everything works perfectly with a test e-mail.
If you have any questions or comments, please let us know!
To keep up with the latest updates and news about Abyssale, join our LinkedIn community!


.webp)
%20(13).webp)
.webp)