At Abyssale we use Airtable a lot. In fact we can use it to import data in order to create personalized images, the same way we’ll use a spreadsheet. It is one of the most used of our generation methods.
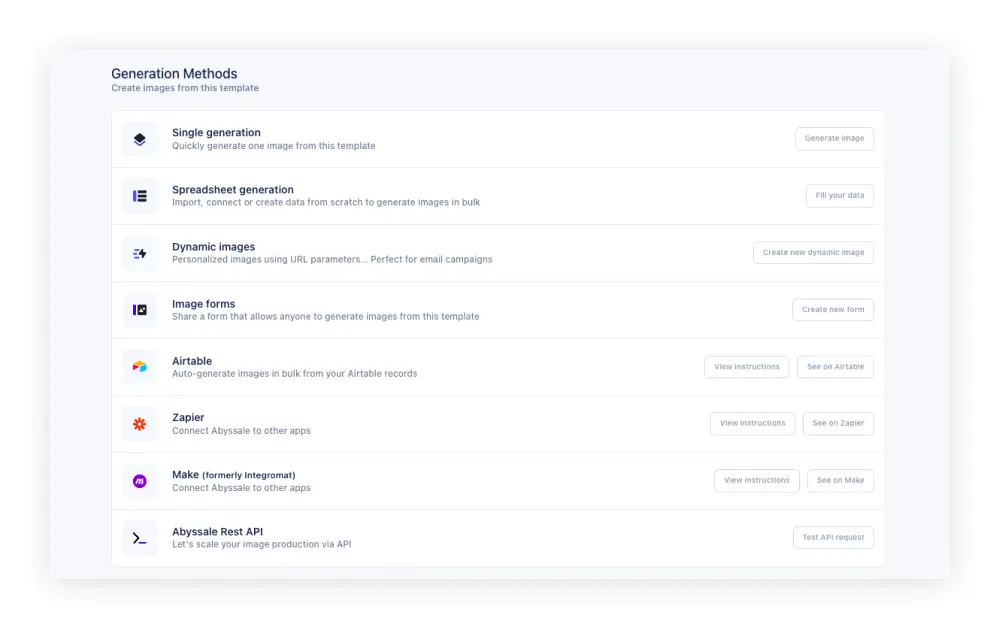
It allows our users to generate several banners in bulk, from the same template. For example to create a personalized image for each one of your most loyal customers, you can design your template (an event invitation for example) and create all you data in Airtable (guest list, date of the event, guest speakers …) and choose it as a generation method. Then Abyssale will use these information to generate your different images. As you can see bellow, we used this method to create images to announce a Webinar. The date, title and guest speaker of the event have been imported from our Airtable.

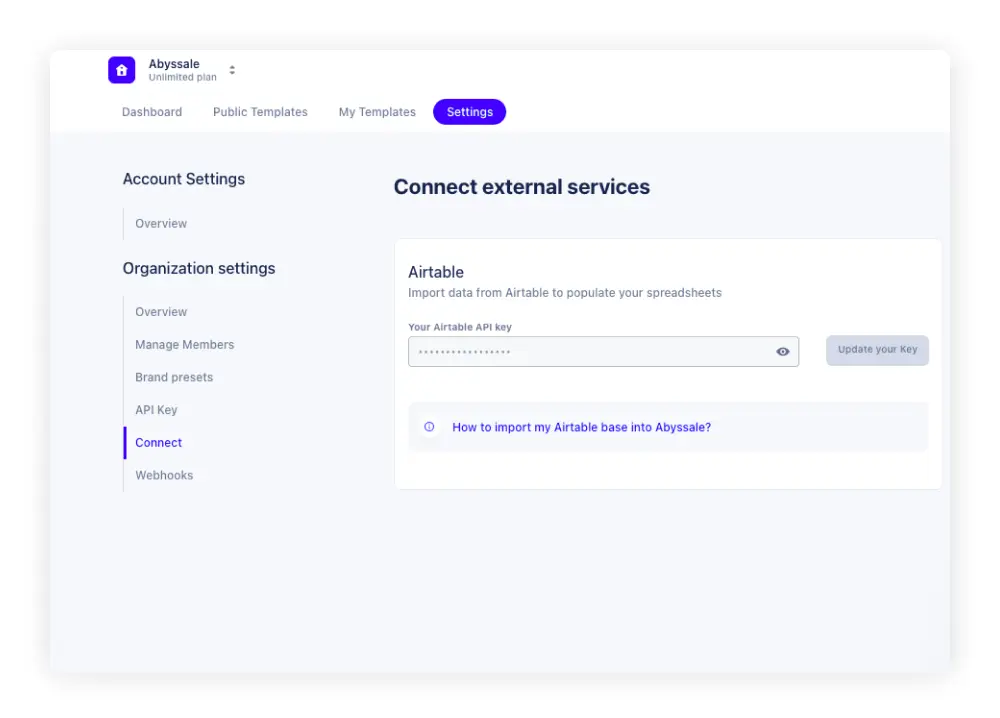
To do this easily you can connect Airtable data base to our Abyssale account. We actually did a tutorial on this, that you can read just here.
As it is a tool loved by our users and really useful for personalized images, the Abyssale team research a lot on Airtable best practices. Our team have tested 12 Airtable hacks and selected for you the ones we’ve found the most relevant, to give you a top 5 of Airtable tips that will change life!
1/ Personalized & Locked views
One of the coolest things in Airtable is that we can look at the same data from different views. Now you might think it is the same in excel/ Google Sheet because you can create filters and different sheets or tables with different views. But here is the thing, in Airtable you can do it all from the same sheet and same table, in collaboration with your team, and Airtable will keep the views you’ve created in the sidebar, so that you can have access to them next time and look at your data in different ways.
This is really useful because, used right it will considerably decrease the number of tables you have. You can just create a big centralized data table with several layers of informations gathering the activity of your company, and then create different views for different persons involved in the same project. Awesome right? And I know what you’re thinking, “it will get so messy”. And you are right. If everybody can create or edit different views of the same table it can be hard to keep you data clean and organized, this is why our first Airtable tips is all about organization.
First of all, if you are the one creating the table and want to keep a clean view visible for your teams, you can lock a view.
For that just click on your view (for example Grid view) then go to
Collaborative view > Locked view
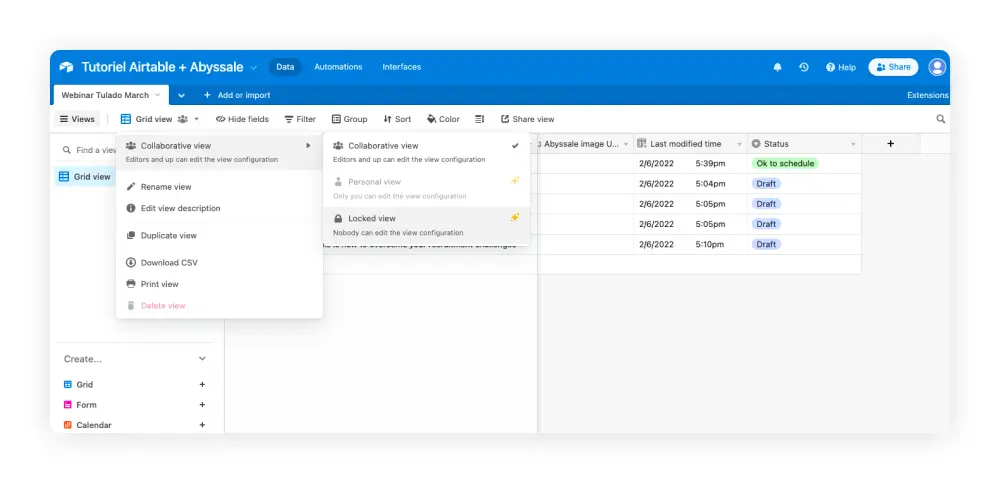
This way even if every one can see this view, they will not be able to edit it. To make this table their own and make it more intuitive for each and everyone, they can all create personalized view. just by doing the same thing :
Create a view > Click on the view > Collaborative view > Personal view
so that they will be the only ones to be able to edit this view.
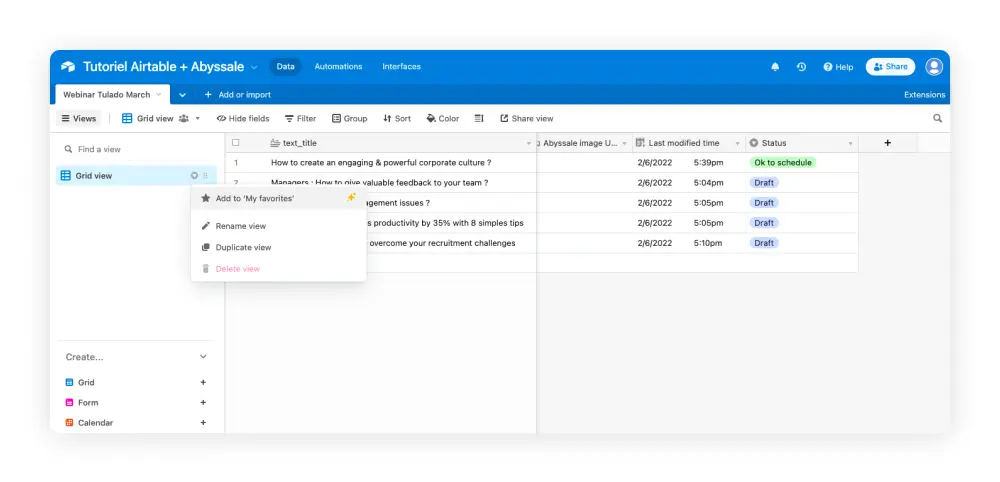
Also to see the view the most relevant for you first, you can add certain views in “Favorites”.
Just click on the drop down arrow next to your view > Add to “My favorites”
2/ Create sections for team views
Now if a lot of people in your team are using the system of personalized views, and everyone is creating views, even if you’re using “my favorites” and mastering views permissions & collaborative views, you might end up with a long list of views on you sidebar and it can be tricky to find the one you wanted in the first place.
This is where our second Airtable hack comes in handy : create different sections to organize your views and your side bar!
You can see these sections as folders. You can create sections by teams of course, but also by semesters, by campaigns … really everything you want, it is made for each team to find the right fit. These sections will appear in your side bar with a drop-down arrow and once you click on it , you’ll be able to see the different views created, belonging to this section.
To create a section just go tot the bottom of your sidebar and click on “New section” then, you can name it and place different views in it, here is how it’s done:
3/ Link tables across multiple bases
When your Airtable data base is pretty dense, you may find yourself in a situation where you have several bases, including several tables and it is possible that you have in a certain base, to take values present in another base. Thus you might be wondering “hey, Airtable can you link tables across multiple bases?”
For that you have to know that Airtable allows pretty easily to link tables within the same base, but restricts you from linking tables across different bases.
Let’s say you have a data base A, with 5 tables (1,2,3,4,5) and a data base B with 3 tables (1,2,3). What we are saying is that is would be pretty easy to link table A1 and table A4, as well as table B1 and table B3 , but it is almost impossible to link table A3 with table B2.
One of the alternatives offered by the platform is to use Sync. This consists in using one data base as a source for others bases and tables. For example you can use a “source” data base to create a product inventory , referencing all the products you have, and then sync it with other bases like Sales activity reviews or stock management or even marketing data bases. Here is a documentation about Airtable Sync Basic set up, that will explain you how to do just that.
Here is another alternative; often when you ask yourself “can you link tables across multiple bases? ” and that you try to do so, you’ll quickly realize that you don’t really need to link the whole table, you just need to reuse some of its key values.
To use the value from another table you’ll have to:
- Put it in a formula field
- Create a relationship between the 2 tables with a linked record field.
- Add more visibility with lookup fields
In our two following tips we’ll explain you these two essentials notions of Airtable automatically linked record and lookup in Airtable and how to create them.
4/ Airtable automatically link records
Before diving in how to create an Airtable automatically link records, let's explain what it is about first.
Let’s start with computed fields values. You might not know why we’re starting with this, but stay with us, you’ll understand later.
A computed field is a field where the value is automatically created by Airtable. It is not a field where the user edit the value, but one that calculated by Airtable. These computed fields are also cross-table friendly, as their values may be calculated from other field values of the same table as well as field values from another table.
Now to create a link record:
- Identify in which tables are the values you need to link
- In one of these tables add a field
- Click on “Link to another record”
- Choose the other table you want to link
Once this is done, you’ll be able to choose any record from this table and add it to your other table:
- You can click on the cell and add any record you want from the other table
- You can also add multiple records within the same cell
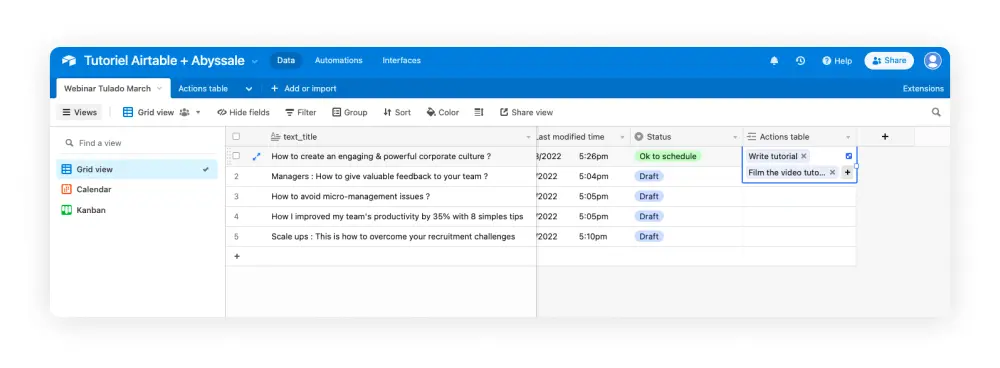
Also note that this field will also appear in the table you’ve linked.
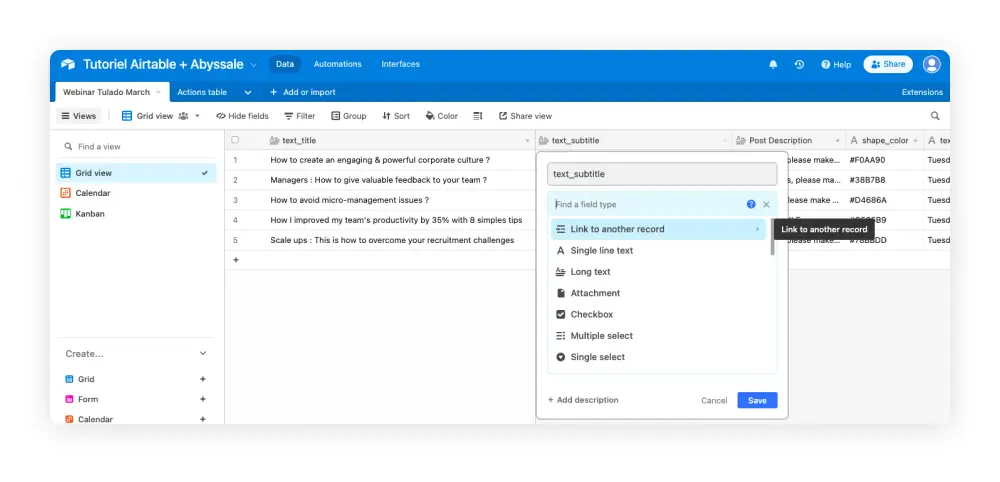
in addition to create new link record fields, you can convert one of your existing fields into a link record.
Just click on the field you want and select Customize field type> Link to another record.
Here you go, you have just made Airtable automatically linked records.
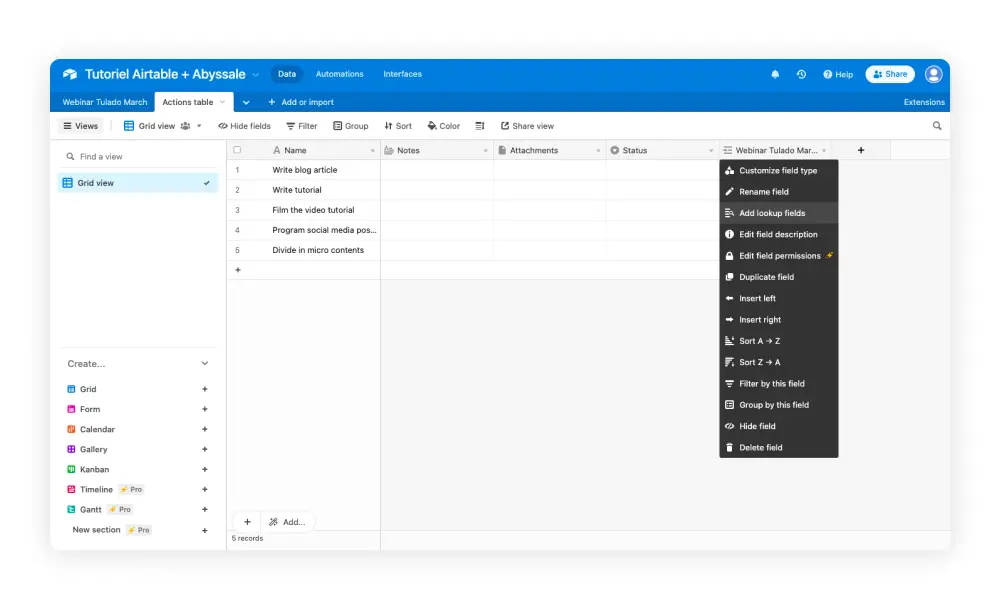
5/ Lookup in Airtable
Doing this, Airtable will maybe propose to you to add a roll up or look up in Airtable.
This can be useful if you want more details on the field linked to another record.
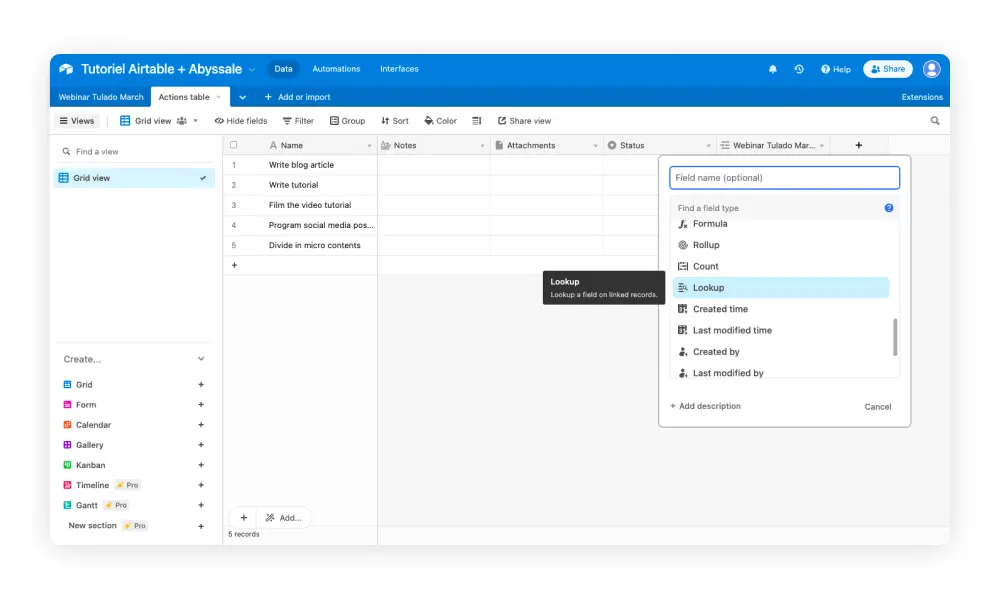
For this you need to click on a new field and choose Look up. Then you can add the details you want by choosing the fields of the other table. Be careful, this will only work if you have already configured linked record fields.
For more precision, especially if you have several linked record fields the look up in Airtable also gives you the possibility to configure and add conditions. You can choose to display in your look up field, only certain records. For example in our Webinar table we have a status field.
Let’s say we want to see in our Actions table more details about the description of each webinar, but only when it’s needed. So we can set up a condition to display webinar descriptions record only if the status of the webinar is in “Ready”
Finally, last trick for this look up in Airtable hacks, you can add look ups in bulk :
This can be useful if you have multiple linked records and need to see different details without having to switch tables.
If you want to see more creative automation hacks, join our LinkedIn community!