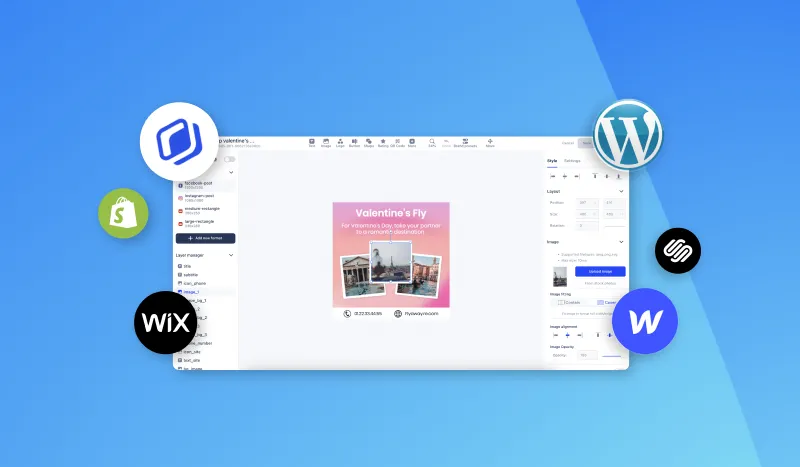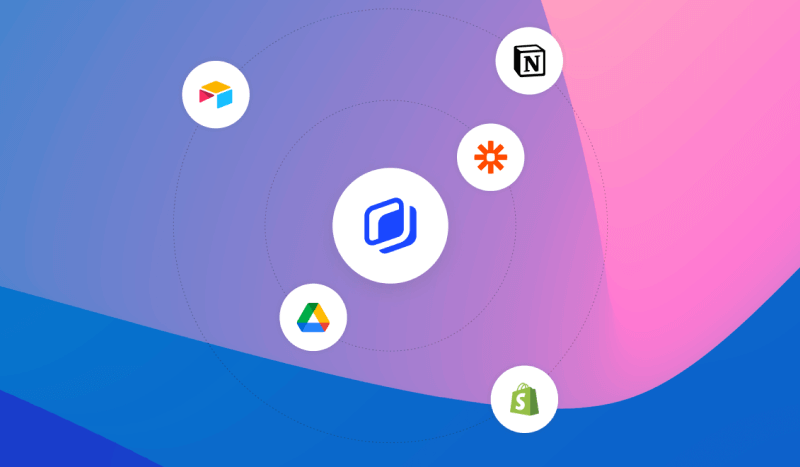
Notion is a really intuitive and easy-to-use tool when it comes to categorizing, organizing and sorting data, notes, information and so on. Abyssale offers the same advantages for image generation & storage. Combining these 2 tools to facilitate & automate social media content thus appears to be obvious! In this tutorial we’ll show you how to easily and quickly generate several visuals for social media purposes, in different formats, using Notion, Abyssale & Buffer on Make (ex-Integromat). Notion is already used by many as a social media content creation tool and offers many integrations to help you automate some of your daily tasks so it serves as a great base for this tutorial.
To make things more relatable, we always use an exemple all along the tutorial, this time we'll illustrate this tutorial like this :
Let's say I'm a last mile delivery company, delivering packages to clients for local businesses in an environmentally friendly way through a large community of bike delivery drivers. So within my company I have 2 communities to animate, and I talk to them on two different channels. My community of delivery drivers to whom I talk on Facebook, via a group created especially for them and my community of corporate customers, with whom I communicate mostly by email and on LinkedIn.
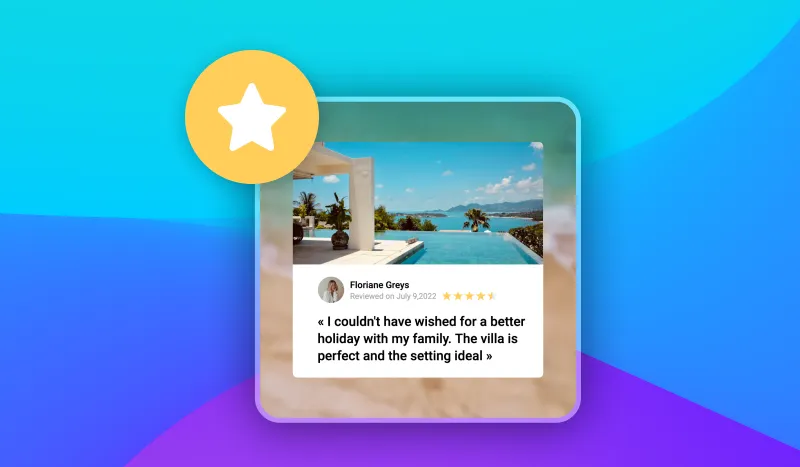
My challenge today is to promote several testimonials to both of these communities in order to inspire them to join us. So I do have to create visuals on 2 different social media channels.
I have 2 testimonials of delivery bikers and 2 testimonials of small business owners (my clients).I want to automate this visual creation, as well as the publication on the respective social media channels.
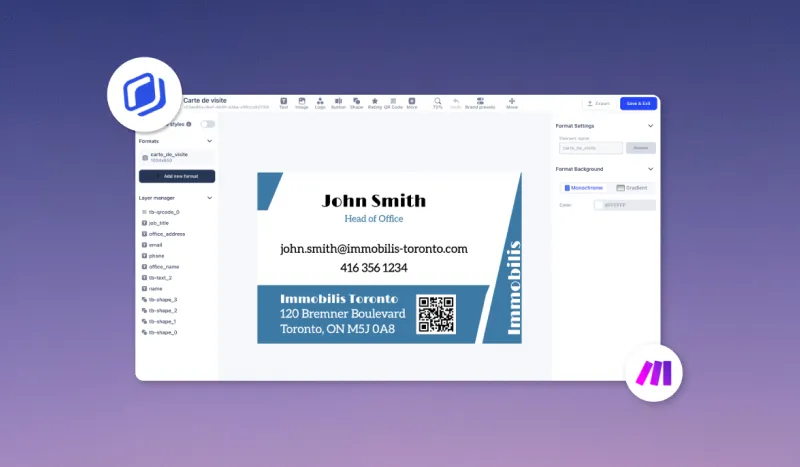
#1 Create an Abyssale template
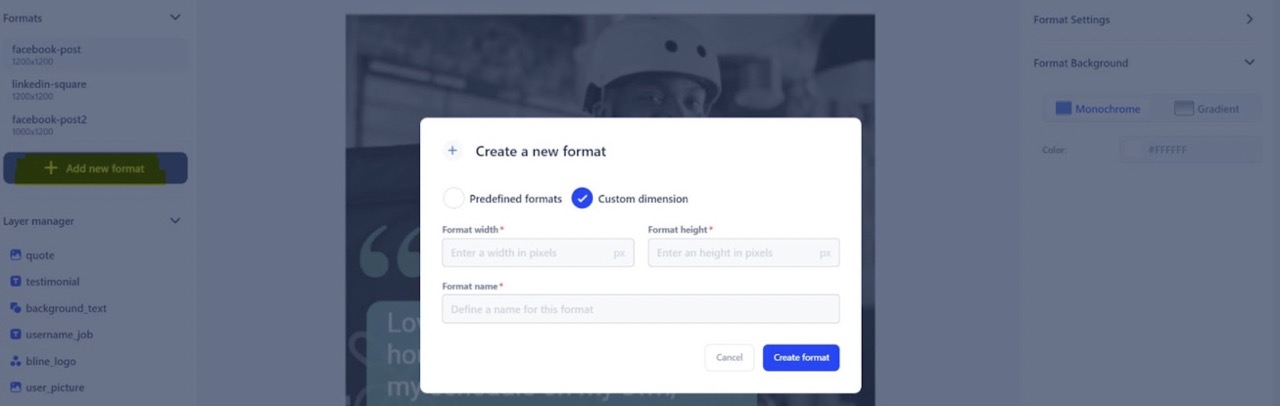
I first need to create my Abyssale Template. This template will serve has a base to generate the variations of our images. I need to add 2 formats to this template, as I want my testimonials to be posted on Linkedin (square format) and on Facebook, for which I will use the 4:5 format (1000X1200). To add a new custom format to your template :
Click on “+ Add a new format” → Select Custom dimensions and create your own:
Now that we've added our formats, it's time to design our template and name our layers properly.
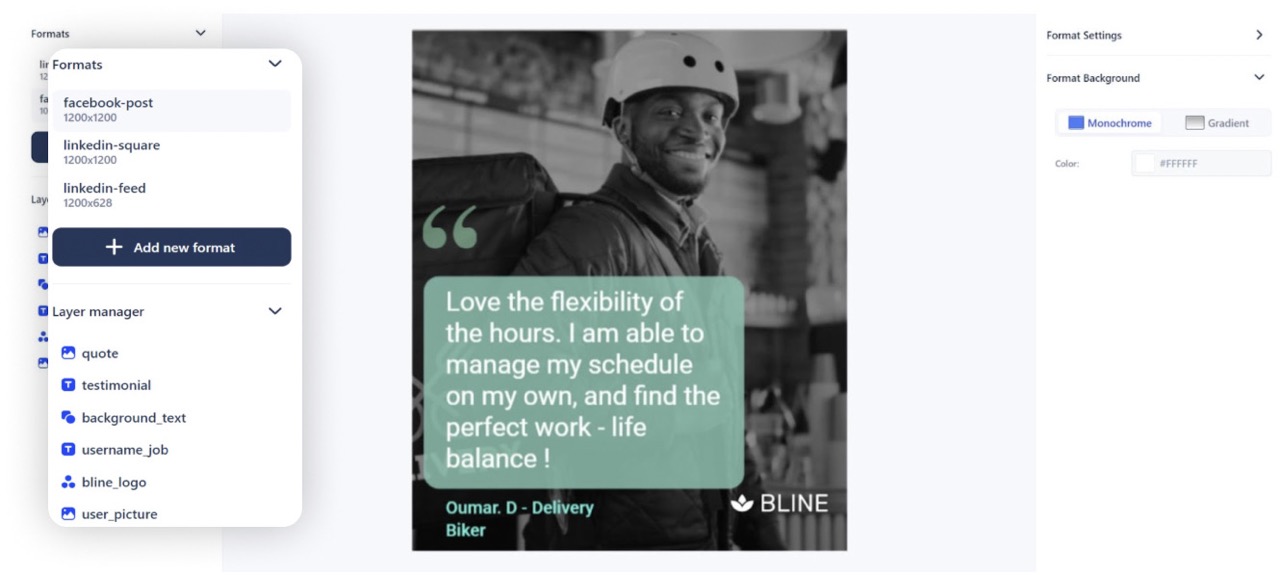
- I named my text zone “testimonial”. Be careful it has to be large enough to fit every different testimonies that may not all have the same length. You can use to text auto-resize options to set the minimum font allowed in order to make your text fit during the image generation process.
- For the background color of the text, I named the layer background_text
- username_job, for the name of the Delivery biker
- user_picture for the image of the delivery biker.
This layer naming process is really important for the next steps of this Notion social media automation.
Finally I click on “Save & Exit”
#2 Set-up your Notion content database
Now in Notion. I create a new content Dashboard by clicking on “Add a new page” → “Board Database”. The Notion board database format will be very useful to order our cards depending on their statuses and launch our automations when our cards change statuses.
I now have an empty Table in front of me. The whole point in this step is to fill in the information necessary to generate every variation of my visuals. So I need to precise for each version which elements to take into account.
Consider that every Card on your Notion table is a different variation of your visual and a different social medi a post. For all your different cards you can have several properties (which will in this case correspond to our different template layers).
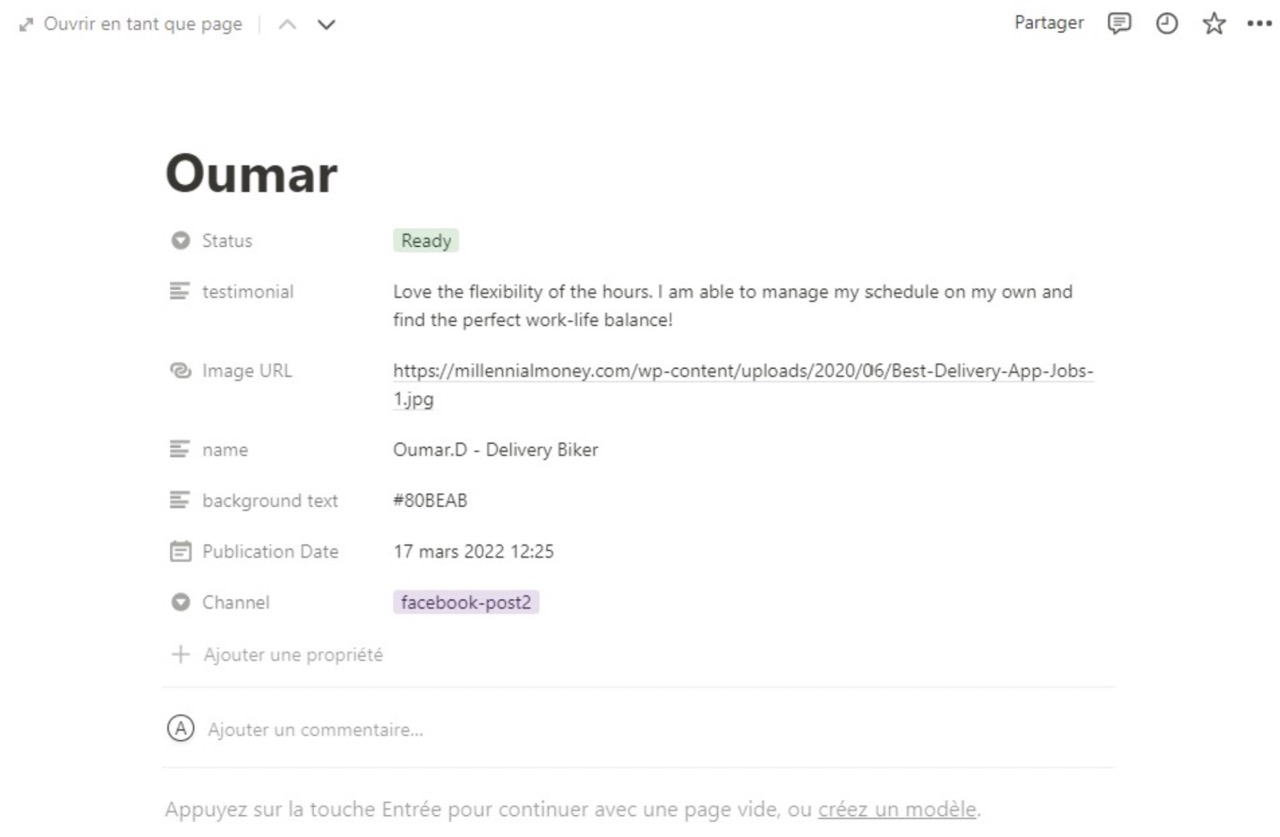
I click on Card 1 and on “+Add a property”
- For my testimonial layer , I choose Text format and name this property “testimonial” (same as my layer) Then, write my first testimonial in this field.
- For my username_job layer, I also choose Text and name this property “Name”
- For my user_picture layer , I choose URL and then add the URL of my image in this field. I named this property Image URL
- Now for the format to use, I add a “Channel” property, in which I choose “Select” and create 2 options facebook-post2 and linkedin-square (the name of each of my format in Abyssale)
- Then, in order to be able to schedule publication, i add a “Publication date” property in Date format , and I choose the date and time by clicking on “include the hour”
Finally I can rename my card. To speed up the process for later social media posts you can create a Notion page template.
I do the same thing for my 4 other testimonies :
- Oumar & Cyril : delivery bikers, Facebook post and blue background color
- Julia & Marine : small business owners, Linkedin post and orange background color
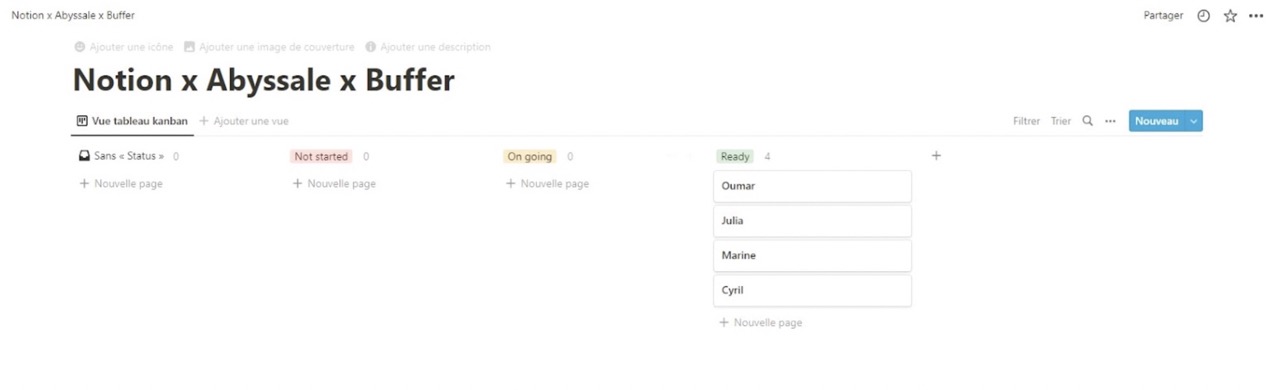
Now that I’ve created all my cards, it is time to update my status . In the theme I chose, I currently have 3 status :
- Not started
- On going
- Ready
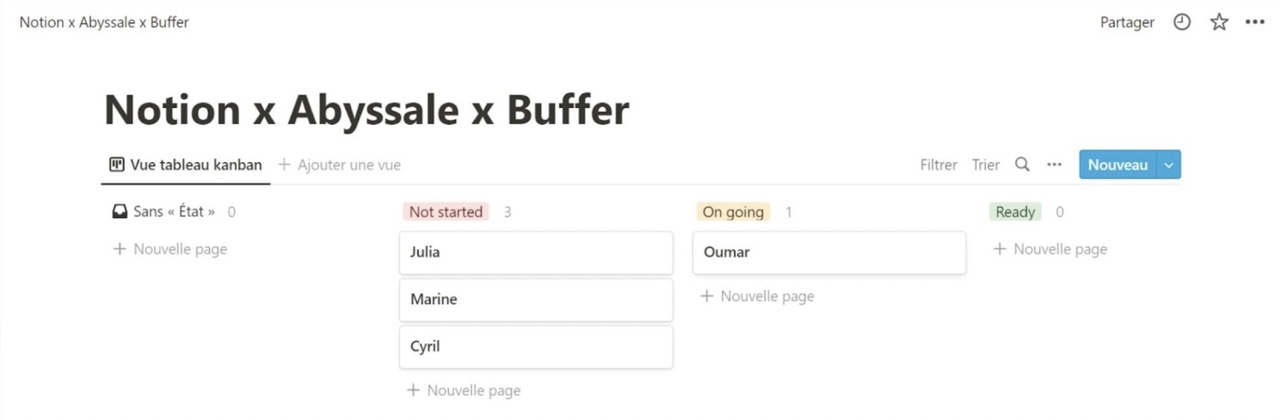
It is important to know that later in my Make (ex Integromat) scenario, only the status “Ready” will be taken into consideration for publishing.
So when I finished editing all my cards, and I am sure everything is correct, I can change the status of every card by dragging them into the proper column or :
- I click on the card
- I click on the field “Status”
- And then I change into “Ready”
#3 Create my Notion social media automation
Now in Make (ex Integromat) we'll tackle the last step of our Notion social media automation! What we want to do here is to fetch the data from our post and images in Notion, send it to our template in Abyssale template (step 1) and then transfer the generated image and the post content to Buffer for publication according to the different formats and social networks. So our automation will be composed of 3 main modules : Notion - Abyssale - Buffer.
#3.1 The Notion module
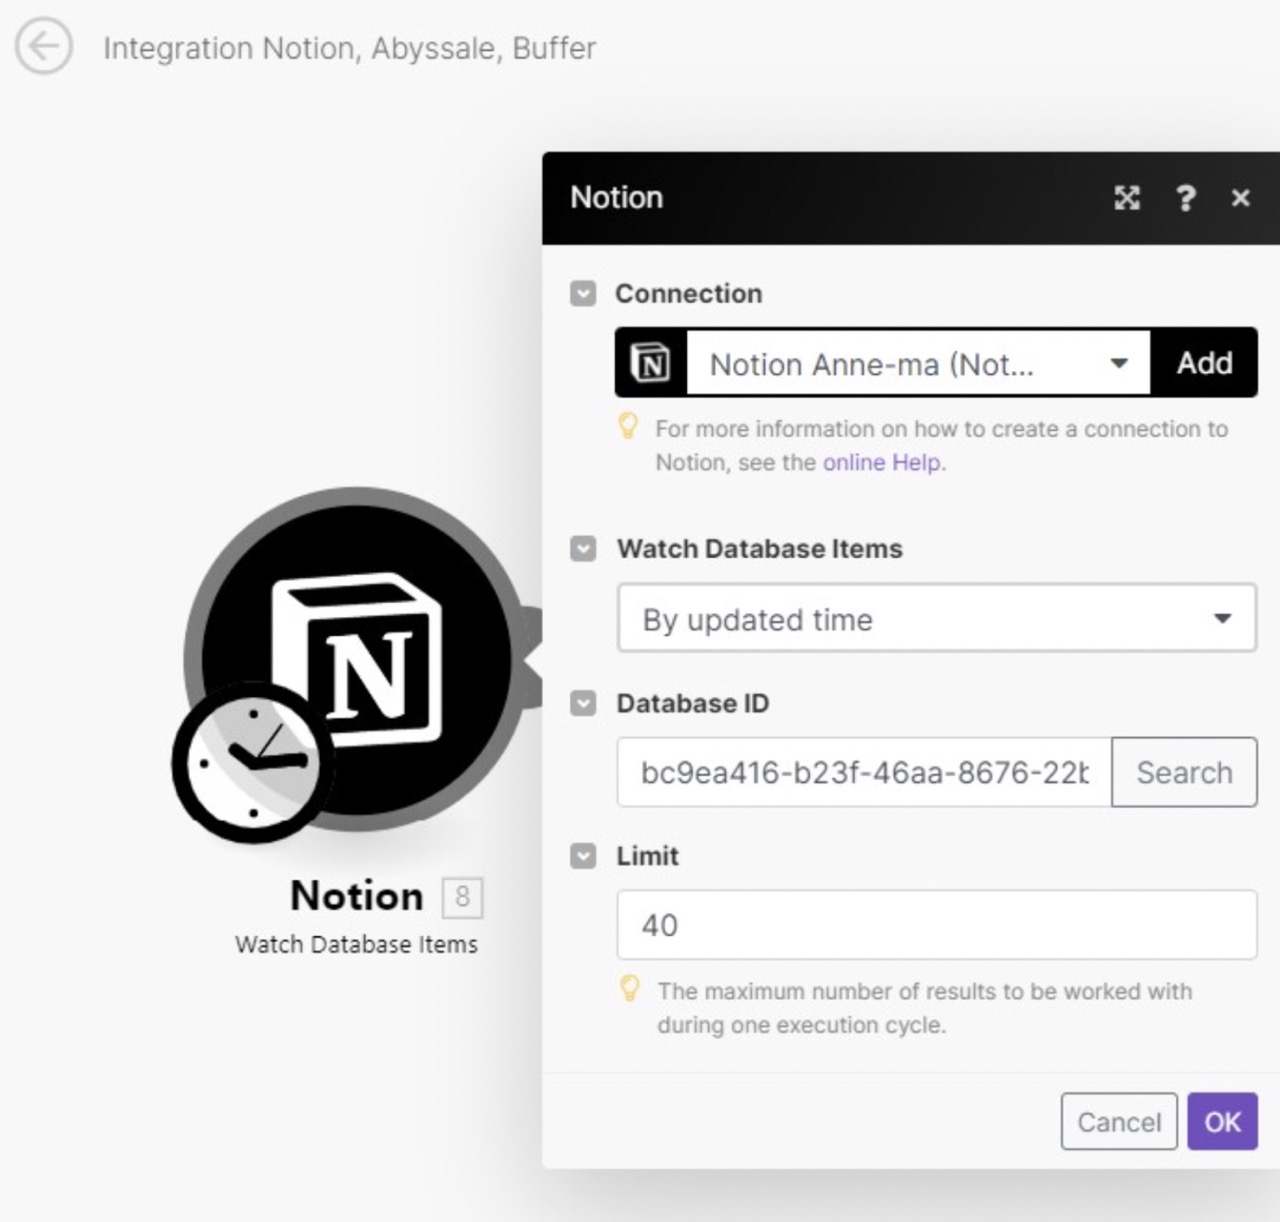
- Create a Notion module and Select “Watch DataBase”. This module will watch our database and look for any change to one of our card
- Connect your account and Select “ By updated time”.
- Connect your Database ID
- And set the limit. This is the maximum amount of Notion cards Make will process in one scenario execution
#3.2 The Abyssale module
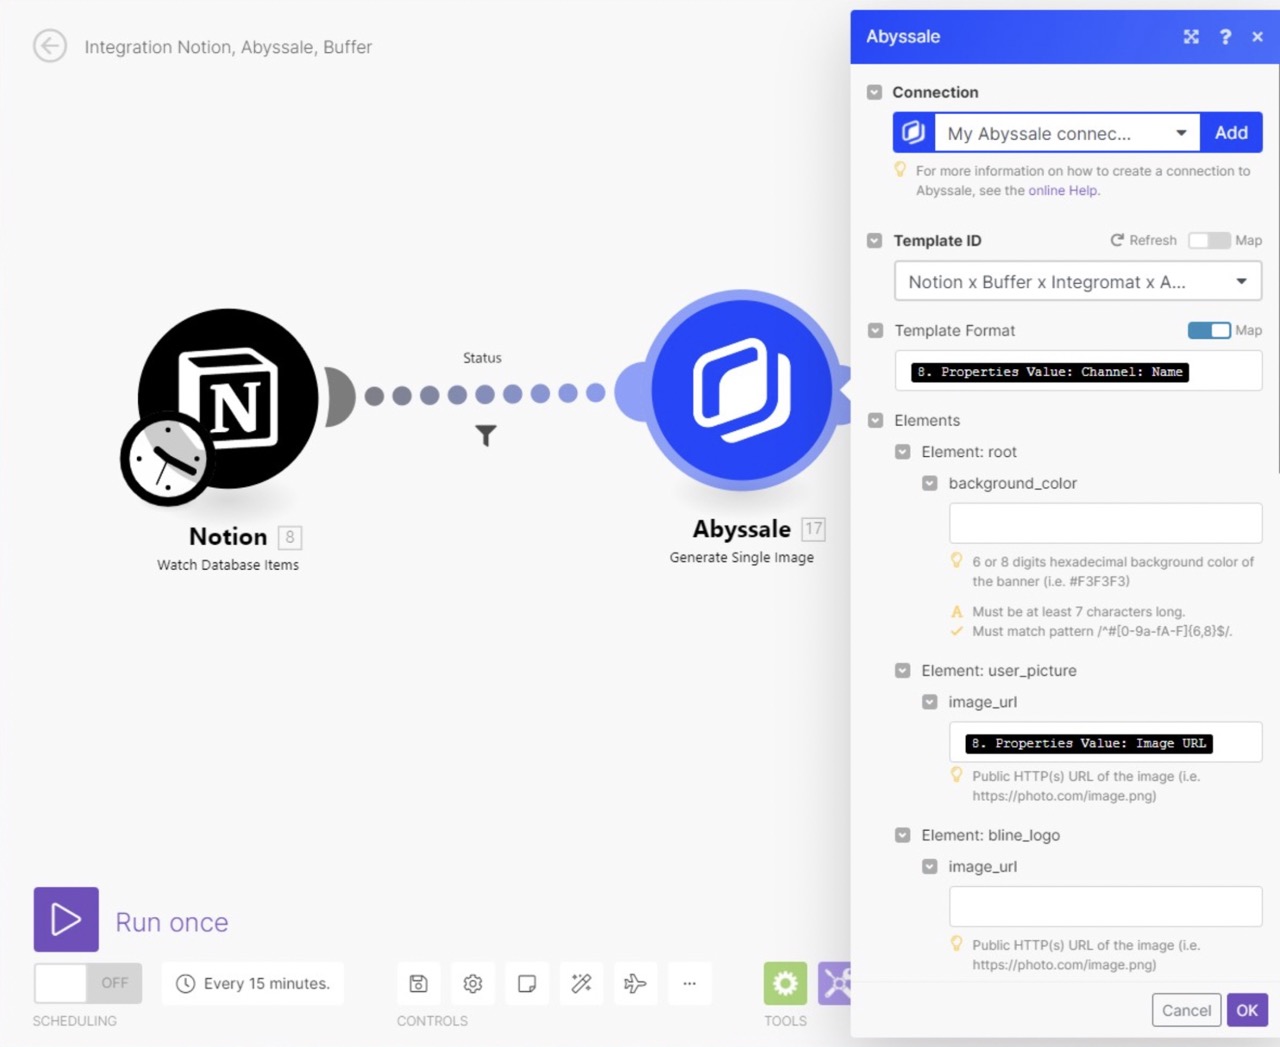
- We'll now add an Abyssale module and Select “Generate Single image”
- Connect your Abyssale account and select the template to generate images from
- For the template format, as you have 2 available, you need to switch on “map”
- Then in the actual field “Template Format” Select your Notion “Channel” field. You should look for “Properties values” when clicking on the field, and select the value corresponding to your formats / channels
Finally for all the “Elements” fields, they correspond to your Abyssale layers and you just have to match the ones that will be changing in your visuals with your Notion properties values. That is why I matched my layer testimonial with the value testimonial (plain text) in Notion. My layer image_ url with the Notion value image url, the username_job with “name” and the background_text color with the background text of Notion.
#3.3 Set up a filter
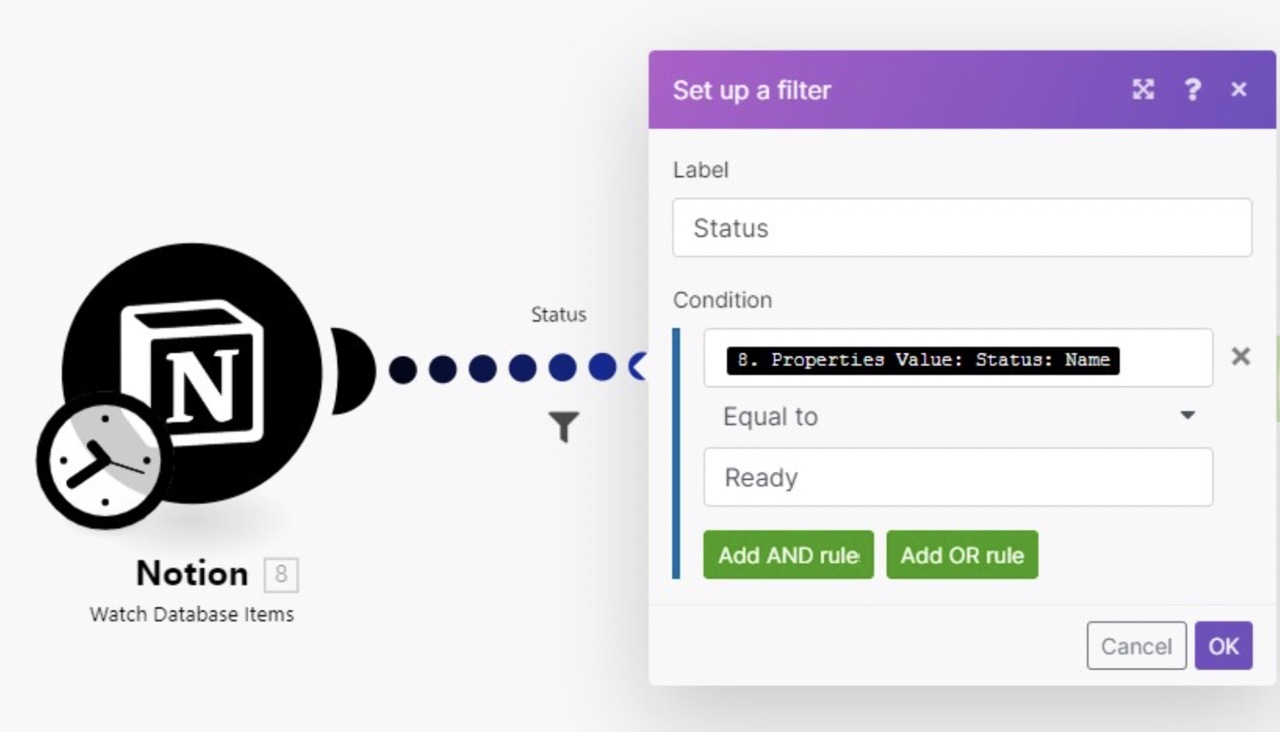
What we just did here is tell Make (ex Integromat) to watch the Database we’ve just created in step 1 and its items, based on their updating time. Then we told it to match these data with our Design in Abyssale. Now we want to specify which item exactly to process according to their status. For that we’ll add a filter. Remember when we updated all our cards' status to "Ready" during step 2 ? This is where it comes useful :)
- On the link between your Notion and your Abyssale module click on the wrench.
- Select "Set up a Filter"
- Name it, and add this condition : Your property value Status should be equal to Ready
- Click on OK
#3.4 Create 2 paths
Now for the rest of the scenario we need to create 2 different roads. One for our Facebook publication, and another for Linkedin. For that we need to install a Router to divide the road in 2 parts and a filter to indicate which data will go on the first or the second road.
- At the Bottom-center of your screen, click on the green icon Tools
- Then Select “Router”
- Now you have 2 roads. On both of these roads, add a HTTP module
- Select “Resolve a target URL”
These HTTP modules are here to transform our Abyssale image generation request into a URL with a pattern that will be accepted by Buffer. This is why you have to :
- Choose the Abyssale “image URL” in your URL field of these 2 modules.
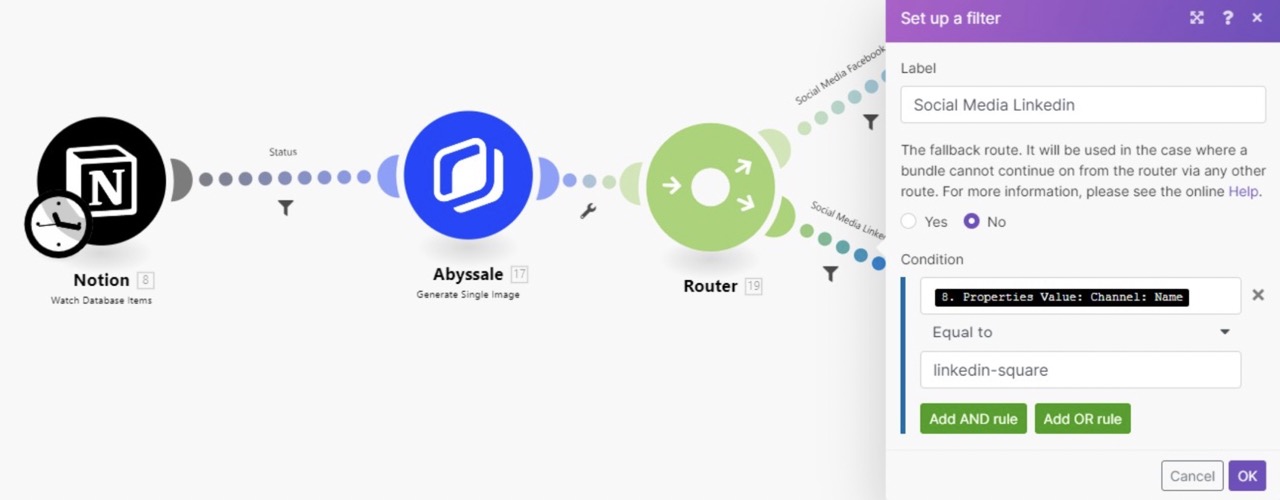
Now to decide which data will go into each road we need to set up 2 other filters (between your Router and your HTTP modules) :
- Same thing click on the wrench & “Set up a filter”
- Name it and add the following condition : Your Notion property value “channel” should be equal to “facebook-post2”
- Do the same operation for the second road, except that the condition is : Your Notion property value “Channel” should be equal to” linkedin-square”
#3.5 The Notion module
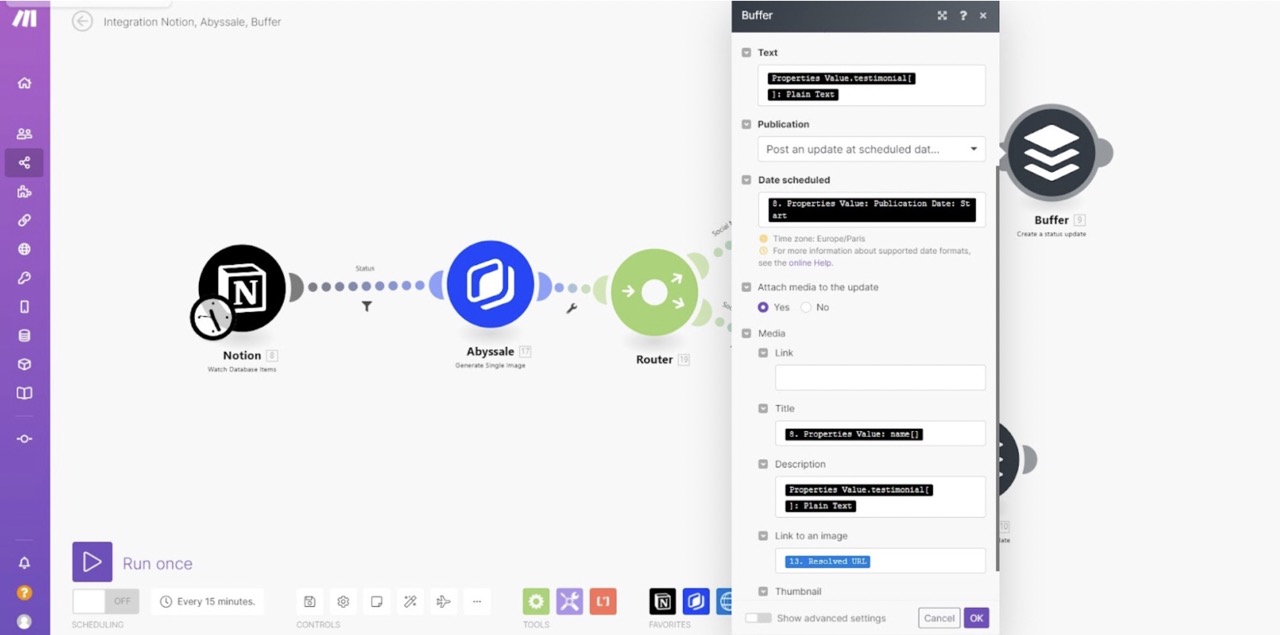
Last but not least, it is time to create our buffer module to finish our scenario. For the 2 branches of the scenario, we create a Buffer Module and :
- Select “Create a status update”
- Connect the account and select the profile for each road Facebook page for the first road and Linkedin page for the second one.
- For the publication field, select “Post an update at a scheduled time”
- And then fill the date scheduled by choosing our “Publication date” Notion property value
- Click Yes on “Attach media to the update” and add a title and description of your choice
- In the “Link to an image” & “Thumbnail” field you will add the image URL
WARNING : it is not the Abyssale image URL we’re adding here, as we have modified it with our HTTP module. So for each field we should take the Resolved target URL!
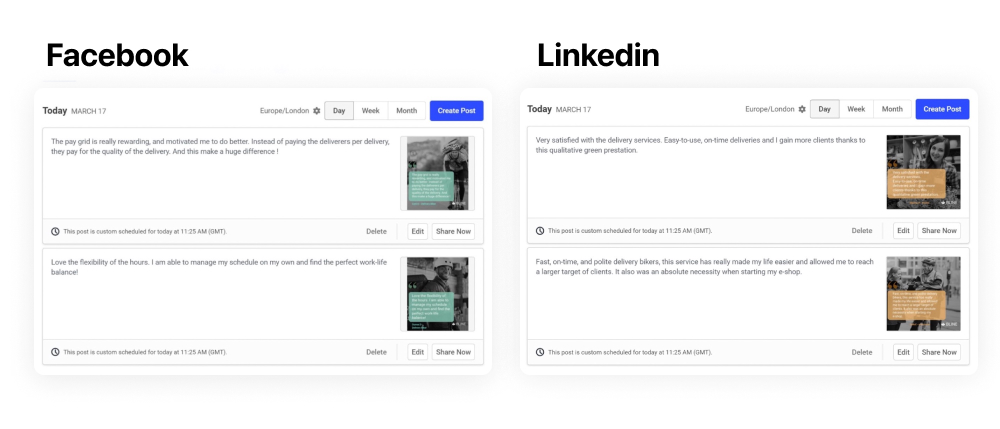
And here it is ! Run once your scenario to make sure you done it right. In buffer we can now see that our articles are scheduled correctly:
#4 Extra tips
- For your Notion property values, you have the value group and then the subgroups (plain text, annotations, type …etc) make sure to select the “Plain text” option. Also you can see in light gray.
- Don't forget your schedule settings. On your Notion module you have a black clock where you can adjust your schedule setting according to your publications :)
- If you scenario does not work when clicking on running one , click on the errors in red to have the details of it
- Pay attention to the length of your text according to your text zones defined in Abyssale. Sometimes if you design a text zone with a size, it can be too small for some of your variations. Either shorten your text in Notion or enlarge your text zone in Abyssale, and try again
- Pay attention to your publication date scheduled (in Notion) because it needs to be in the future in order to work.
One last tip :
If you ever have an image (file) and you can’t seem to find its URL (necessary for notion) you can
- Insert the file in one of your notion card by typing / and choose Media → Image
- Click on the 3 dots at the top-left of your image
- Then click on “Full screen”
- Now you can click right on it and → “ Copy image address”
- Here is your image URL :)


%20(9).webp)