Engage leads with personalized visuals using Landbot chatbot
Engage leads with personalized visuals using Landbot chatbot
- Using personalized visuals within your chatbot to engage customers
- How to build a chatbot that engages customers with personalized visuals
You've worked hard for weeks or months, now you're finally planning your product launch. You got your coffee in hand and looking out of the window you think: How can I improve my chances of having a great product launch? You decide a chatbot that engages with the people visiting your website for the launch is a GREAT idea.
Then you realize, everyone has a chatbot - so what could you do better?
A simple & powerful way to leave a good impression would be to include personalized visuals within your chatbot answers.
This tutorial explains how to build a personalized web chatbot using Landbot. ( We will be focusing on a web-based chatbot. Other channels such as WhatsApp, Facebook messenger or Google Business Messages are also available within the product).
When you create a Landbot web chatbot you can expect it to work like this:
- A visitor lands on your website.
- The chatbot bubble appears, and a welcome text is sent to the visitor asking them for their name and email.
- The user can now provide their information to the web chatbot, and magically, a personalized image welcoming them is generated from Abyssale and sent back within the chatbot, in seconds.
We're on the internet, where one GIF is worth a million words so here's what the whole exchange will look like.
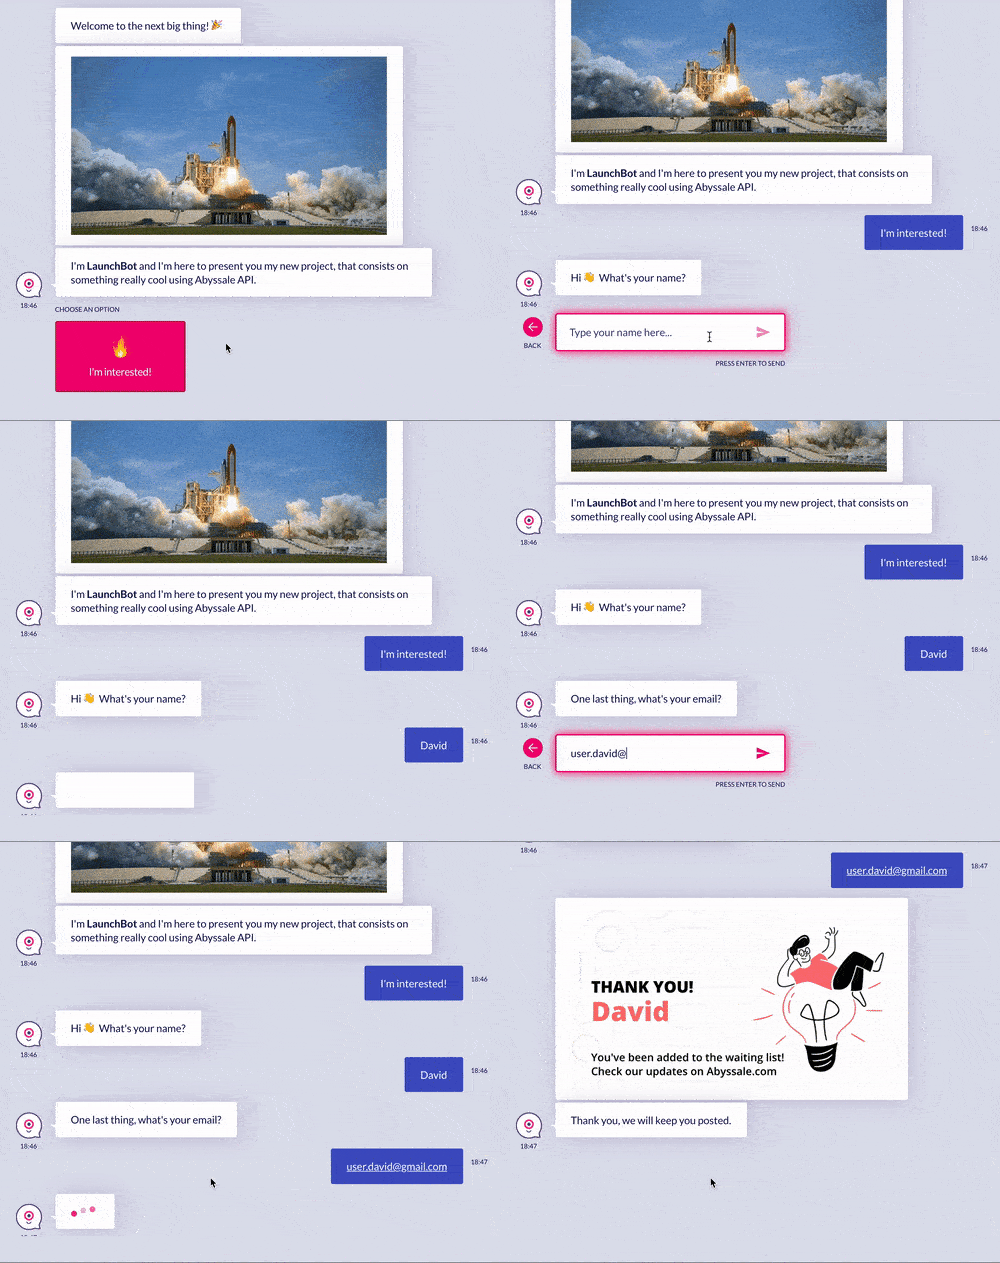
We personally think it looks amazing 😎
Abyssale: Prepare your "Welcome" template
- Login to your Abyssale account
- Go to your Dashboard and click on "Create New Template" > Browse templates
- Select the Email category and choose a template
- Select and use the template
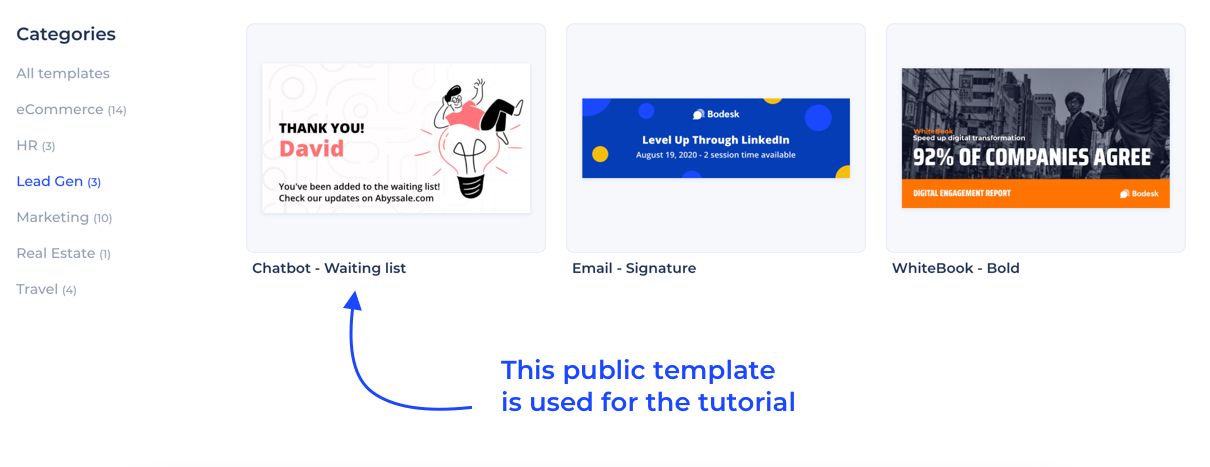
Editing the template
You will be redirected to the template edit page.
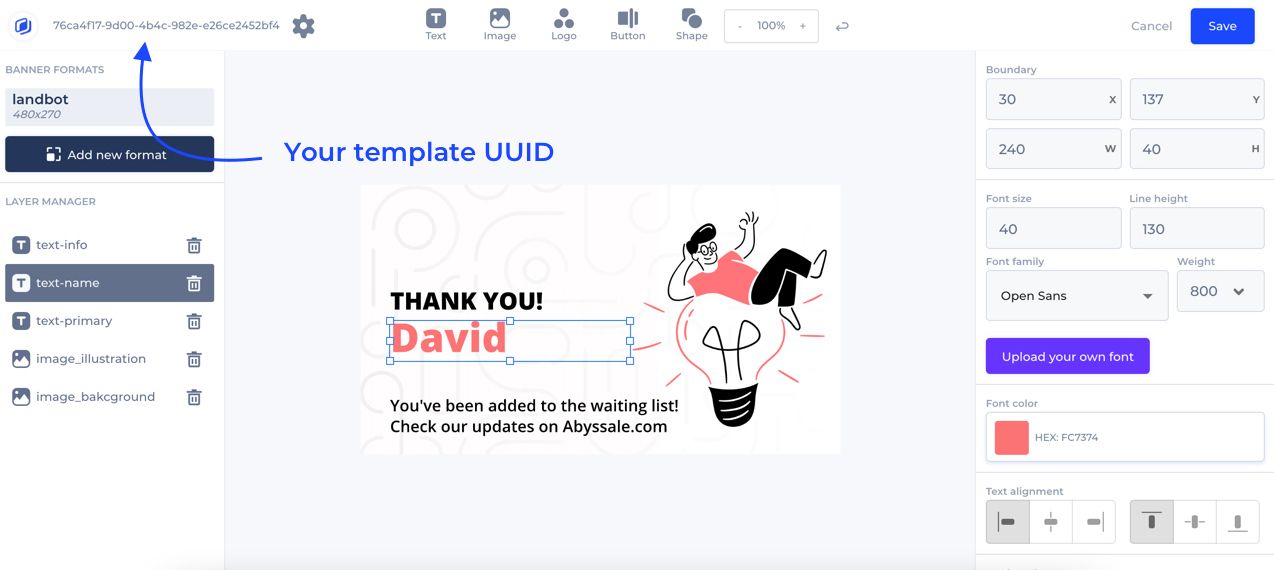
With this chatbot integration, the text-name element will be dynamically filled with the one provided by the user during their first interaction with the bot. In our template the default placeholder is David.
Save the template_uuid for later. See image below to see where you can grab it
Landbot: Connect Abyssale to your conversational bot
If you don't have a Landbot account yet, you can create one here.
1. Login to your Landbot account.
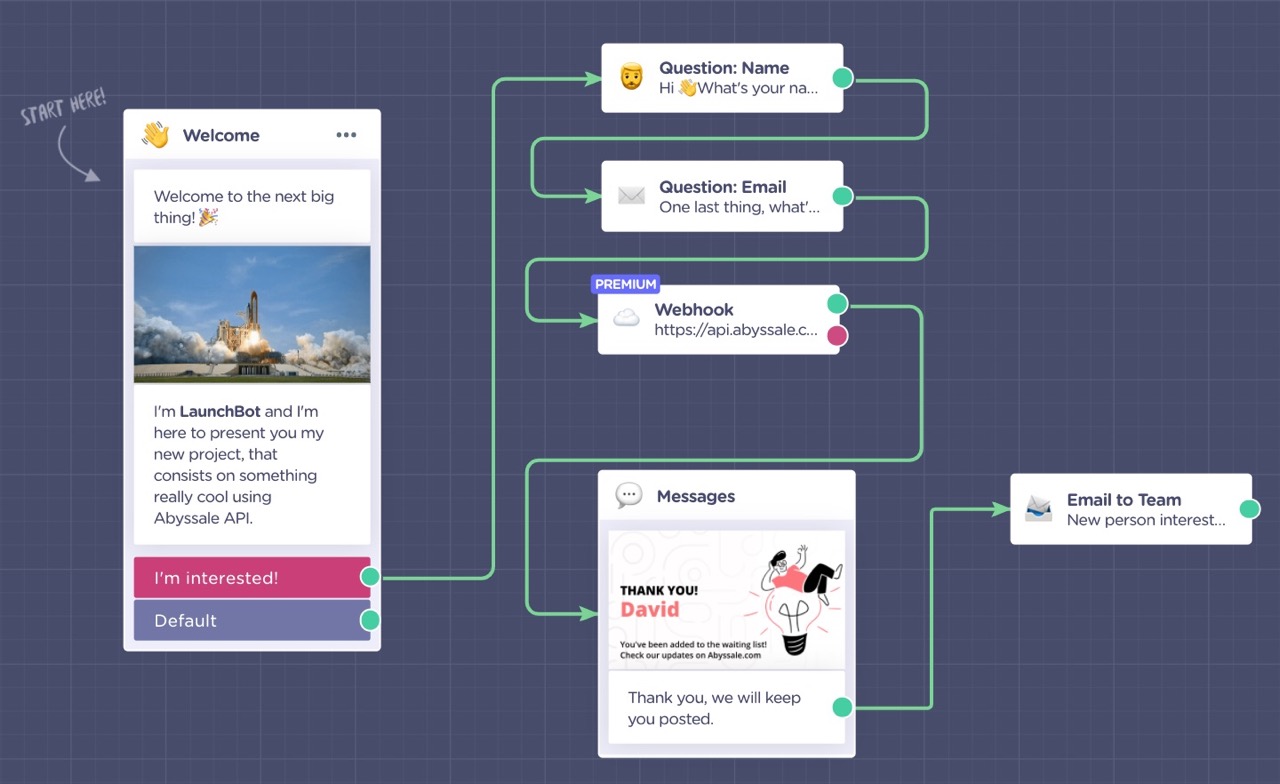
2. For this tutorial we will one of the default Landbot templates: the "LaunchBot - Product Recommendation". Click "Use this template".
3. The goal is to replace the "Messages" block with 3 new blocks ("Question: Name", "Webhook" & "Media")

4. Remove the "Messages" block (when hovering the block, a delete icon will appear.
5. Add a new "Name" block and connect it to the "Question: email". See how we've done it below.

The two "Question: Email" and "Question: Name" blocks are configured by default (obviously, you can customize the messages) and will provide you with two variables (email and name) that we will use next.
Configuring the Abyssale webhook
1. Add a "Webhook" block. Let's configure it:
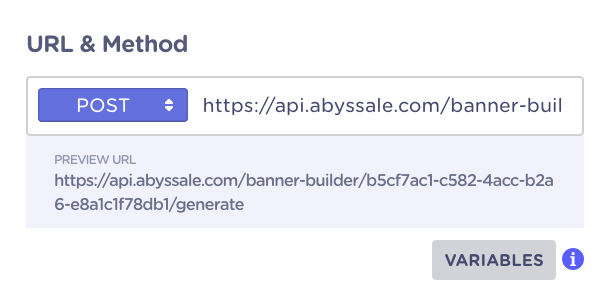
1.1. Set the Method & URL as follow:
- POST
- URL : https://api.abyssale.com/banner-builder/{{template_uuid}}/generate
🔴 Replace {{template_uuid}} with the one we saved at the start of the tutorial
1.2. Select "Customize Headers" and add two keys:
- Content-Type : application/json
- x-api-key : {{your-api-key}}
🔴 Replace {{your-api-key}} with yours. It can be found here, copy/paste your API Key and replace it.
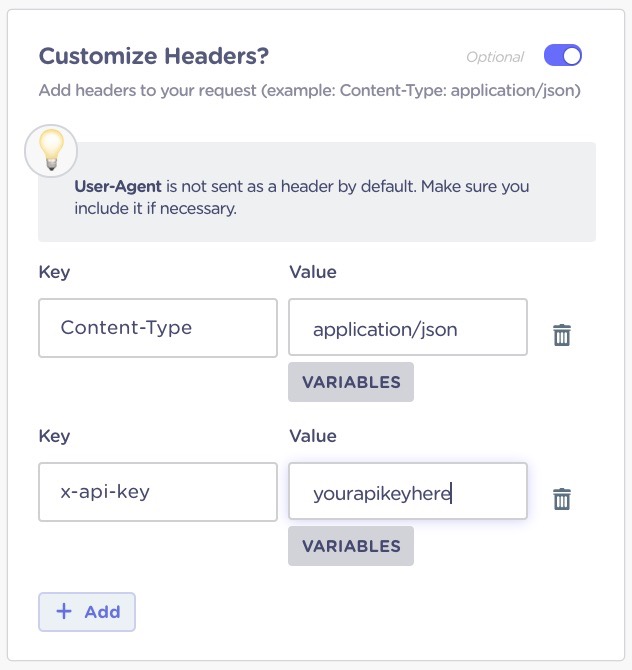
1.3. Select "Customize Body" and fill it with:

Take a look at how the name is injected here with @name, this is how the name is sent over to the Abyssale platform through our API.
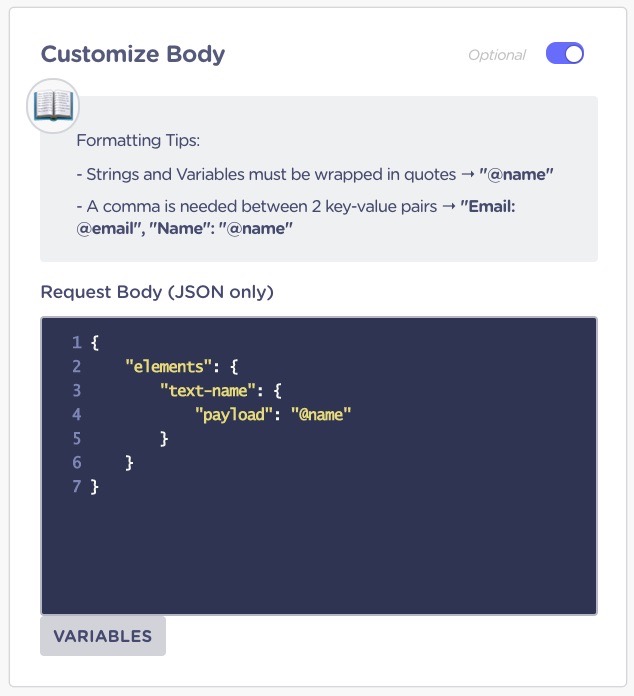
PS: You can find all the customizable properties on the Abyssale template page. Here is the documentation that covers it.
1.4. Select the "Test Your Request" and add a test variable:
- Variable name: John Smith
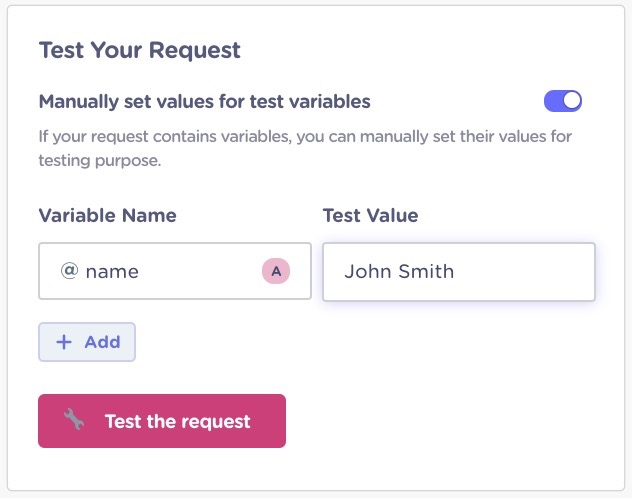
6.5. Once done, click "Test the request". You should see a successful 200 status code looking like this:
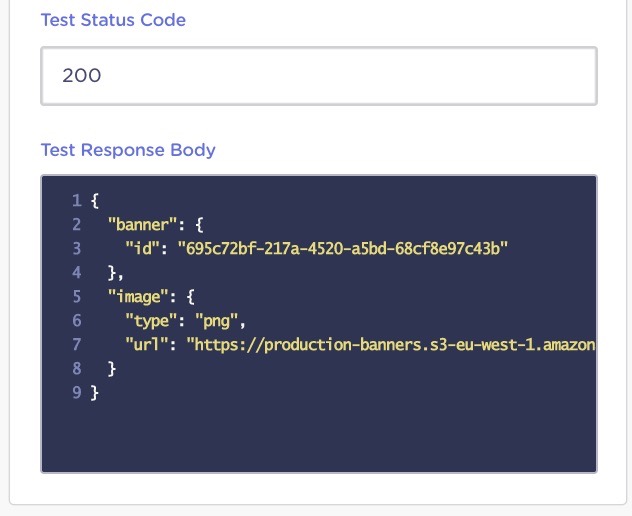
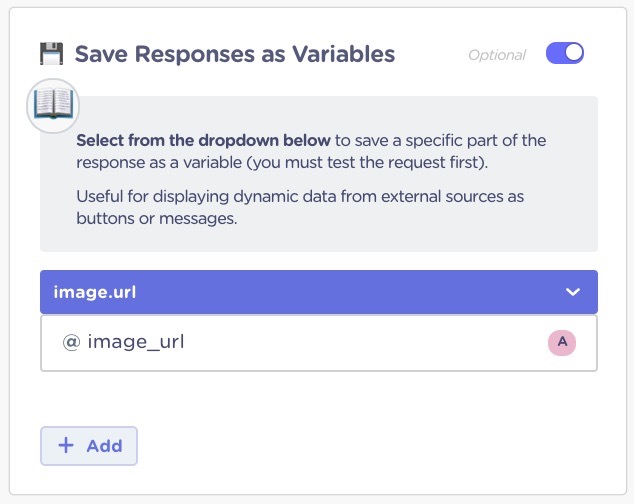
6.6. Select "Save Responses as Variables":
Select image.url on the dropdown and save this variable as image_url
6.7. (optional) Handling Webhook failure
- You can select Response Routing to handle 400 & 500 errors and send a message without any image in case an error appears during the rendering process.
The webhook is now ready to process messages and generate images.
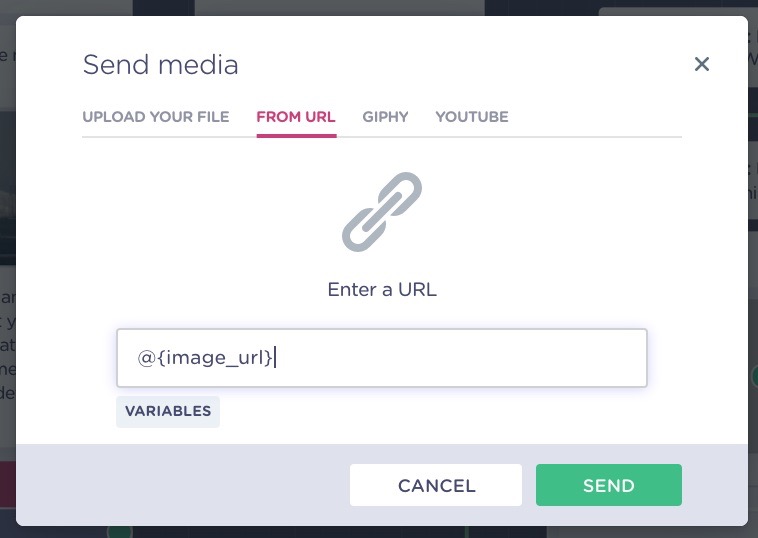
7. Let's send the generated image to the user by adding a "Media" block:
Select FROM URL and enter @{image_url} as value (This references the variable we created a moment ago)
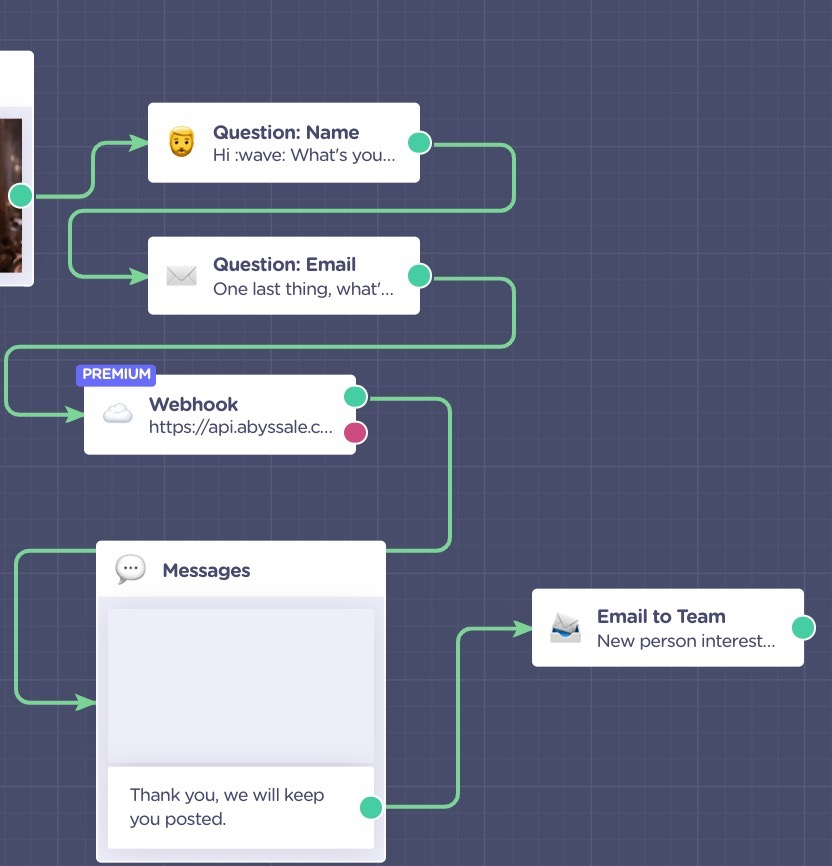
8. Connect all blocks together:
- "Name" & "Email" blocks can be reversed depending on your preferences.
- "Webhook" block must be connected after either the Name or Email block
- "Media (Messages)" block must be connected to Webhook
- The subsequent actions are up to you. The default template proposes to send an email to your team, but you could also send it to your database, to Zapier...
9. Test your bot by clicking on the "Preview" button (top right of the window).
Obviously, feel free to go ahead and customize all predefined images & texts to fit your needs.
10. Everything is ready to be published. Now, it's up to you to embed this bot into your website.
This tutorial might also apply to other bot platforms:
- It could be applied to other chatbot builders such as SilFer Bots, ManyChat, ChatFuel, ActiveChat, Quriobot, BotStar...
- Chatbots can be integrated within different channels, such as Facebook Messenger, Slack, WhatsApp...
This article became possible with the kind help of the ltdhunt.com team.
Get started for free
Master Abyssale’s spreadsheet
Explore our guides and tutorials to unlock the full potential of Abyssale's spreadsheet feature for scaled content production.
FFMPEG : How to overlay an image on a video?
