How to auto generate open graph images for new Shopify products
How to auto generate open graph images for new Shopify products

When sharing a link on social media, your preview image is really important because it will raise people's interest and invite them to visit your website. It is the same thing when you share a link towards one of your product pages. In this tutorial we’ll see how to customize your preview image for each new product on your shopify website thanks to Abyssale’s Dynamic image feature.
All along this tutorial we’ll take the following example : You work for a catering company named Korifood, that proposes fresh home made meals in delivery from its shopify website. Your goal today is to custom your preview image when you share your link on Facebook. As you have a new meal for each day of the week, you need to create different visuals for your promotions. Your task today will thus consist in automating image generation for all your facebook links preview according to your shopify products.
#1 Create a template with Abyssale
To begin, the first thing we should do is create the template in Abyssale. As always, we have to create and design a template that will work for several products (in this case our differents meals of the week)
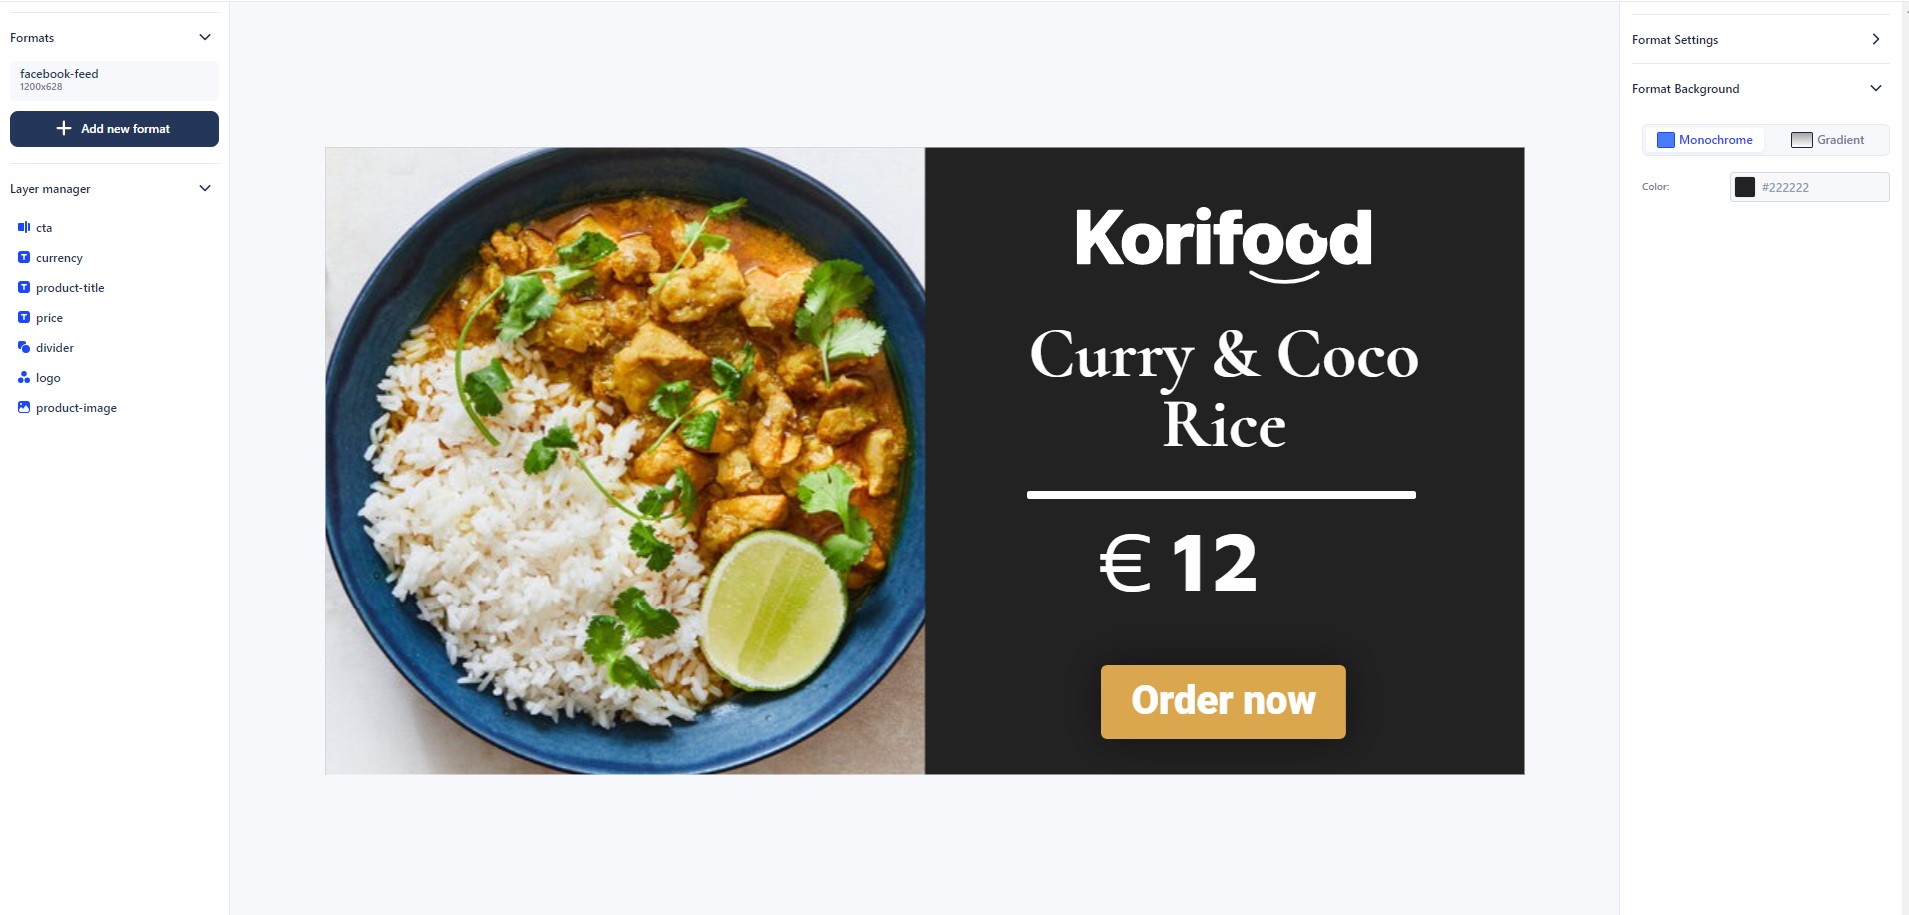
When creating your template you have to pay attention to 2 particular aspects :
The format : as we want to create a dynamic image for facebook preview link, we use the facebook feed format on Abyssale
Your layers name:
This is a very important step for the rest of the process. We really need to name our layers correctly, as it is going to be with these data that we will change information later.
We renamed the layers in which our content will change according to our different meals.
- product-title : for the name of our meal (which is also the title in shopify)
- price : for the price of our meal (same in shopify)
- product-image : for the photo of each meal.
Our other layers cta, logo, divider, and currency (in our case) will not change according to the products.
Once you’re satisfied with your template you can Save & Exit.
#2 Create a dynamic image url
Back on your “Template overview” section of your Abyssale template, you can click on the left tab to go to Dynamic image > Create dynamic image
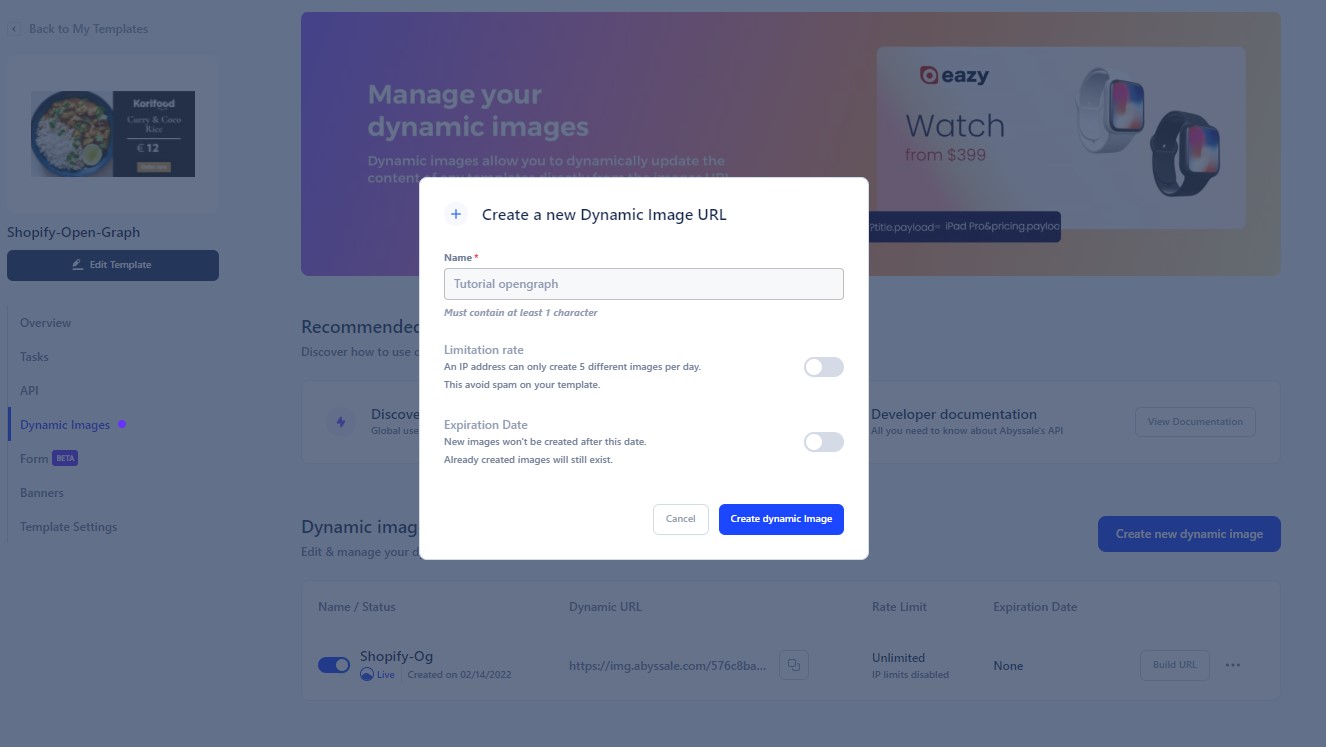
Once you name it you now have to build the URL of your dynamic image.
This step consists in adding to your URL all the parameters that will tell abyssale to change the content of your template's layers according to your product's information.
For every layer you want to customize, click on the layer toggle and parameter toggle you want. Abyssale will help you build your dynamic image url with the desired parameters. In our case, as mentioned earlier, the layers we want to change are product-title, price, and product-image.
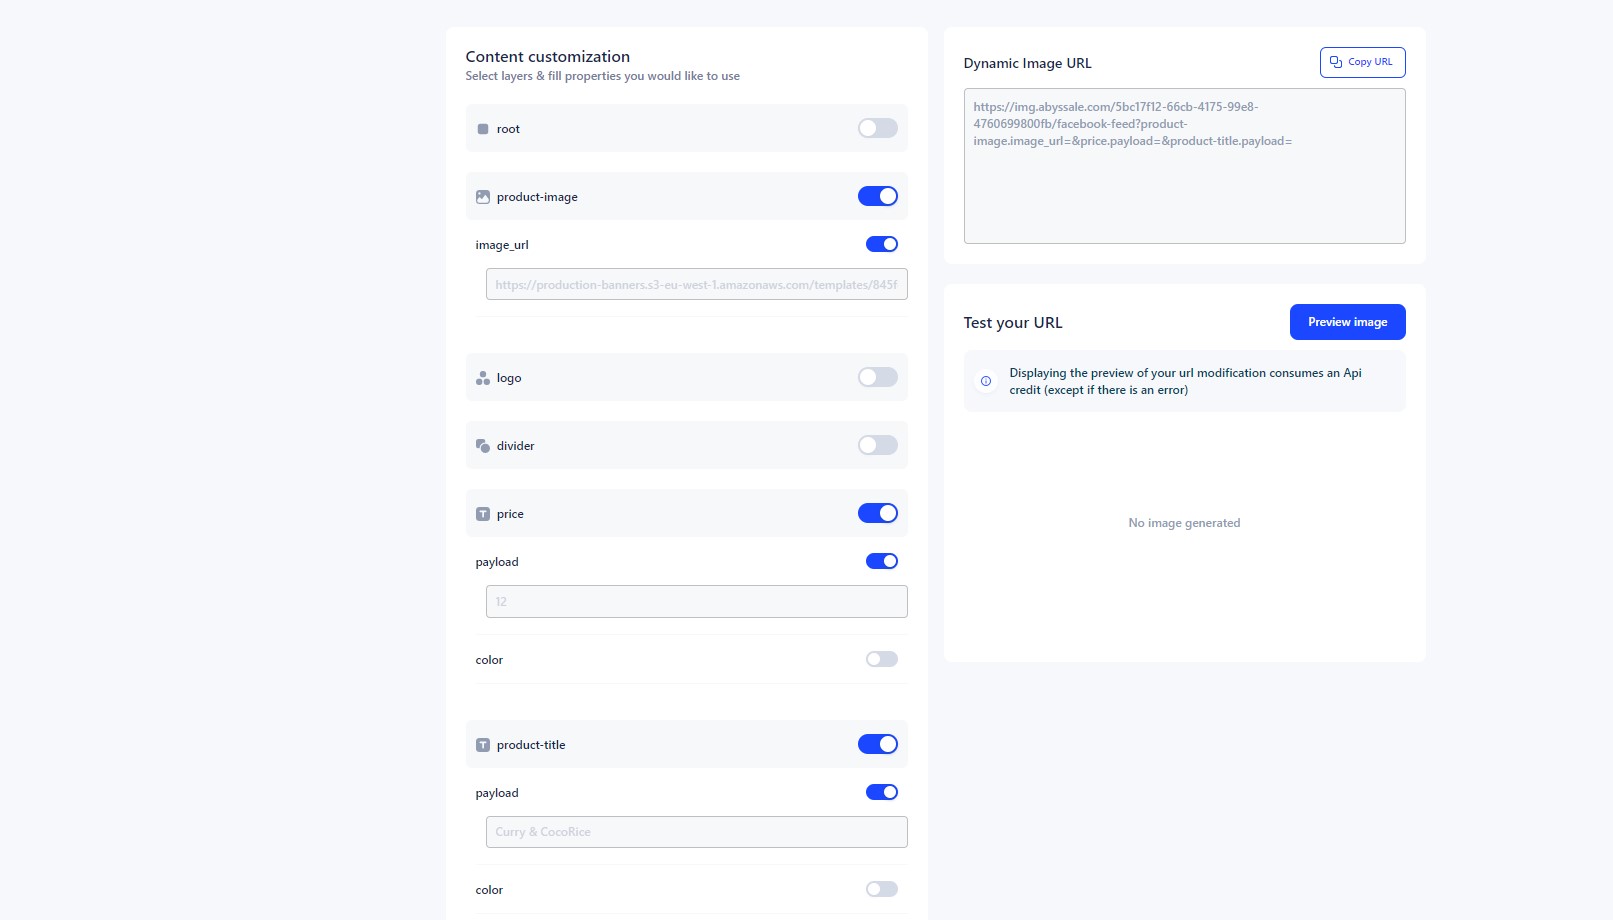
As you add layers to your URL, you will see the URL of your dynamic image changing. Each parameter will progressively added to it. You will see first the format you’ve selected (here in blue) and then every layer and parameter you've added to your URL (here in yellow)
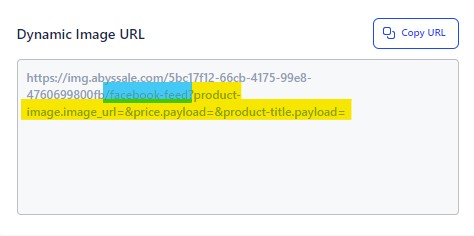
Now all you have to do is click on “Copy URL” to use it on the next steps
#3 Add your dynamic OG image link to your Shopify theme
We will now get to adding the dynamic image URL created with Abyssale to Shopify. In order to do that, we'll look for the section of your Shopify's code where you tell to every social media what information they should display when someone shares a link to one of your products.
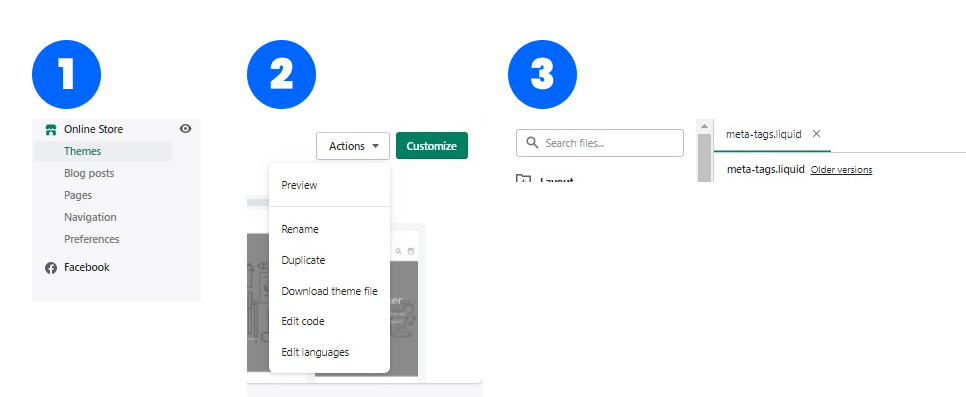
Go to your Shopify account, click on Online store>Theme >Actions>Edit code. Once you are there, look for your meta-tags.liquid file and click on it. On this new Window you will now edit your code.
Look at the code section that begins with “{%- if page_image -%}”.
It is in this section that you’ll have to define your Dynamic Open graph image properties. Grab your Dynamic image URL on Abyssale, so that you can paste it on 2 places :
- After”og:image”content = here you paste your Abyssale URL
- After “og:image:secure_url”= here you paste your Abyssale URL with https in front instead of http
Be careful, to not leave any spaces in your code !
Now what we want to do is to complete this URL with the information that will change dynamicly according to our different products information (price, image...). Remember why we named our layers ? 😉 They are in the URL of the dynamic image you copied.
First you have to understand the structure of the URL :

In red, it is your template format. In green it is our image layer that will change according to the products, in blue it is our price and in yellow our title (in our case the name of our product). So here we are with all the changing parameters of our visual.
Now what we want to do is match each one of these layers with the matching data of Shopify, in other words, we have to make each layer correspond to a tag in Shopify. If you don’t know your tags name they all are in the same window meta-tags.liquid you’re in.
- Just after the "=" of your image layer write : http: and then add your product image tag followed by | img_url:'master'| url_encode
- After you price layer add your product price tag
- and after your title layer add your product name tag (the product title)
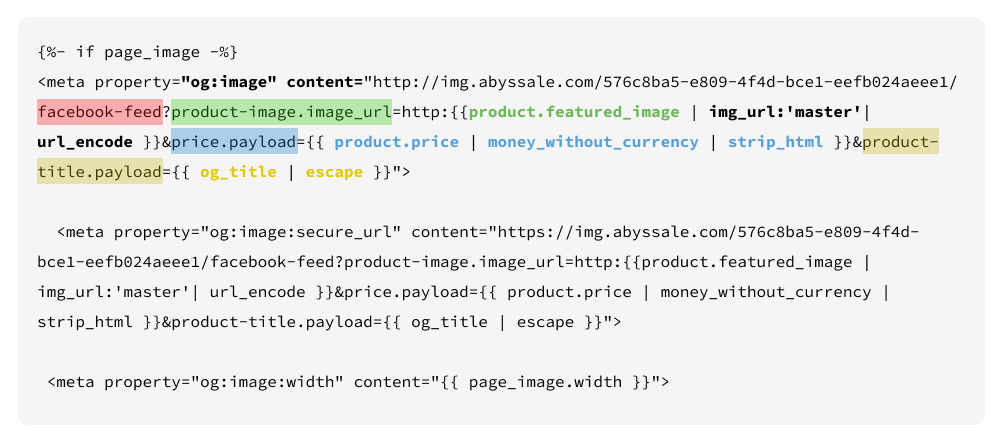
When it’s done, just click on save.
#4 Checking your Open graph image is working
There are several tools to check your Open graph URL preview and make sure you have the image you wanted. Take the link of one of your products and copy it.
Then go to: https://developers.facebook.com/tools/debug/
and enter your link there, you will now see how your preview image will look if you share your link on Facebook feed.
Here is ours :
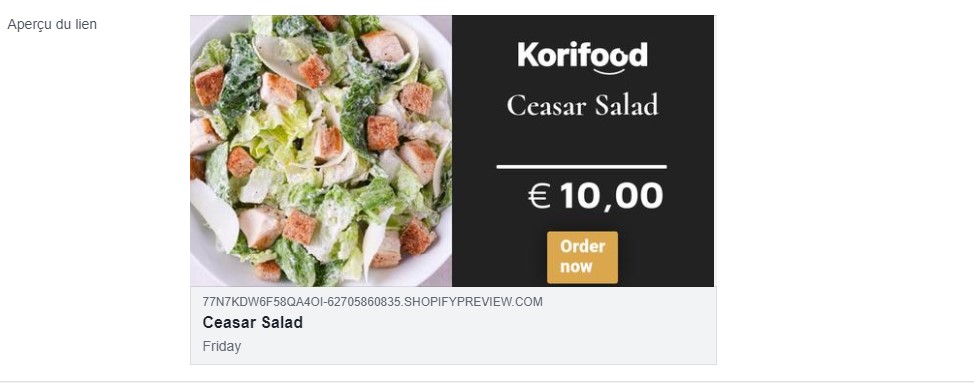
The same trick can be use for Twitter. Here is the link to check how your preview image will look like on twitter feed : https://cards-dev.twitter.com/validator
Be careful : If you don't use the debugger, Facebook auto updates the data sent by Shopify every 48h.
Once you edit your code, it will work for every product on your Shopify. On top of that, if you update the design of your Template inside Abyssale, your dynamic OG images will automatically update 👌
Get started for free
Master Abyssale’s spreadsheet
Explore our guides and tutorials to unlock the full potential of Abyssale's spreadsheet feature for scaled content production.

How to auto create Instagram stories from my Shopify products?
