How to display your NFT collection with QR codes?
How to display your NFT collection with QR codes?
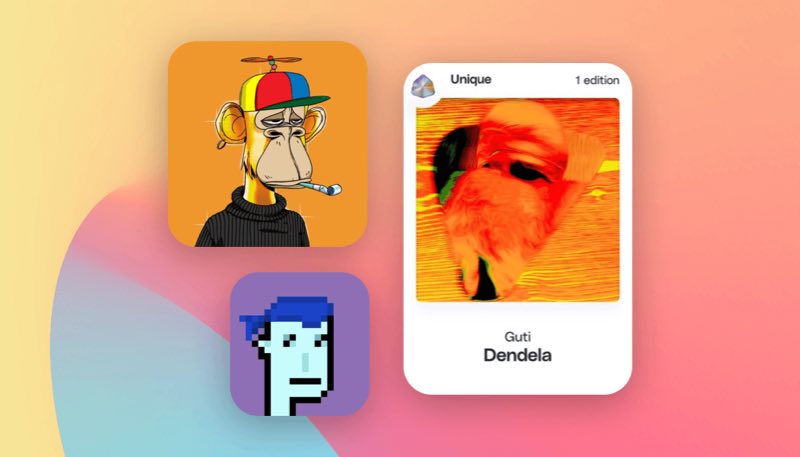
QR codes can be really useful when it comes to giving your audience direct access to your content. Instead of having to go on a website and navigate to find it, they just have to scan QR code to see your content. It also helps brands and content creators to offer them a seamless multi channel experience and make the offline support - to mobile or computer screen- to mobile journey more fluid. But having to create a new visual for each QR code is also time consuming and can reduce your productivity. Today we’ll show you one way to automatically create new QR codes for your visuals. One sector that uses QR codes often are the NFT world.
To share NFT art on social media, one can post its NFT collection url and use NFT QR codes to enhance their experience. Thanks to Abyssale and its NFT QR code generator feature, its never been easier to display your art and prouve to the world the authenticity of your NFTs.
This is why, we’ll take the example of an NFT enthusiast, who needs to share his NFT collection to the world. The goal here is to create a QR code for each NFT he wants to share and automatically integrate it on the image design to share it on social media. To do so, we’ll create a template for Twitter banners & Instagram stories.
Note that the image rendering engine of Abyssale can also be used as an NFT generator as it allows to generate thousands of variations of an image in seconds.
Create an NFT QR code template
First we'll have to create an NFT + QR code template in Abyssale. As we want to to share our visuals on Twitter and Instagram it's important to add the right image formats to our template.
Formats
By Clicking on +Add new format , we'll add 2 formats to our template: Twitter & Instagram stories. For the twitter banner we create a custom format of 1500x500.
The Instagram format is already in the pre-defined format of Abyssale. Now it is time to get to the design. We'll put the image of our NFT, and our @alias so that people can find us easily.
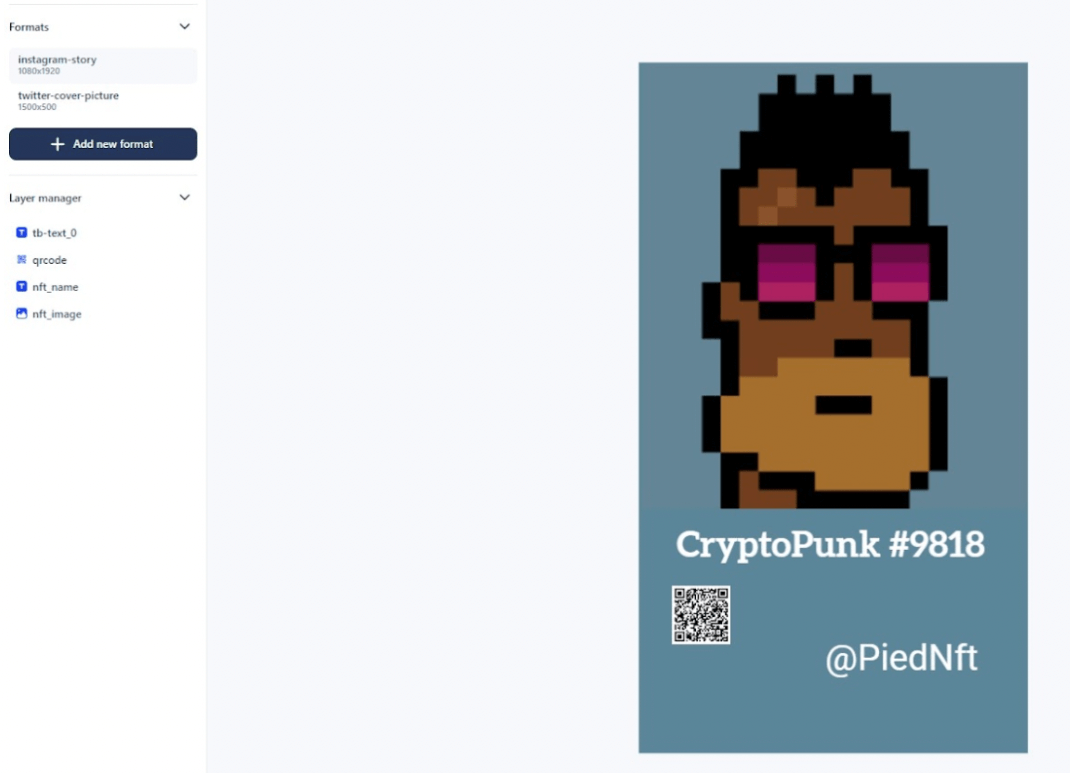
Add a QR code to our NFT
In this step, we'll add a QR code generator to our template in order to generate a new QR code for each new generated image and link it to the specified NFT.
Let's click on the QR code element of the template builder to add it to our template.

Once our QR code is added to our template, you'll be able to edit its settings. You can change things like color, padding and so on, but most importantly, you can set it's default URL.
Name your template layers clearly
You'll need to name your layer correctly in order to facilitate the generation of our images. If your layers are named clearly, it will be easier to now where to match your data with your template in order to generate your NFT QR codes.
Let's do it this way :
- our Text title layer should be the name of our nft : nft-name
- our subtitle is here our alias.
- our image : nft_image
- and our QR code of course : qrcode_url
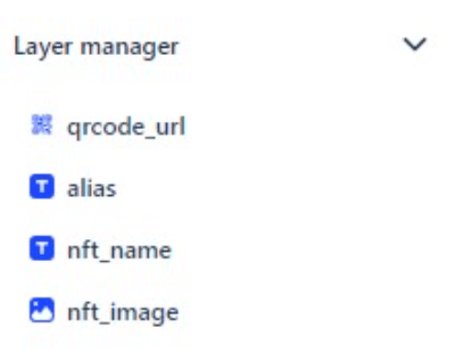
Then save your template.
Create your NFT Collection Database
Now that we have our template, the goal is now to automatically generate several images with each time a new QR code in order to share different NFT of our Collection. There are two ways to do so: We can use Gsheet, or directly the data sheet in Abyssale .
Option 1. Use Google sheet to create your NFT QR codes
If you use Gsheets, you’ll have to create a column for each one of your layers.
These columns will act as a guide that gathers all the information of your template.
This is how the Gsheets should look like :
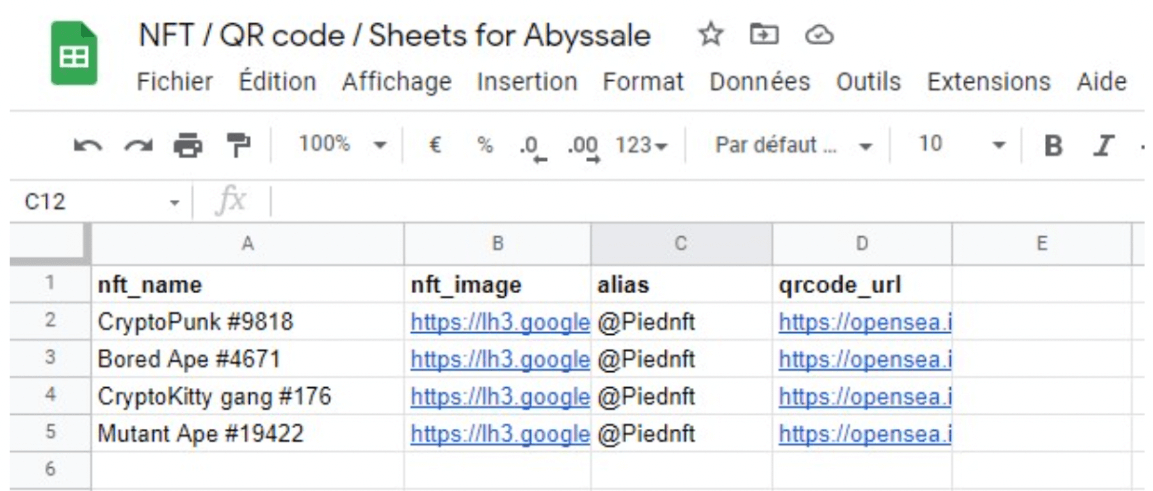
As you can see, we filled our different NFT names to be able to share several ones from our collection, and filled the qrcode column to inform the right url for each nft.
Our alias is a layer that will not be changing as we publish from the same account.
When you have finished your sheet and you’re sure all your data is correct, download it in .csv format.
Connect our Google Sheet to Abyssale
On your Abyssale account go to :
My template > select the template you’ve just created > scroll down to Generation Methods > Spreadsheet Generation > Fill your data.
Now you can see this screen :
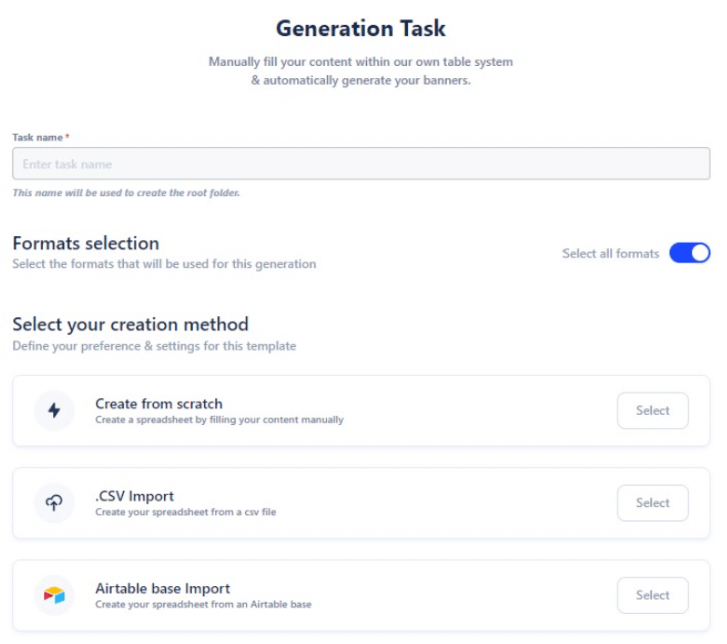
Choose a name for this generation task and select all formats. Then choose .CSV import to connect your sheet with your Template.
Once you’ve download your CSV file it’s time to map it with your template :
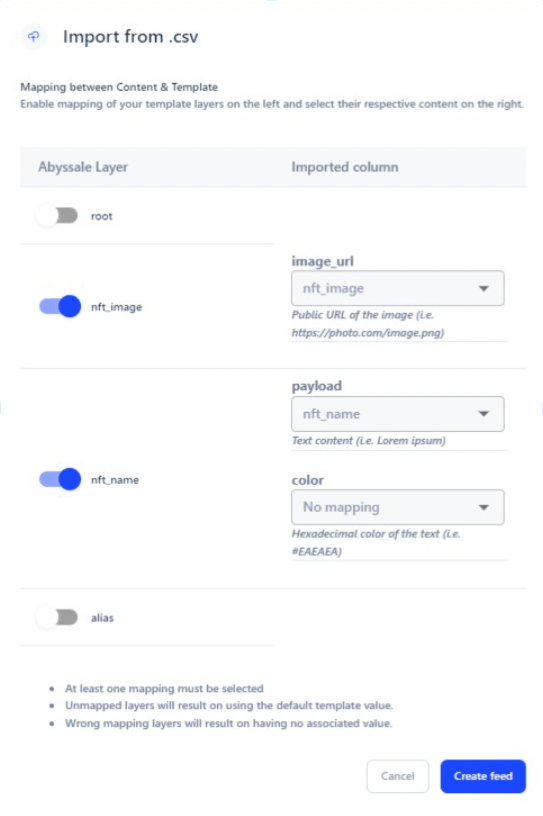
The goal here is to match your Abyssale layers with your sheet columns. As we named our layers accordingly, this step is quick, we match the image of our template, the title (nft_name) the qrcode_url. The alias does not need to be matched, as it will not change.
Option 2. Use the Abyssale Spreadsheet to create your NFT QR codes
On the same screen than for Gsheet, if you click on Generate banners > Fill your Data, you can this time choose “Create from scratch” on your Generation task
You will see a table with the first row filled, which corresponds to the data of your actual template.
Columns are already made according to our layers, you just have to fill the rest with the different visual variations infos :

When it’s done, click on Save & Close.
Generating your NFT Qr codes
On both methods, you have a verification screen :

You can click on Save & Start generating.
Once generation is done you can find all your images in My template > Templated concerned > Banners > Name of your Generation task.
For us, the 8 images have been generated. 4 different visuals on 2 different format (Twitter & Instagram story)
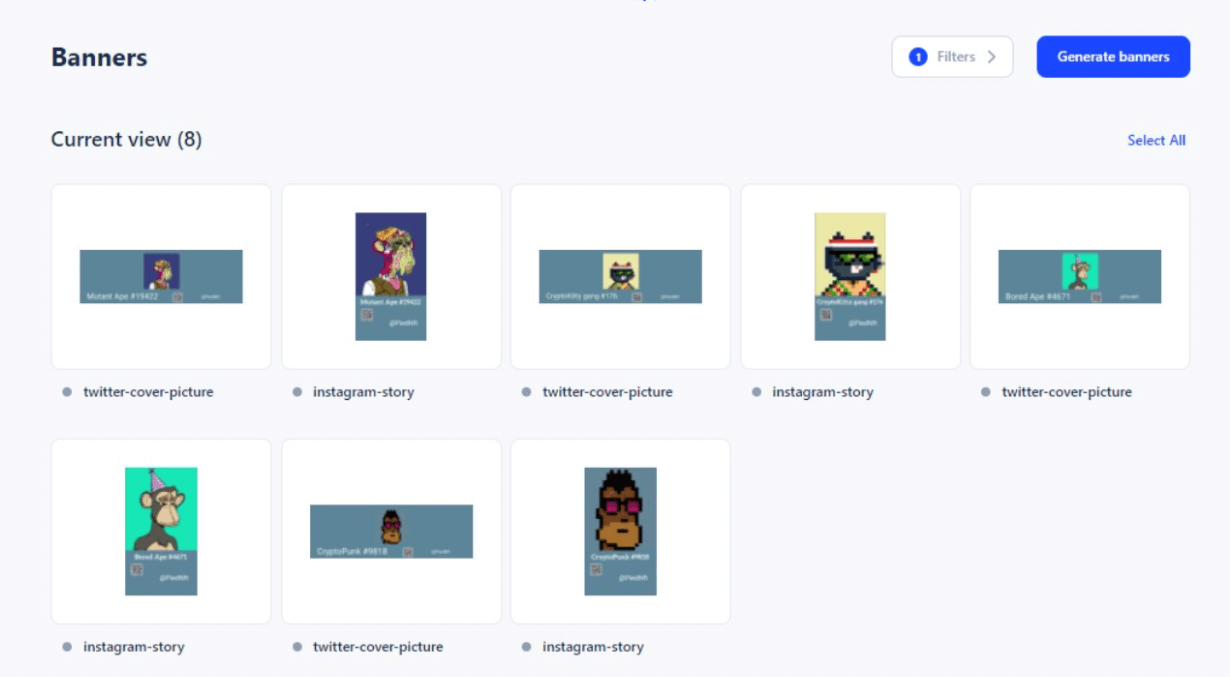
Congratulations!!!!! You are now ready to display your NFT collections with QR codes! If you feel like flexing on Twitter or Instagram it's the perfect way to do so!
If you want to learn more about Image generation check-out this pages
Get started for free
Master Abyssale’s spreadsheet
Explore our guides and tutorials to unlock the full potential of Abyssale's spreadsheet feature for scaled content production.
How to easily generate custom certificates for your users
.webp)


%2520(11).webp)


