How to easily generate custom certificates for your users
How to easily generate custom certificates for your users
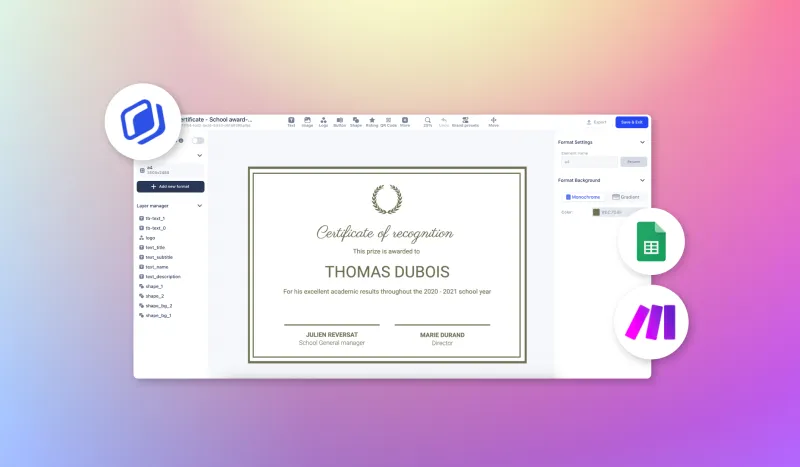
Easily generate custom certificates for your users
What's more satisfying than being rewarded for your work or progress? It's an added source of motivation to keep putting in the effort. And this cognitive bias is used as a loyalty lever by marketers.
The reward principle can take many forms. But, in this tutorial, we will focus on certification. This recognition is very powerful to keep your users motivated.
We will explain step by step how to simply generate custom certificates for your users with Abyssale.
Setting the scene
In order to illustrate our explanations, we will take a concrete example of a situation in which custom certificates are relevant.
So we'll imagine that we're running a mobile application. This platform is called Easylanguage and allows users to learn a new language for 15 minutes a day.
To keep users motivated and reduce churn, their new knowledge is evaluated every 15 days. When they reach a new language level (A1, A2, B1, B2, C1, etc) then we want to generate a new certificate attesting to their new language level.
Creating a template on Abyssale
Let's start by creating the template that will host the certificates.
To do this, go to Abyssale, and from your dashboard, create a new template by choosing the desired format(s).
For our example, we will choose the A4 Landscape format.
Add the text and image elements you want and name at least those you want to be able to modify.
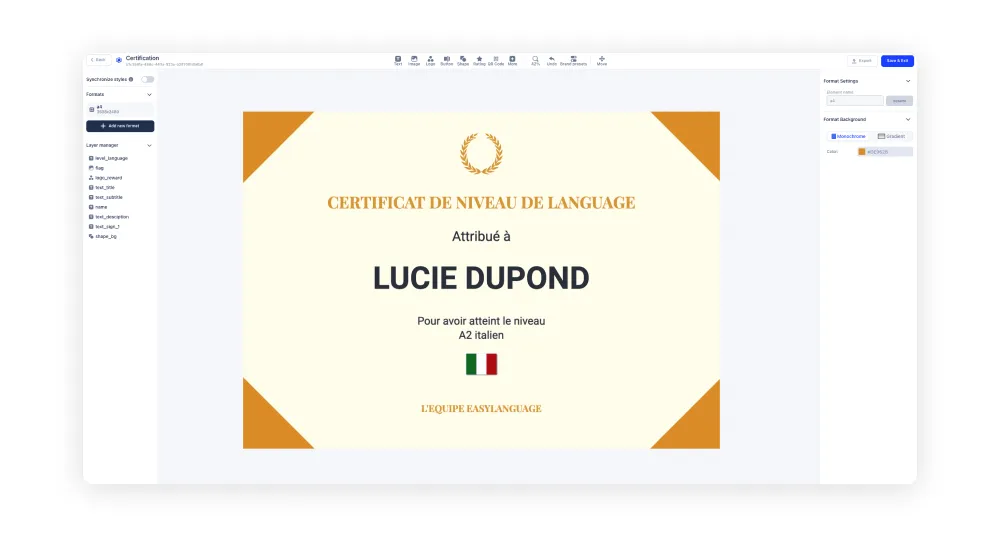
Our template will therefore contain text and image elements in order to integrate the variables concerning:
- The first and last name of the user. It will be called "name".
- The language and the level reached. It will be called "level_language".
- An image of the country of origin of the language in question. It will be called "flag".
Your template is ready. Click on "Save & exit."
Manually generate the certificate
From this step, it is possible to manually generate a certificate from the Image Form tool.
All you have to do is modify the variables according to the information you want to let appear on the certificate.
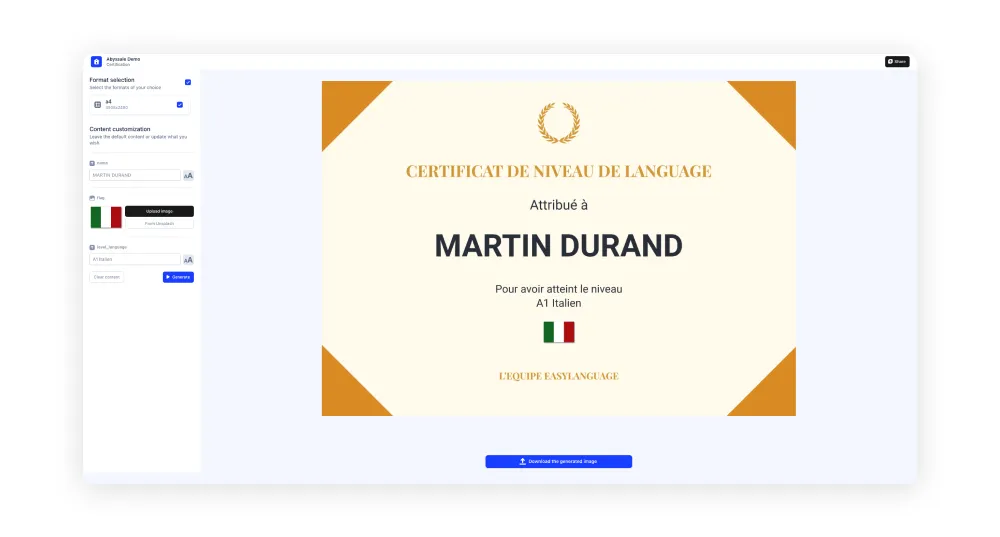
In our example, we will modify the variables "name", "level_language" and "flag".
This method has the merit of being simple and quick to configure. However, when the volume of certificates becomes important, you might need to automate some tasks. That's what we'll look at together in this process.
Automate certificate generation
Create a database with Google Sheets
Let's say you have a large database listing each of your users and gathering all their information. To facilitate automation, transfer the data needed for your certificate into a Google Sheets document.

In our example, our Google Sheets document will have 3 columns + 1 last one to host the generated certificate:
- Name & first name of the users
- Language level
- Country flag of the language
Depending on the characteristics of your certification, you may have more columns in your Google Sheets file.
Connect Google Sheets and your template
Go to Make.com and create a new scenario.
Create a first Google Sheets module "Watch Changes".
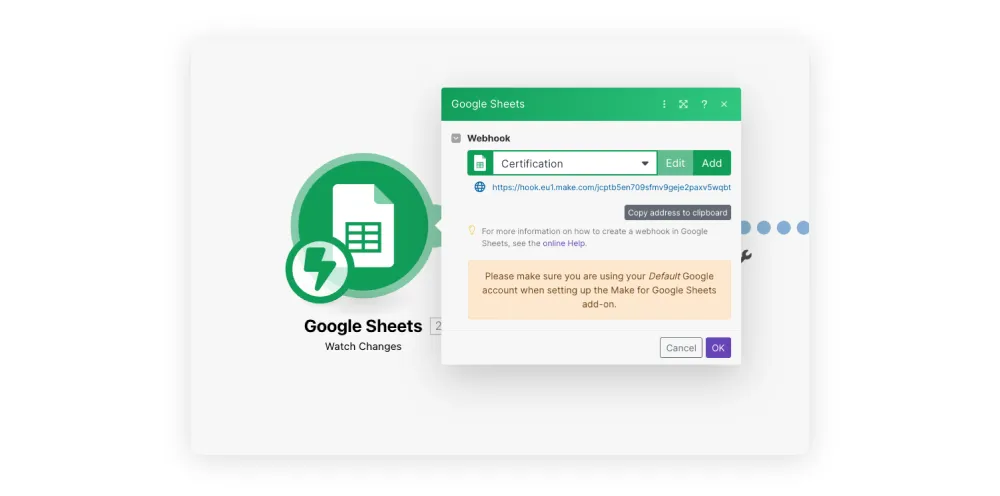
Edit a new webhook. Copy the address of this webhook, then go back to your Google Sheets file.
Click on Extensions > Make for Google Sheets > Settings tab (Be careful, you have to install the "Make For Google Sheets" extension first. On this link, you will discover how to do it).
In the first line "Webhook URL", copy the address of your Webhook.
Go back to your Make scenario.
Then click on the "+" to add a new module. Search for Abyssale and select "Generate a Single Image".

Fill in the variables. In our case:
- "name" → 2. Row Values [ ] : A
- "level_language" → 2. Row Values [ ] : B
- "flag" → 2. Row Values [ ] : C *
(*) Warning, for images, remember to enter the image URL on the Google Sheets. No import.
The connection between your template and Google Sheets is ready. Thus, as soon as a data is updated, a new certificate will be created.
All that remains is to automate the addition of the certificate to your Google Sheets document.
To do this, add a new Google Sheets module "Update a Row" and fill in the variables as follows:
- Row number = 2. Range : Row start
- Table contains header = Yes
- Values = In the column for which you want to see the URL of your file (CERTIFICATE (D) in our example), add "3. File : File url".
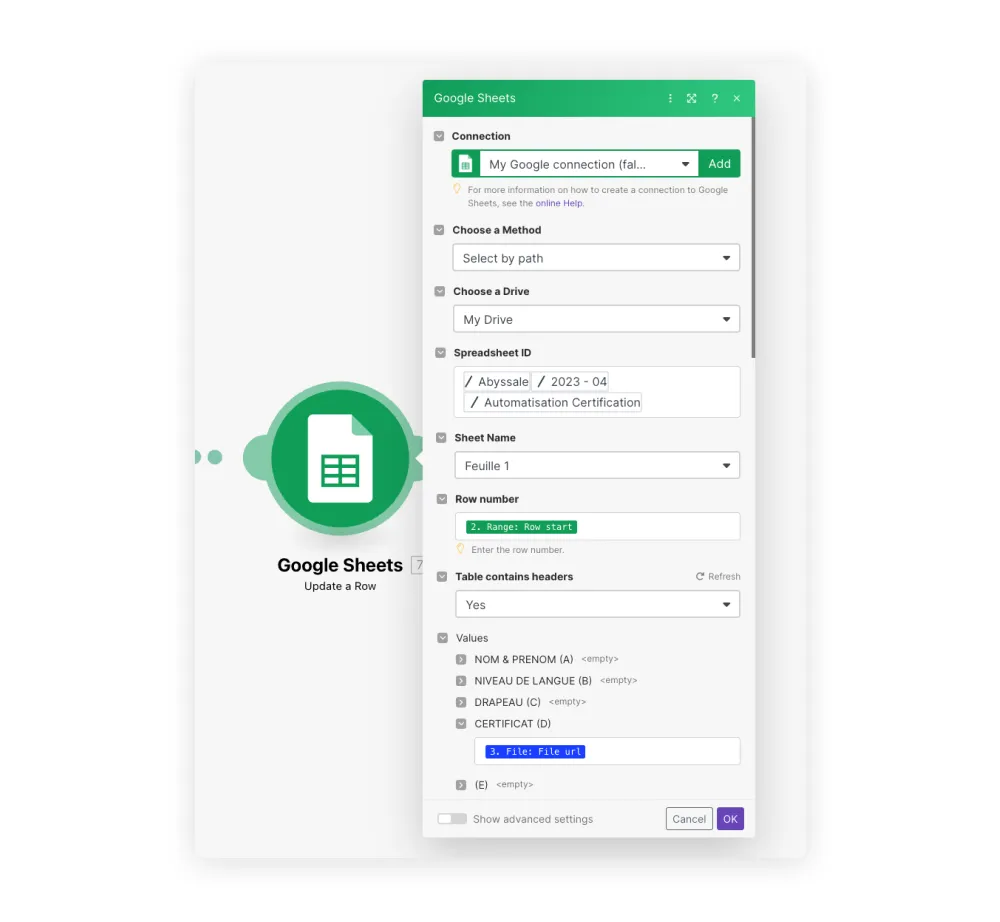
The automation is ready. You can test it by clicking on "Run once". Remember to first modify a data on your Google Sheets document.
Before you finish, remember to clarify how often you want to run the scenario, whether you want to generate new certificates every day, every week or every month.
You're done! You are ready to automatically generate custom certificates for your users 🎓
To take it a step further, you can automate sending the certificate from an email. To do this, use Make again.
You can also use dynamic Image. In this case, we refer you to the article: "How to gamify the experience of your users with images by email" from the part: "Using Make to link Google sheet and your email manager".
If you have any questions or comments, please let us know!
To keep up with the latest updates and news about Abyssale, join our LinkedIn community 🙂
Get started for free
Master Abyssale’s spreadsheet
Explore our guides and tutorials to unlock the full potential of Abyssale's spreadsheet feature for scaled content production.

How to create a slideshow video from images with FFmpeg
