Wouldn’t it be nice to auto transform your Instagram posts into reels? Whether you are a content creator, an e-commerce merchant or a brand, creating and producing video content can be really time consuming.
In this tutorial, we’re going to see how to automatically transform Instagram posts into reels. We will use Make (an automation tool), a Google Sheets file and Abyssale to create our video template. This process can be very helpful if you create content on a daily basis and want to save time on your video production.
For a better understanding, we will pretend that we are a clothing brand promoting its products on its Instagram page. Our goal will be to automate the creation of Instagram reels each time a product image is published on our Instagram page. As we post everyday, the creation of reels represents quite some time in a week! With this tutorial, you will avoid spending time on your reels production!
This tutorial is divided into 3 sections:
- The design of the video template in Abyssale
- The creation of a 1st Make Scenario
- The set up of a final Make Scenario
Let’s start!
1/ Design a video template in Abyssale
The first step is to connect to your Abyssale account in order to create a video template. You can choose a pre-made template among our public library or design your own.
a- Create a template
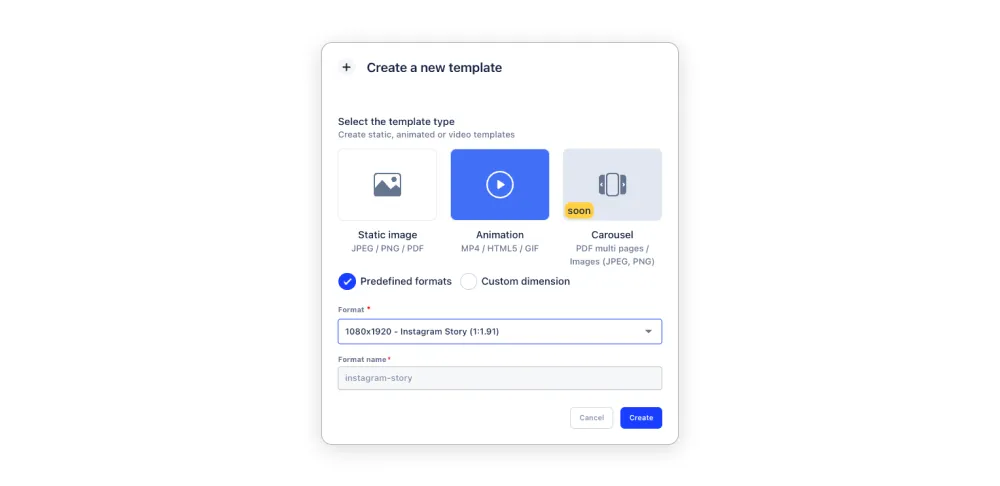
To create your template, go to your Dashboard section and click on the button “Create new template”. Then, click on "Create from scratch " and select the “Animation” template type. For the format, we’re going to choose the Instagram Story as we want to transform our post into a reels (which is the same format as a story, 1080x1920).
b- Animate it!
Now that your template is created, you have access to our video editor. For this step, our goal is to create a template that has animations as it will be posted as a reels.
Of course, you can choose to design it and animate it the way you want. But for the purpose of this example, we will show you a simple way to design an animated template!
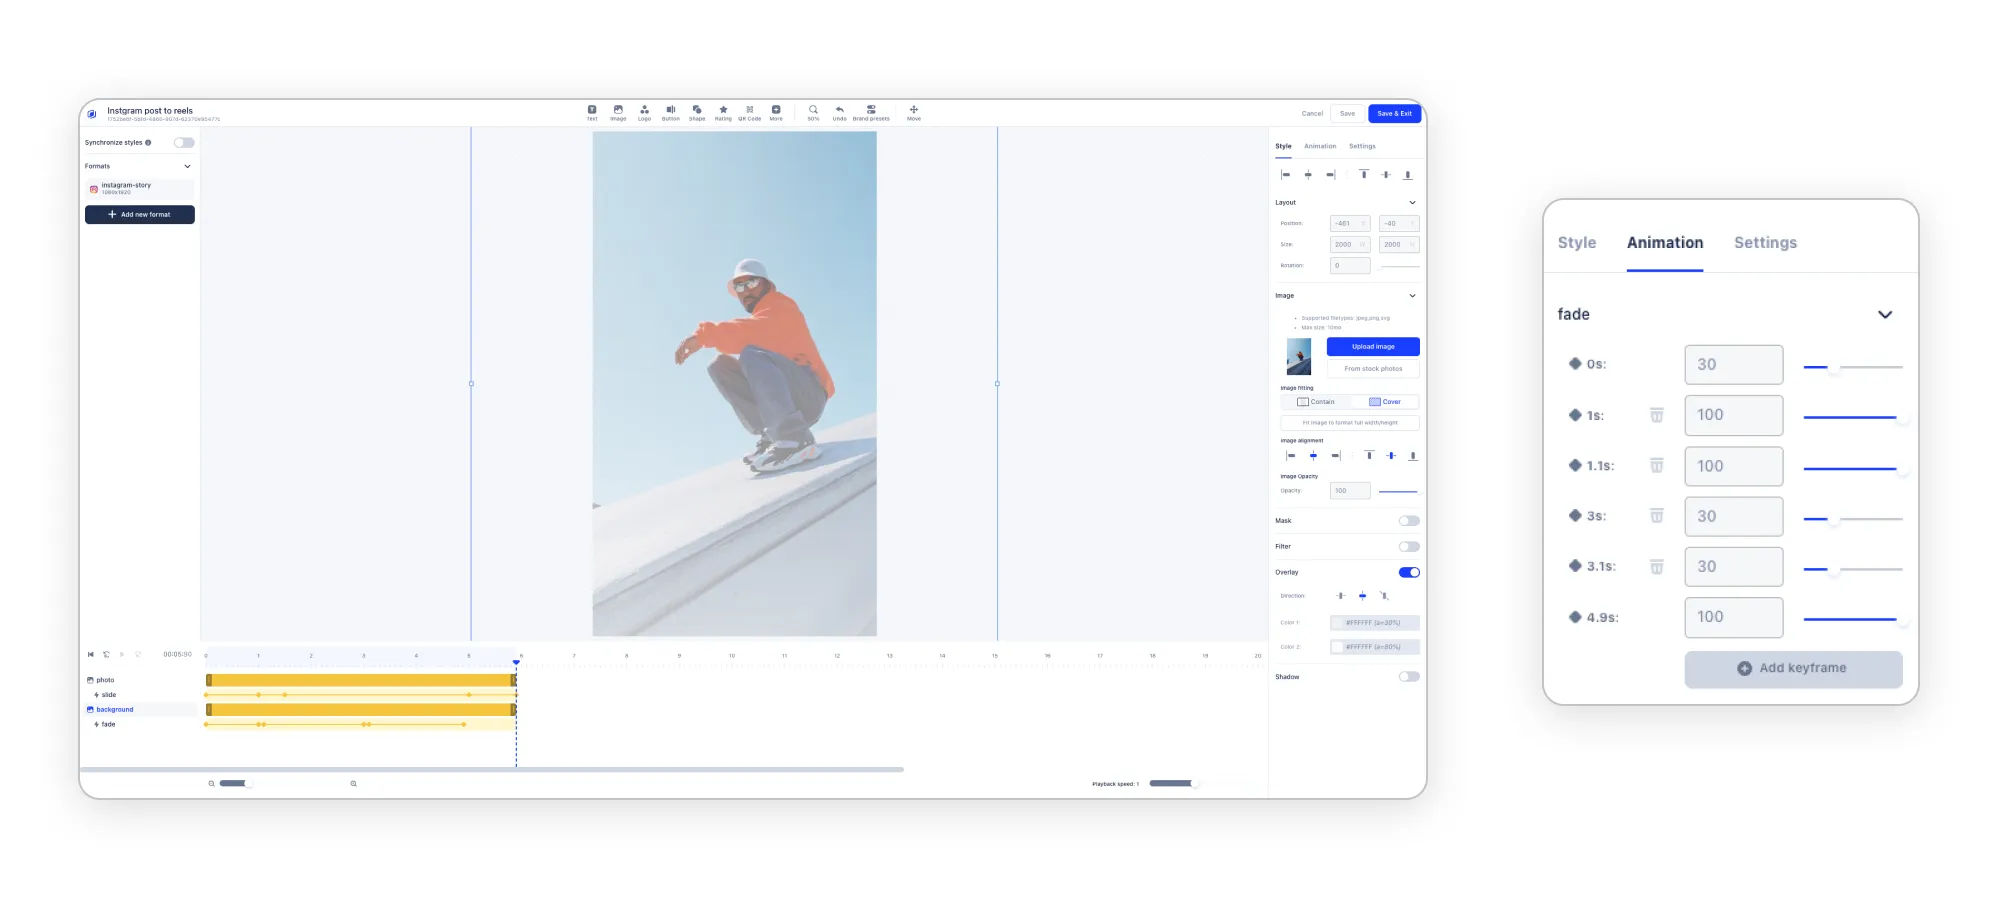
To reproduce this animation, we will add the image of our Instagram post as a background so we need to add an image layer. We need the image to fit the format full width and height so it needs to be on “Cover”. As you can this in the right panel, we also used an overlay to add this faded effect to the image. Then, we also added the “fade” animation to give some life to our background.
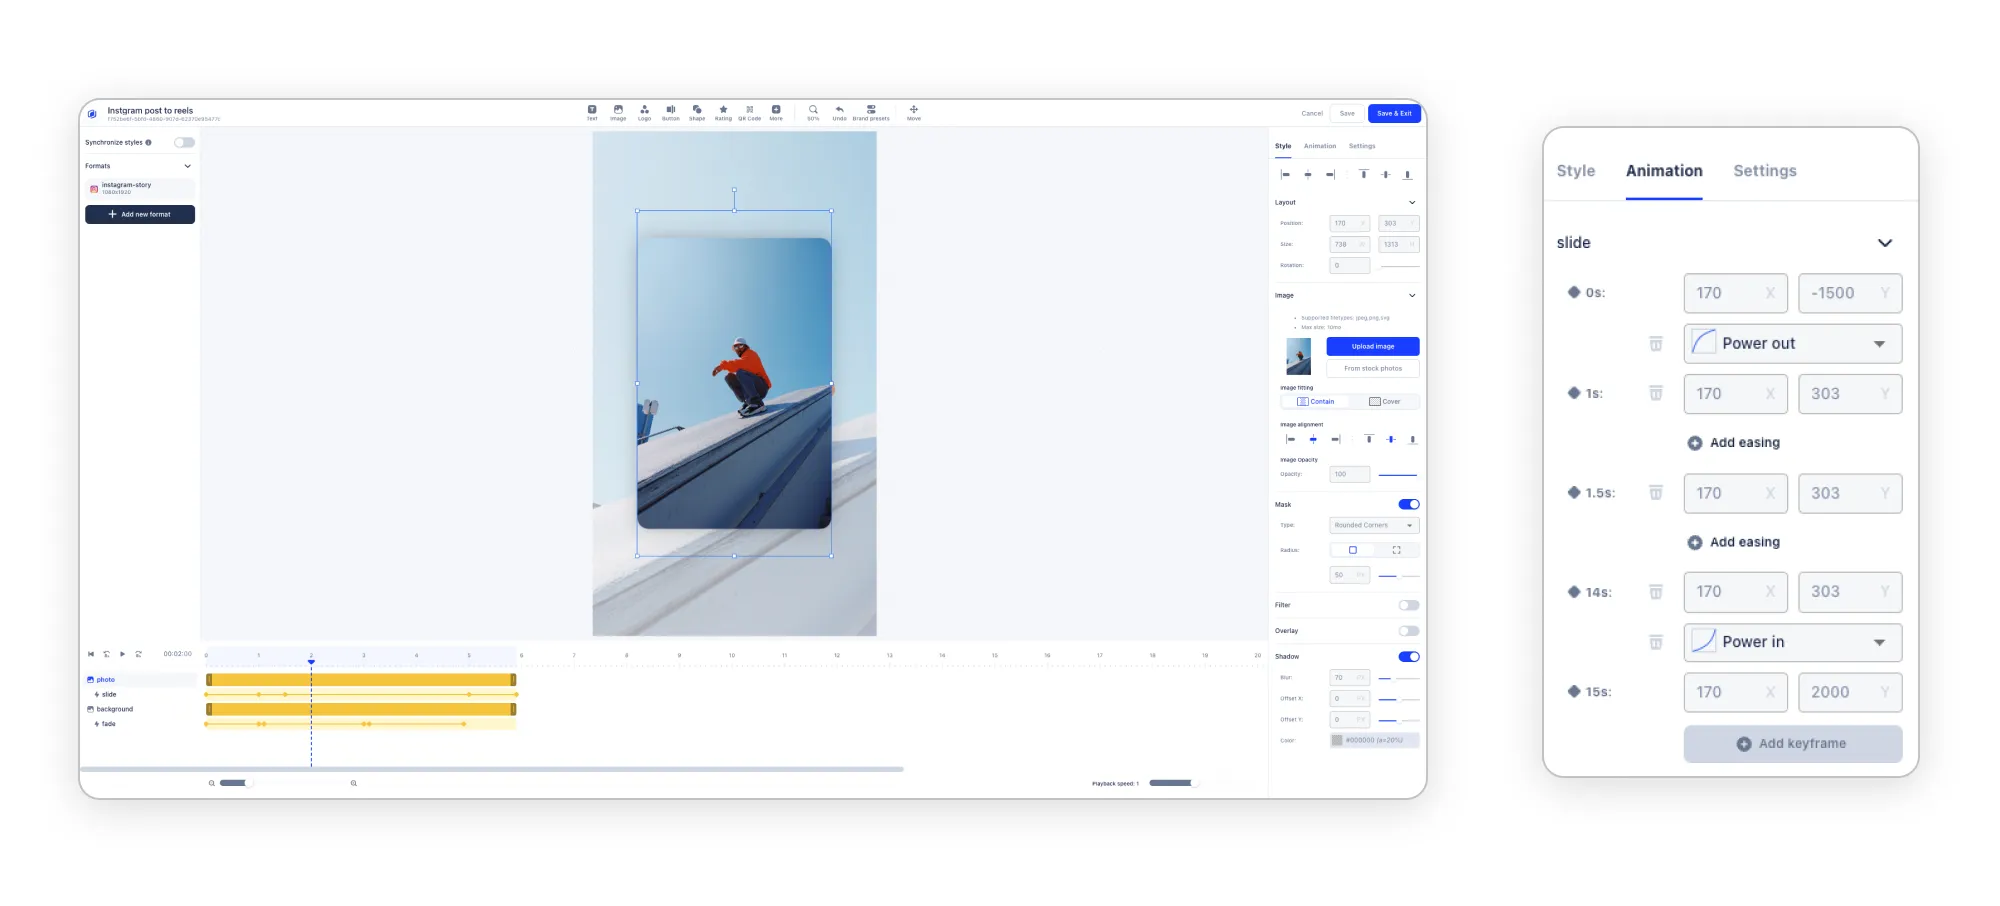
For the main image, we simply added the same image and made sure that the image fitting is on “Contain” so that no matter the size of the image it will always be in full size in the template. As for the aesthetic aspect, apply a mask with rounded corners and some shadows to give it depth. Next, add a combo of two animations : power out and power in to make it more dynamic. In between the two of them, add a pause so that the photo will stay in the center of the template before sliding out.
Note that you can also add some text, your logo, a call to action, change the length… It’s up to you!
⚠️ Take some time to correctly name all your layers in order to quickly and easily find them in Make.
Now that our video template is done, click on “Save & Exit”!
2/ Set up a 1st Scenario in Make (Integromat)
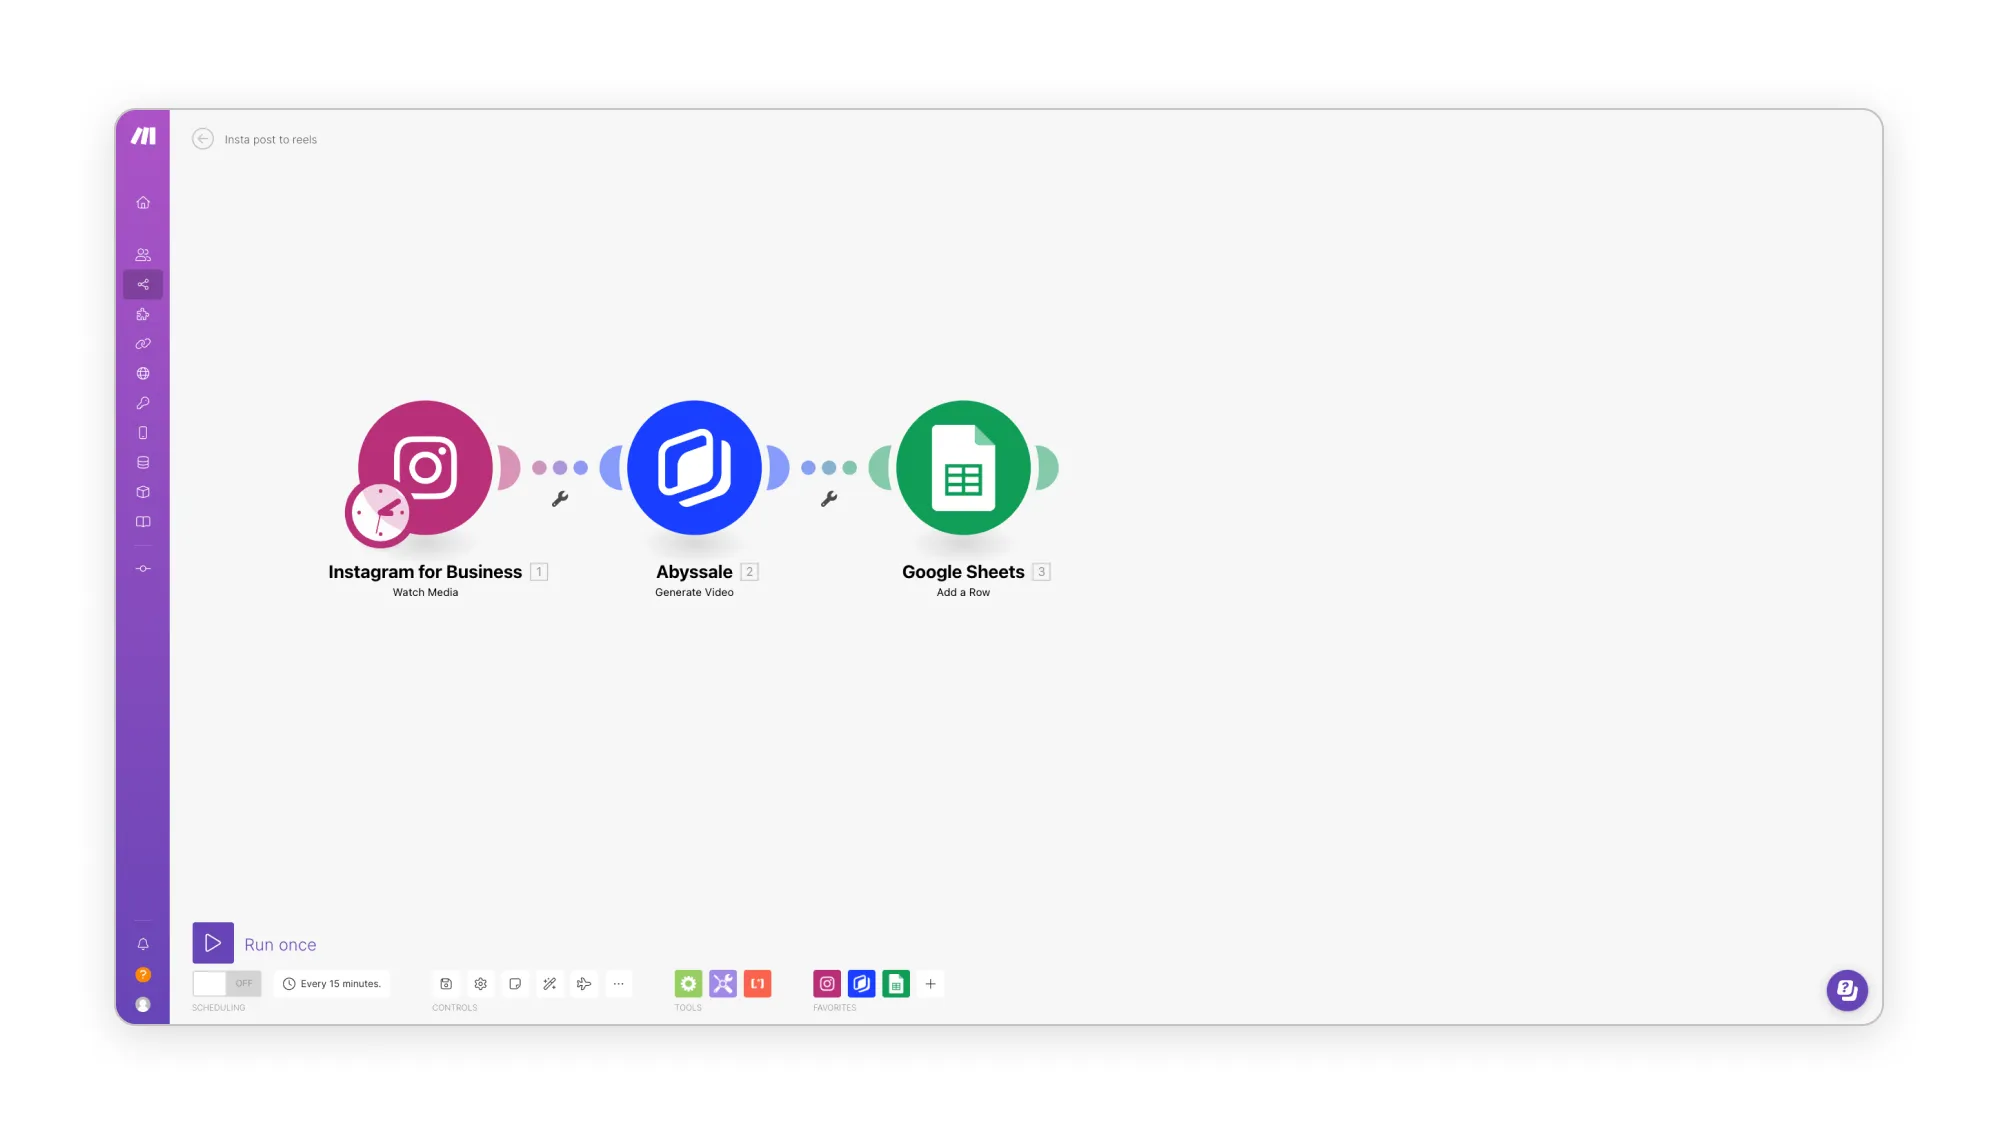
The next step consists in creating a scenario in Make using 3 different modules. The first one will retrieve the image from your last Instagram post. This data will then be sent to Abyssale who will generate a video using the template we have just created. Finally, it will add a row in a Google Sheets file to keep track of everything.
a- Add the Instagram for Business module
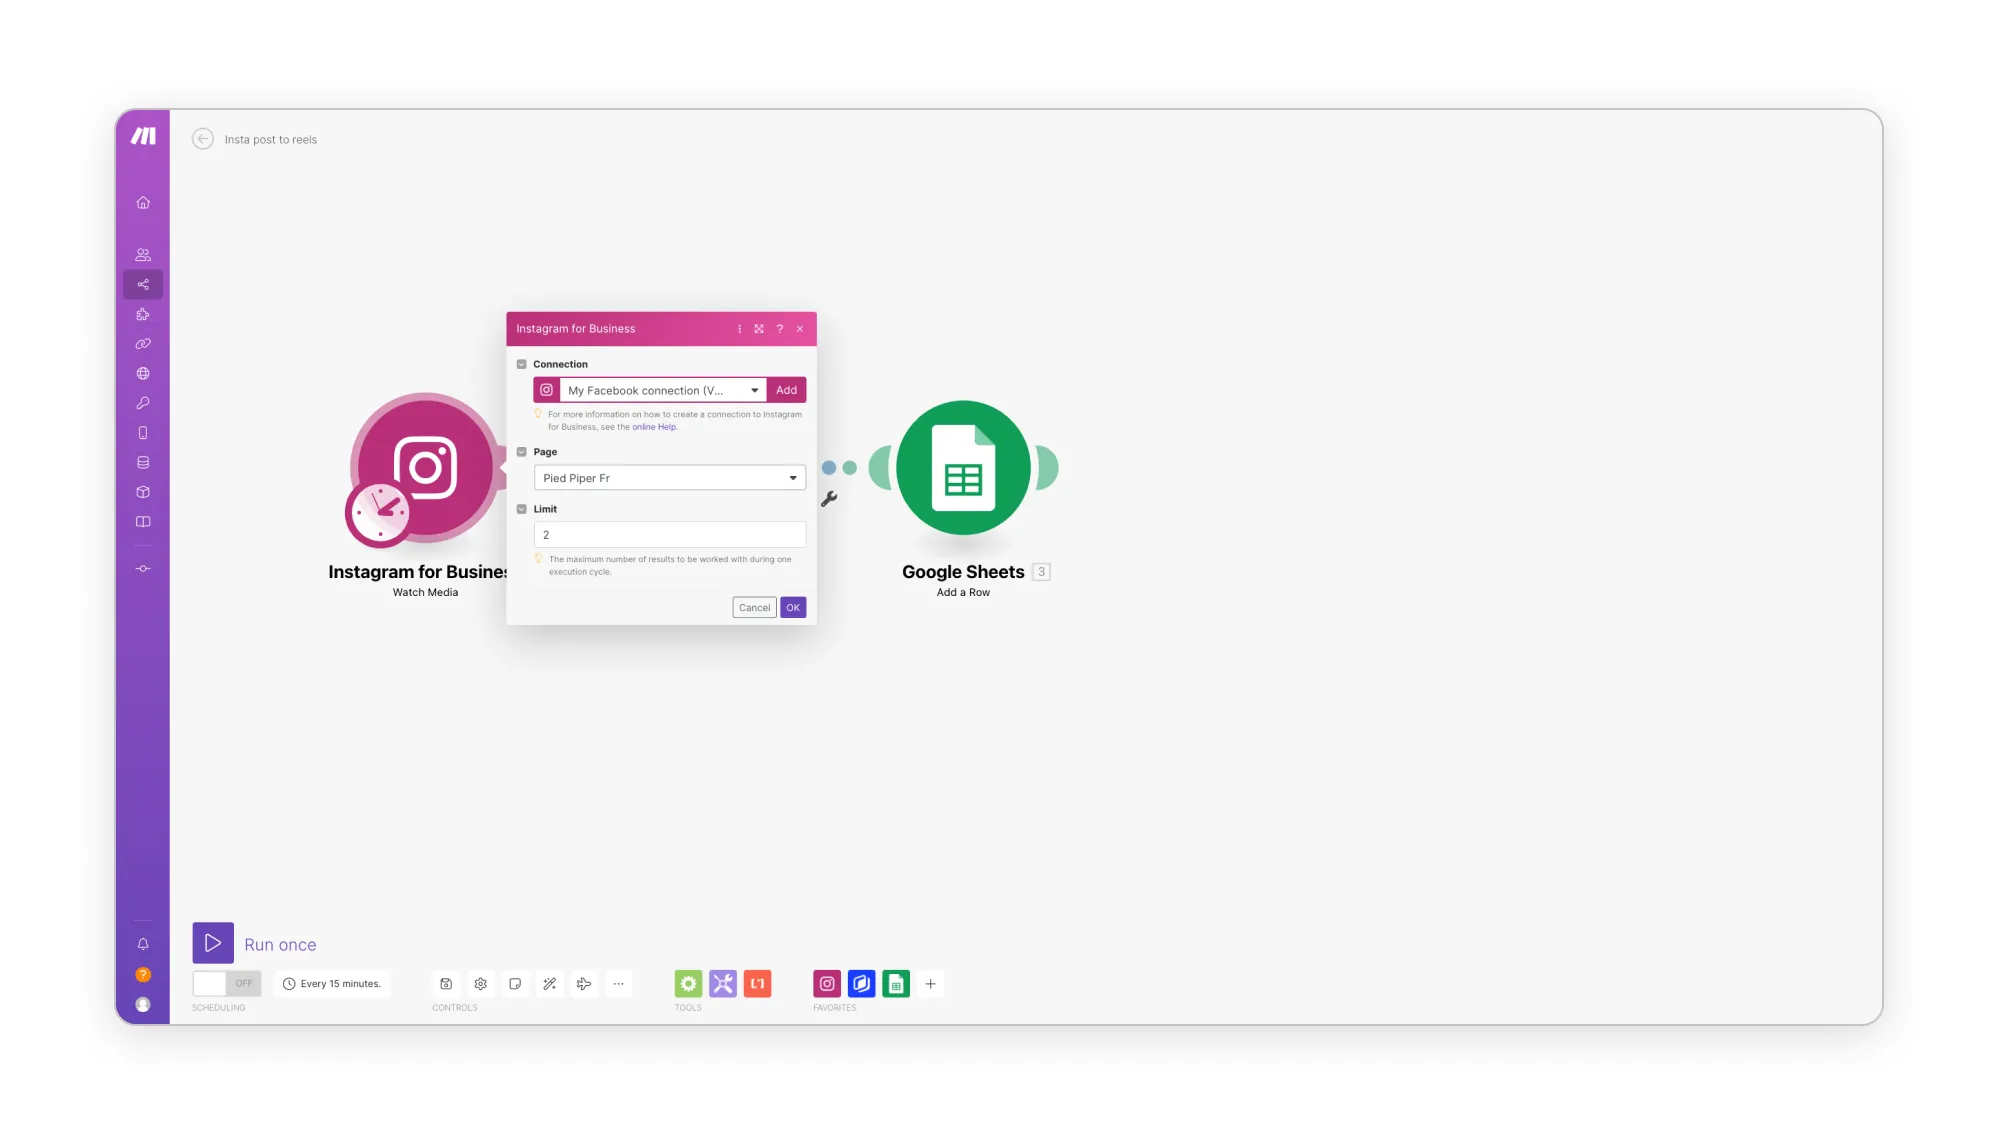
You will first need to add the Instagram for Business module “Watch Media”. Connect your Instagram account and select the page from where you want to collect the images of your posts. Here, the limit should match the number of posts you publish every day. If you post 2 times a day, choose 2 as a limit. If you post 10 times a day, choose 10, etc…
b- Add the Abyssale module
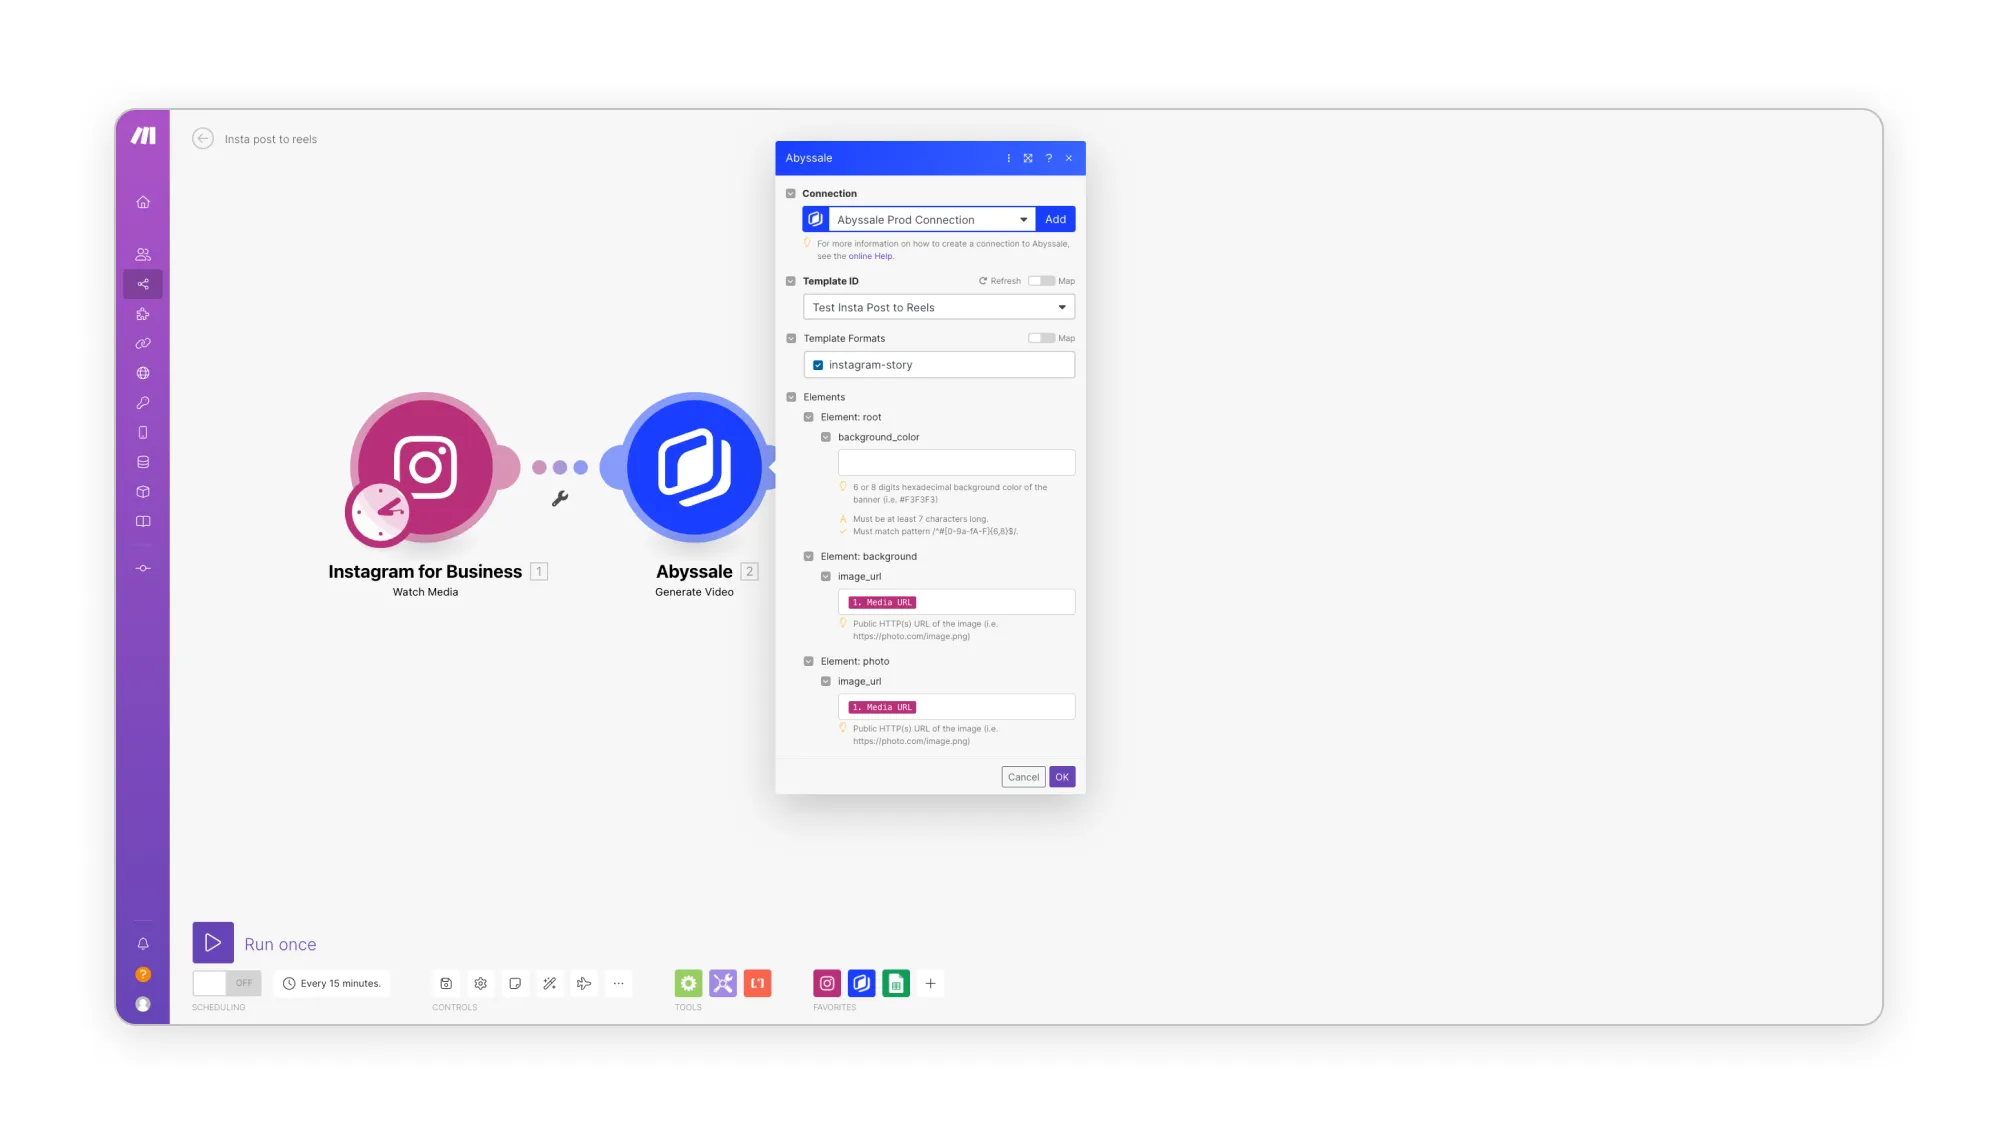
For the Abyssale module “Generate a video”, choose the account which you want to connect to and select the template you created in the 1st step of this tutorial. Add “Media URL” in the fields “Element: background” and “Element: photo” to retrieve the images of your posts and put them as a background and main photo in our template.
c- Add the Google Sheets module
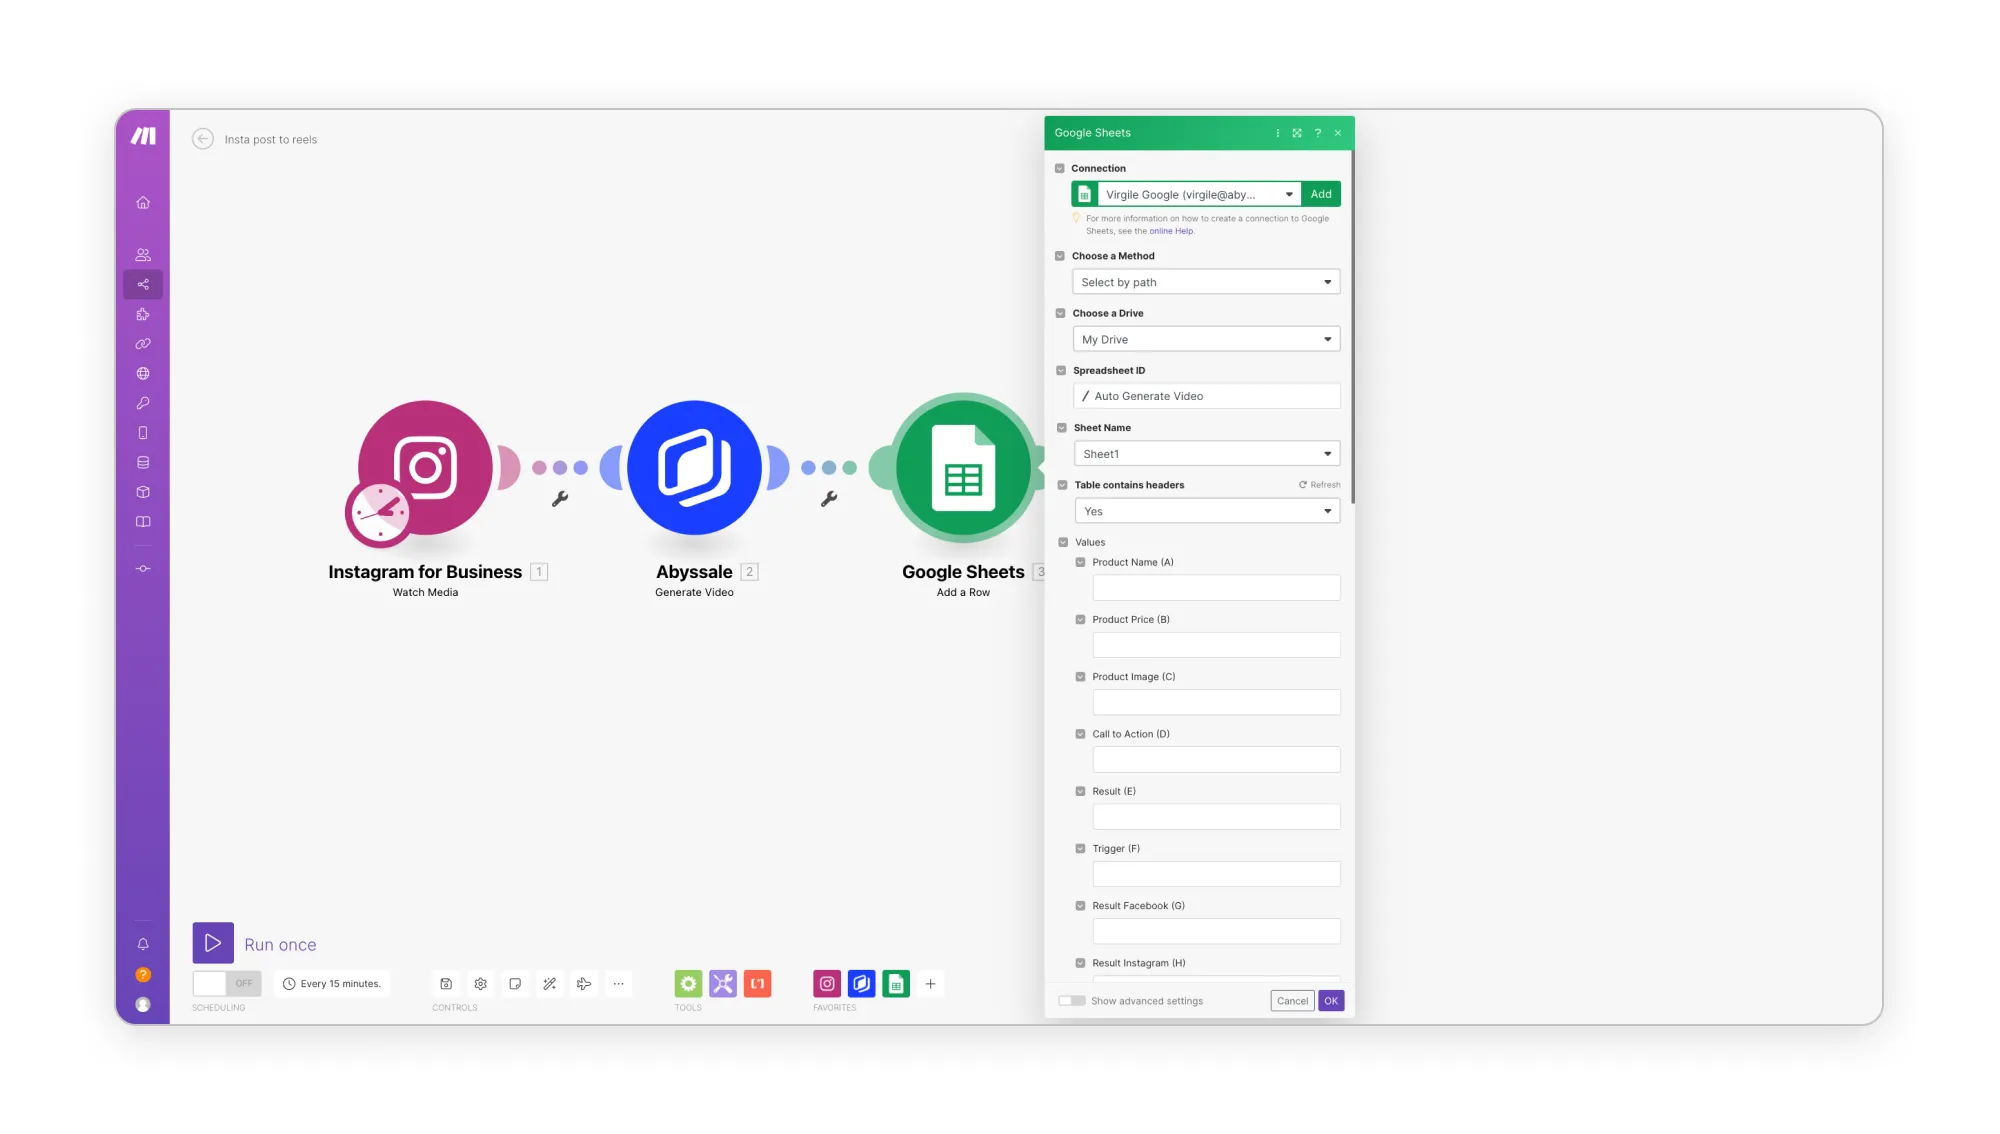
Once you’re done, add the Google Sheets module “Add a row”. It will automatically add a row with the Batch Generation request ID to a Google Sheets file you have previously created.As a request ID, choose “Batch generation request ID”.
3/ Create a 2nd Scenario in Make
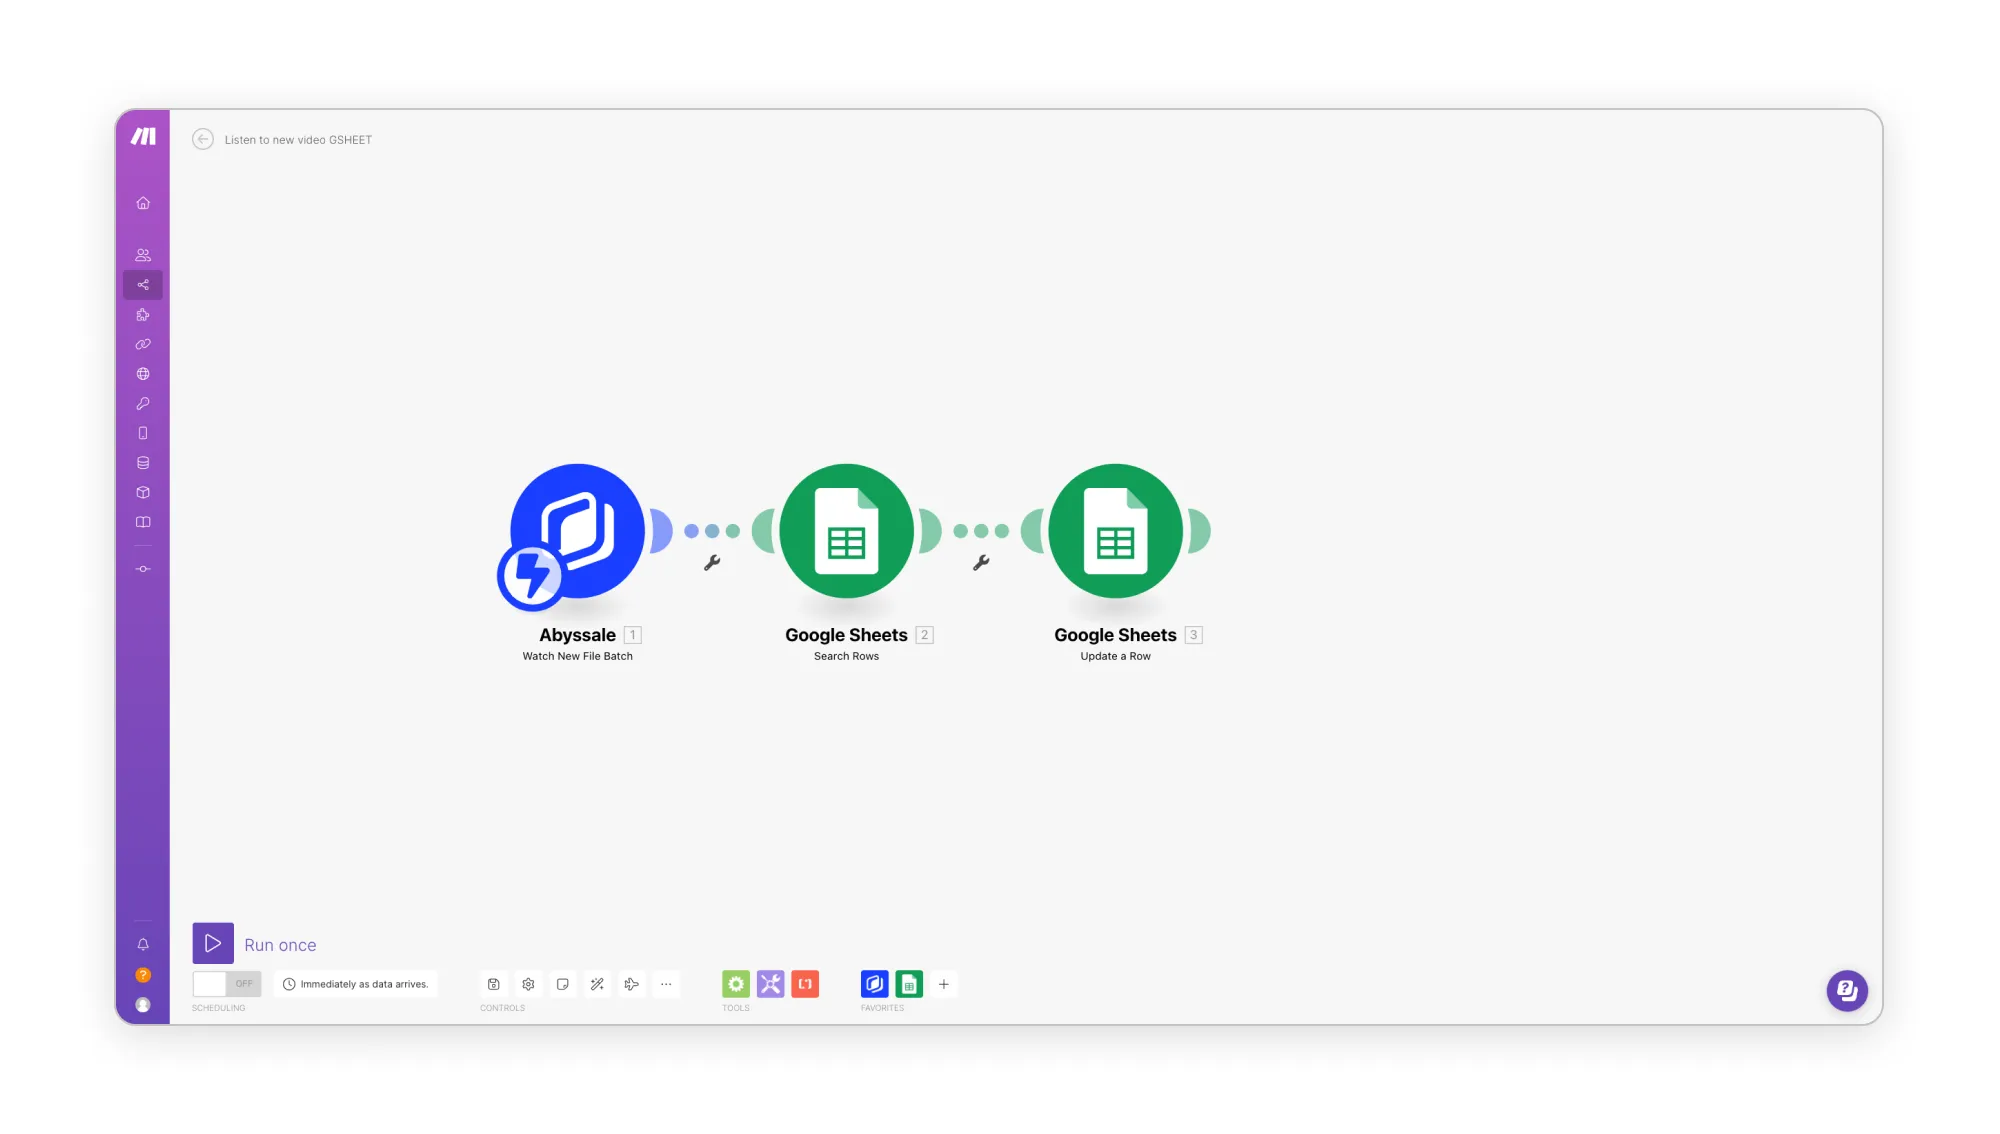
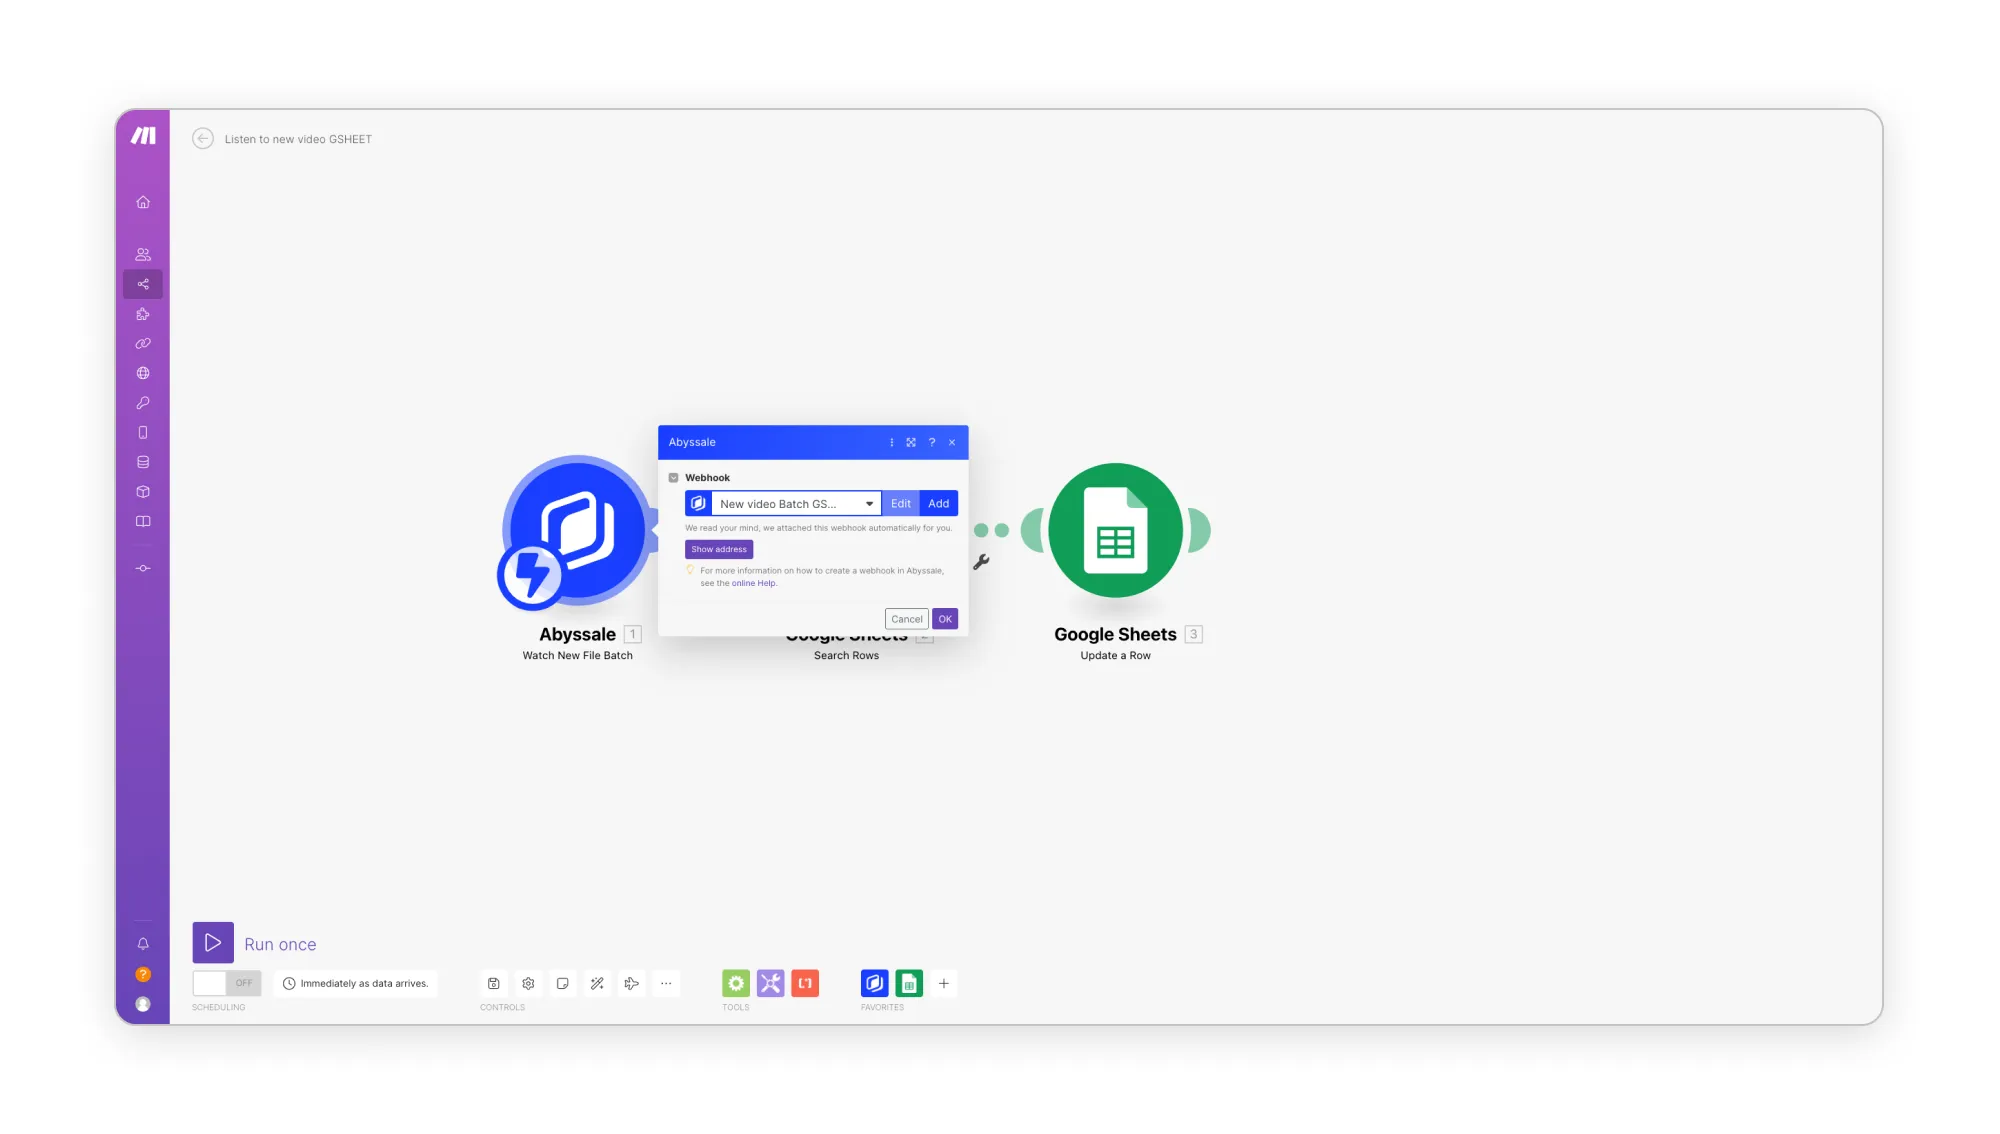
For this final step, our goal is to create a scenario using a webhook that will listen to Abyssale. This means that each time a video is generated by Abyssale, the ID of this banner is retrieved by this webhook who will then transmit this information to Make. As video files are quite large, they can take a while to be rendered by Abyssale but your Google Sheets file should now be updated with the result of all your video generation. This way, we avoid waiting for all the videos to be generated.
a- Add the Abyssale module
Here, you first need to add a module that will watch the generation of our videos and get the Batch Generation Request ID from Abyssale.
b- Add the “Search Rows” module
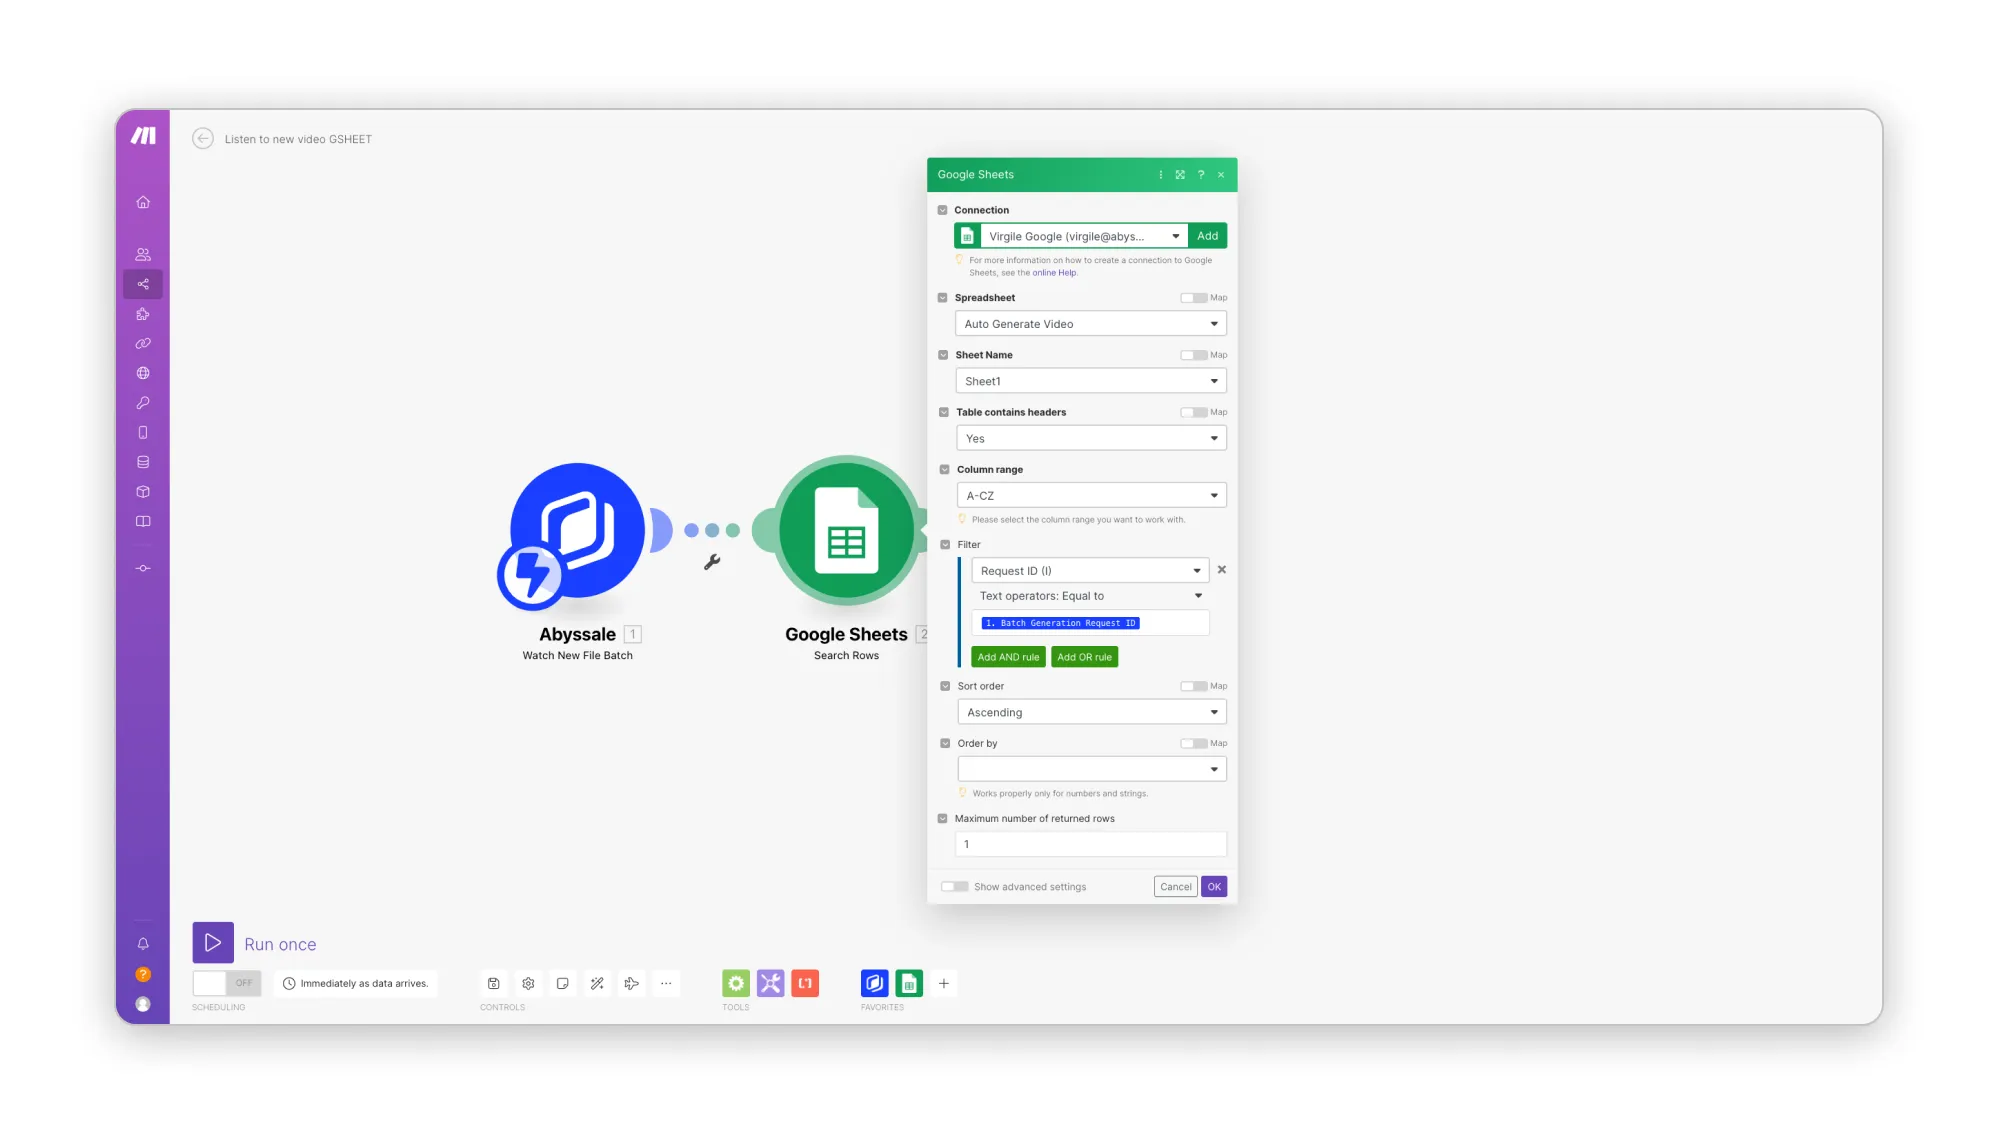
The Batch Generation Request ID is then transmitted to the “Search Rows” Google Sheets module, who will look for the right row in the file.
c- Add the “Update a Row” module
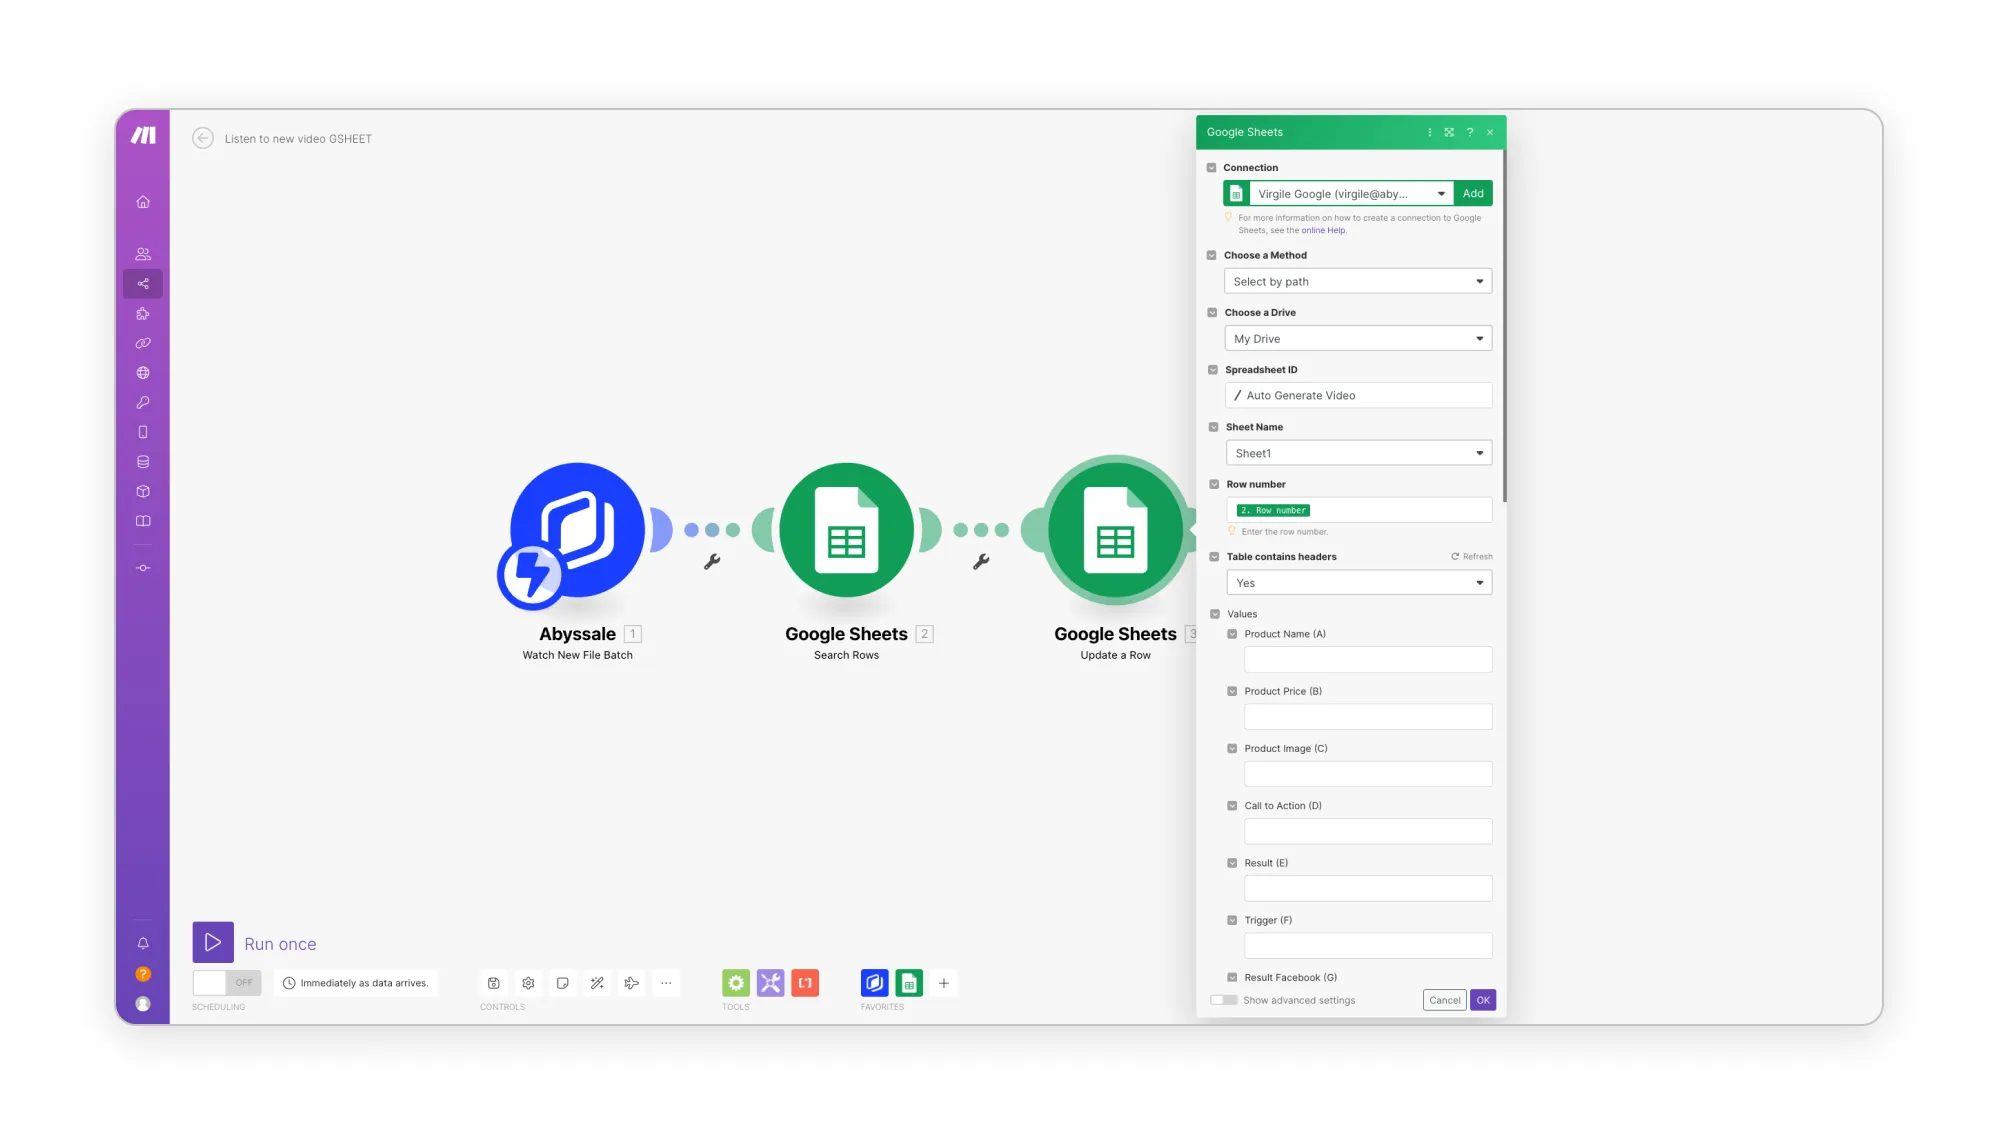
Finally, the row matching the request ID will be updated thanks to this last Google Sheets module. In the column “Result Instagram”, we ask Make to add the URL of the file (the video Abyssale generated). You can now retrieve your file URL directly in your Google Sheets file.
You’re done! 👏
That’s it! You have put together a full automation workflow using Make and Abyssale. Now, all your Instagram posts will automatically be transformed into reels. You have some content ready to be posted on your Instagram account. Moreover, this format (1080x1920) can also be posted as a video ad on TikTok for example!
Check out our other Make articles for more powerful automations 😉


%20(14).webp)
.webp)
